

Widget
Create a bot on your website or mobile app in a few minutes
Laiye Chatbot's Widget is a very simple chat interface to easily integrate a bot on your website.
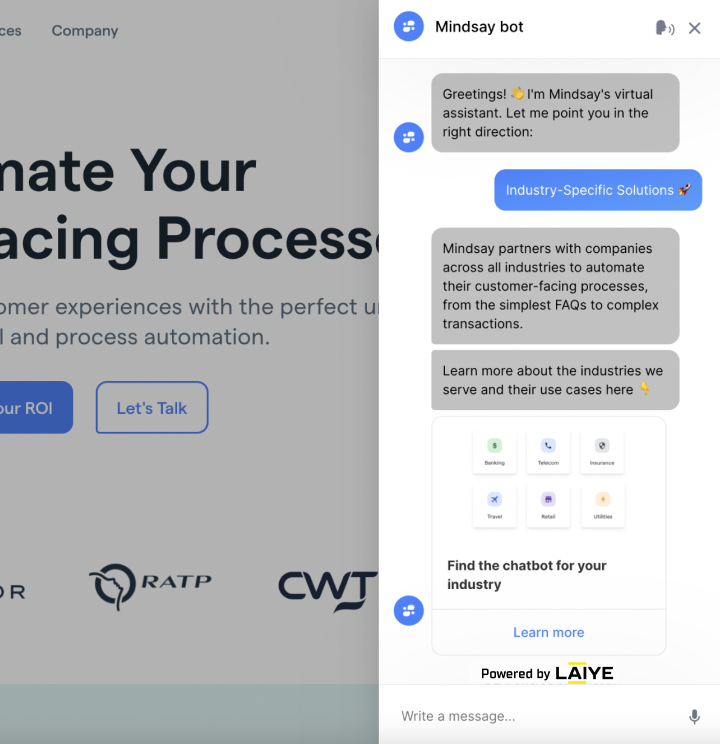
Widget on Laiye's website
In the widget configuration, you have access to the following tabs:
- Format & Design
- Greetings
- Handover (Bot Managers only)
- NPS
- Integration
- Advanced

Tabs accessible in the widget configuration
On the top-right corner, a menu is accessible to let you duplicate or delete the widget configuration.
When duplicating a widget configuration you can associate the copy to another language which is useful to quickly start a widget in a new language.
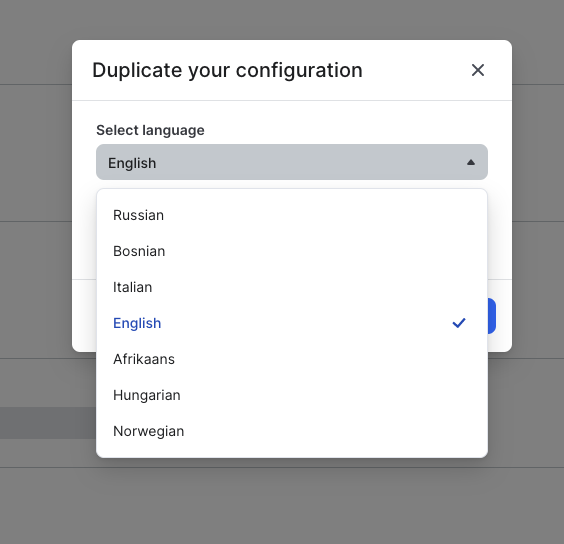
Associate the new duplicated widget configuration to another language
Note
Your changes on the widget configuration can take up to 5 minutes to appear for your customers.
Format & Design
Customize the look and feel of your chatbot interface from this tab. A preview is displayed on the right side of the page.
Chat Window
Edit here everything related to the widget style and position:
- Format: Regular, Sidebar, or Full-page
- Main color
- Secondary color
- Font
- Chat bubble position: right or left
- Margins and z-index to position the bot depending on other elements of your page
Depending on the chatbot format you pick, the integration is slightly different. Find more information in this tutorial.
Header
Design the header banner of the widget. Give it a custom Logo, Title and Subtitle inviting users to ask questions.
Optimal size of Logo
Make sure the logo uploaded has square dimensions, and the size should be 60x60px for optimal display.
Messages
- Upload a bot avatar (by default it is the Header logo).
- Display a text placeholder to indicate users they should type to start chatting with the bot.
Persistent menu
The persistent menu allows you to have an always-on menu available inside the widget. Use it to host a feedback form or simply to help people discover and access the core functionalities of your bot.
A menu item can be:
- a web URL to redirect to an external webpage (Item as web URL)
- a direct trigger to an intent (Item as Quick Reply)
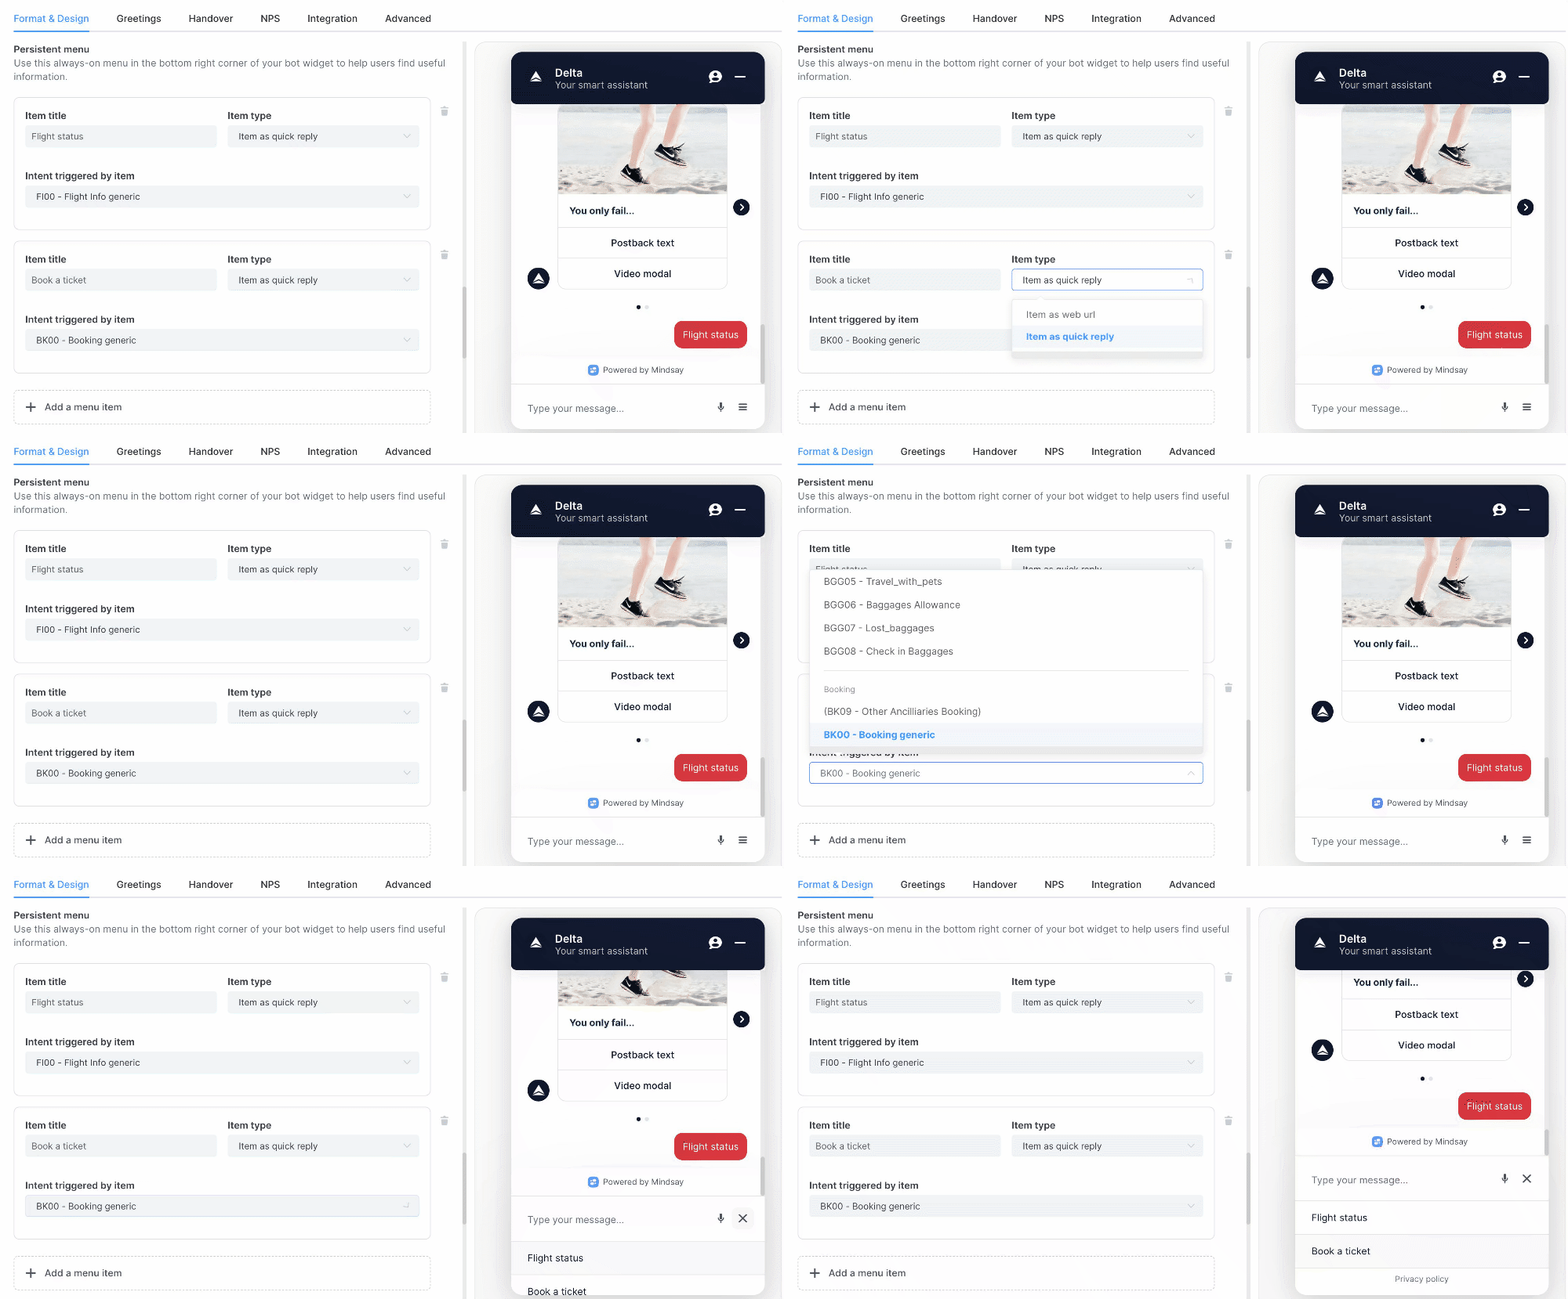
Setting up a persistent menu
Chrome-enabled Mic (Speech-to-Text)
In Chrome browsers only, a microphone is displayed in the text field. Once the user clicks on it, it will open the microphone through the Chrome browser and will write the transcript in the text field. The user just need to press enter to send to message to the bot.
This feature is enabled by the Speech-To-Text capabilities of Chrome and the data is managed locally in the browser.
More info on Chrome's documentation: Google Update.
More info on Chrome's privacy: Google Chrome Privacy Whitepaper
Chrome browser on Desktop only
This feature is only available on Chrome browsers in the Desktop version.
Privacy Policy
Add a custom privacy policy link easily accessible at the bottom of the widget.

Privacy policy appears at the bottom of the widget
Chat bubble
The chat bubble is what users have to click on to open the widget. Customize it with an icon or text.
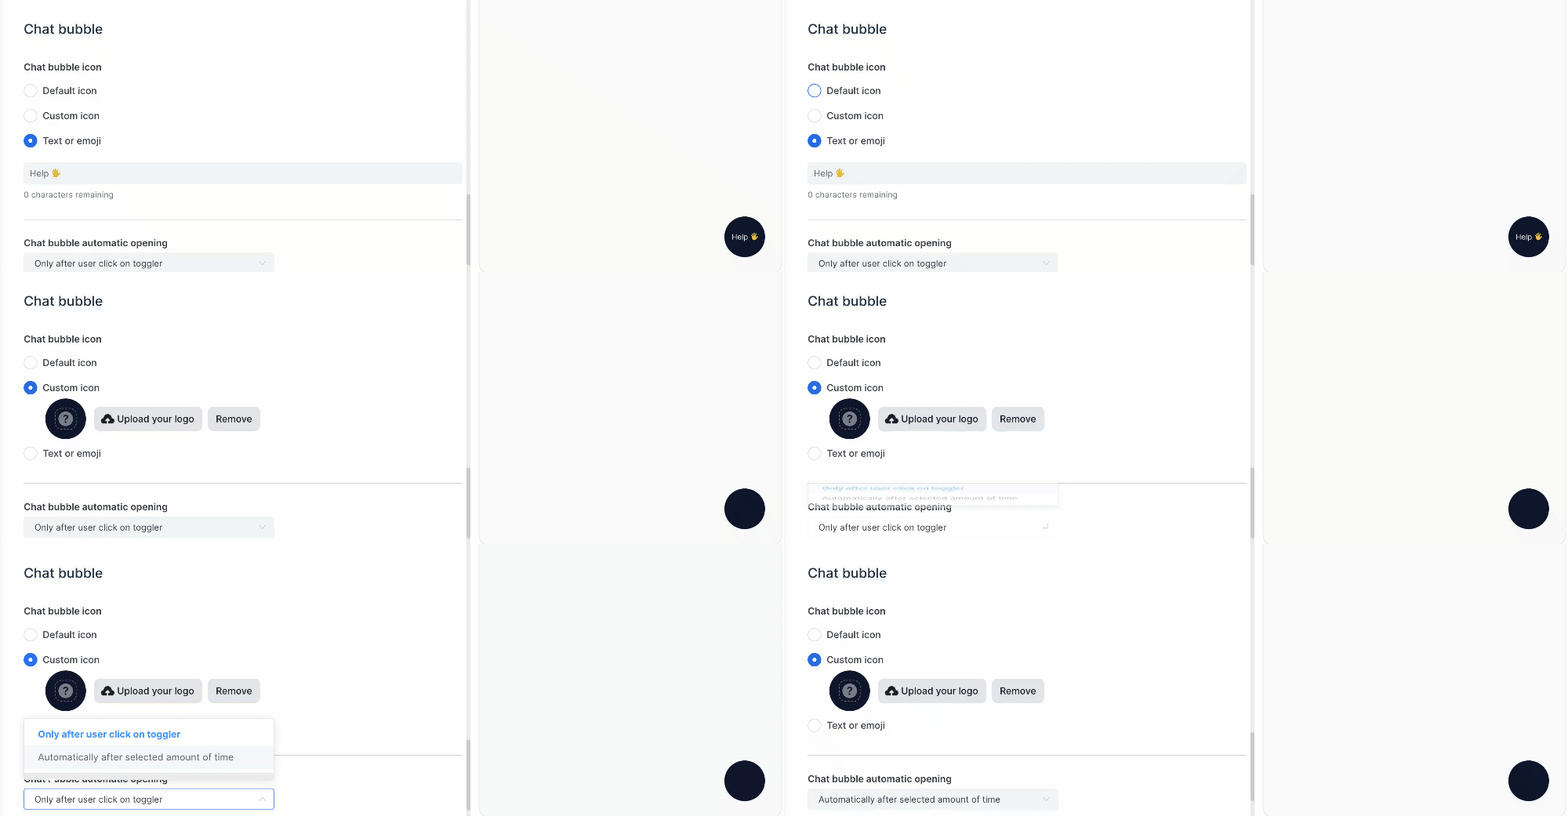
Changing the chat bubble logo
Best practice
The chat bubble is limited to 7 characters for readability reasons. It is also the first item inviting users to open the bot. Use a meaningful icon to generate user engagement.
Automatic opening of the chat bubble after a selected amount of seconds to stimulate user engagement is possible and configurable at the bottom of the format & design tab.
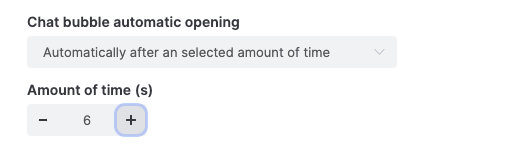
After 6 seconds of user inactivity, the widget will automatically open
Desktop-only
This option is only available when the user is on desktop. Chat won't auto-open on mobile (= screen width below 768px)
Greetings
Define how your bot will greet new customers when they open the widget for the first time. Write a welcome message and choose a selection of Quick Reply to best engage your users.
Best practice
Create a short greeting message to present the purpose of your bot and suggest Quick Replies to the most important use cases.
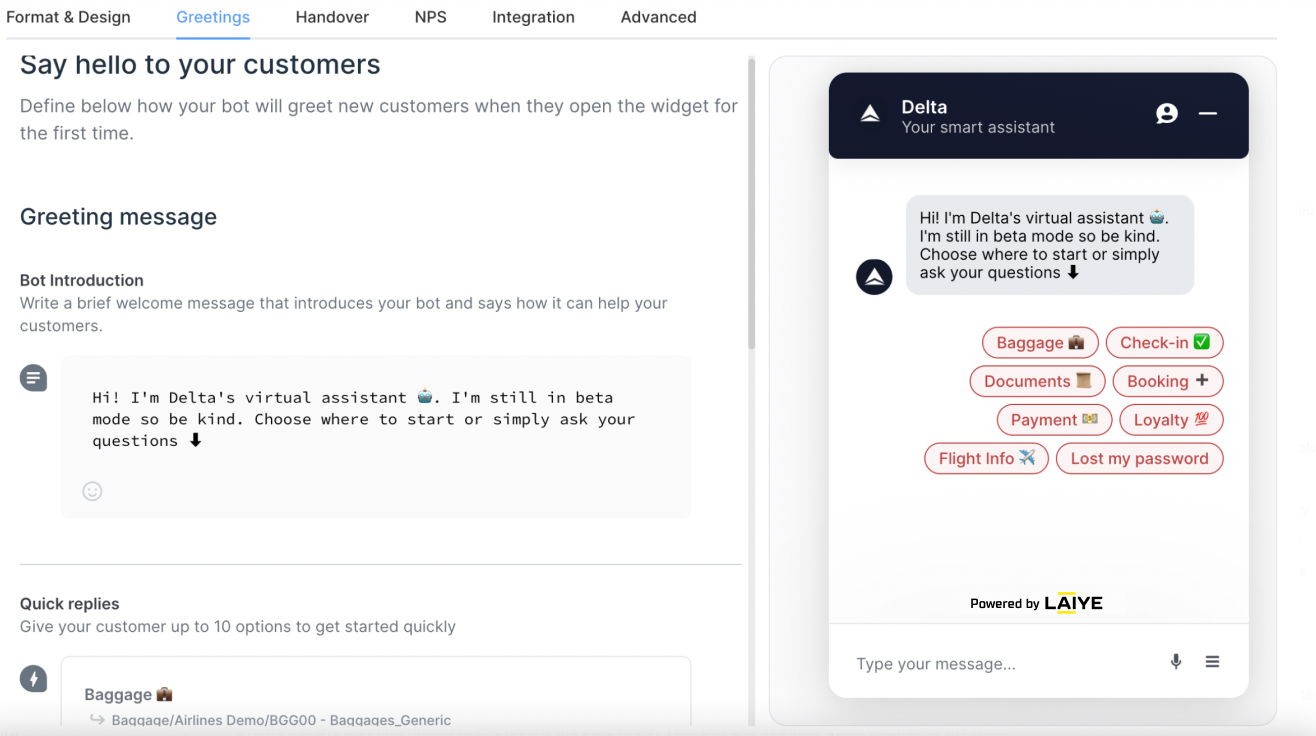
Greeting message settings
Greetings don't allow variable usage
The greeting message cannot contain any variables (Jinja) as the User context is not yet created. The variables will be accessible, once the user send a first message
Handover
Only accessible to Bot Managers
Handover icon
Agent handover can be triggered in two ways:
- through the widget icon in the widget
- directly via chat
Clicking on the widget icon will send a custom message that is supposed to trigger a "contact agent" use case. The bot will read that message using NLP just like any other user message.
Icon tooltip is customizable.
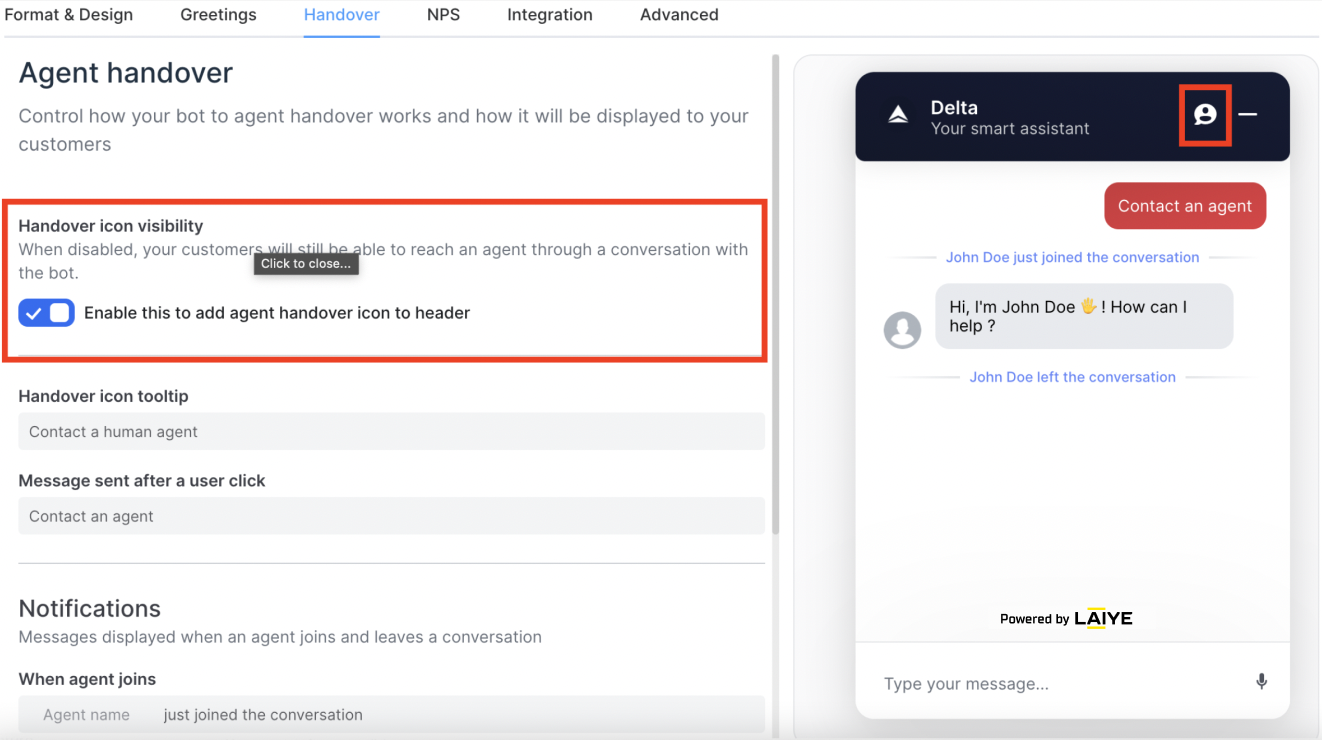
Handover button activation and settings
Notifications
Customize the message displayed in the widget when an agent joins or leaves the chat.
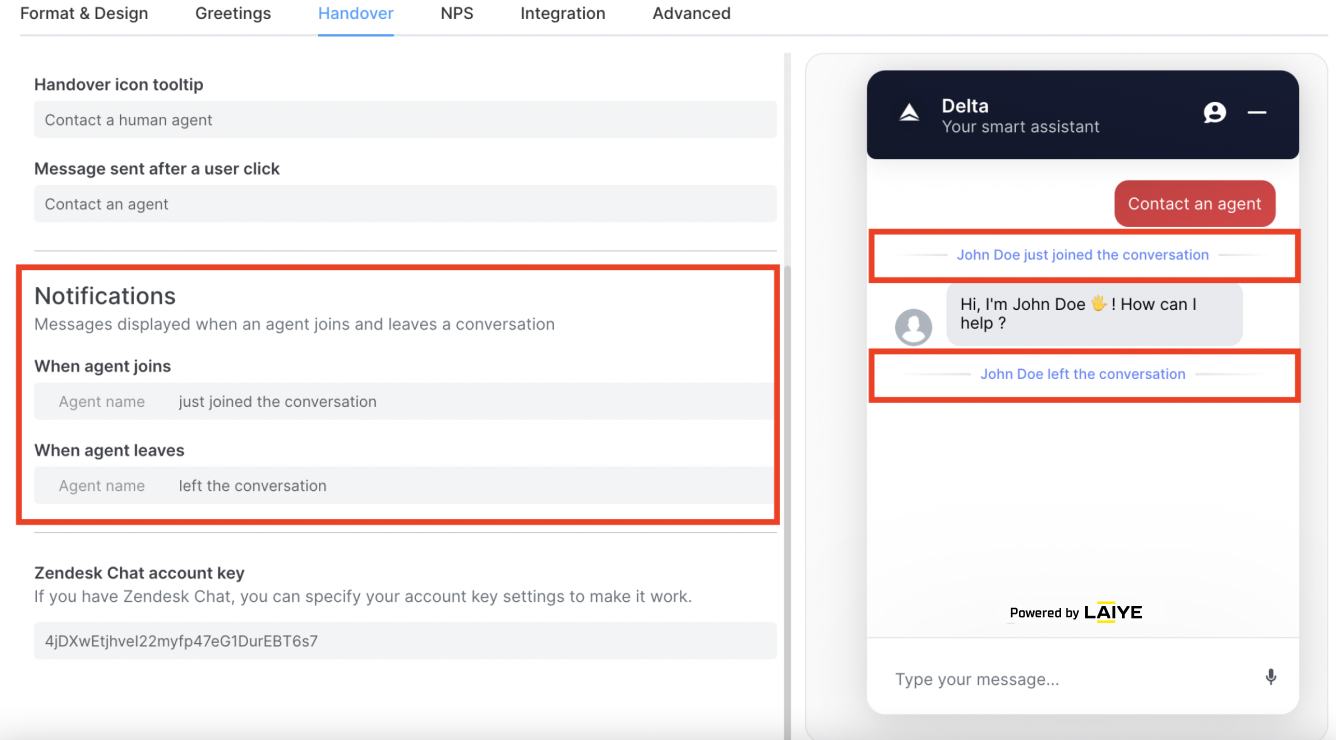
Zendesk account token
Soon deprecated
Connect to Zendesk will be done directly on a dedicated page.
Enter your Zendesk Chat account key here to set up the agent handover to Zendesk.
Here is the official Zendesk Documentation to find that account key.

NPS
This tab lets you activate the NPS question at the closing of the web widget (⚠ only on a desktop or mobile website, not in a mobile app):
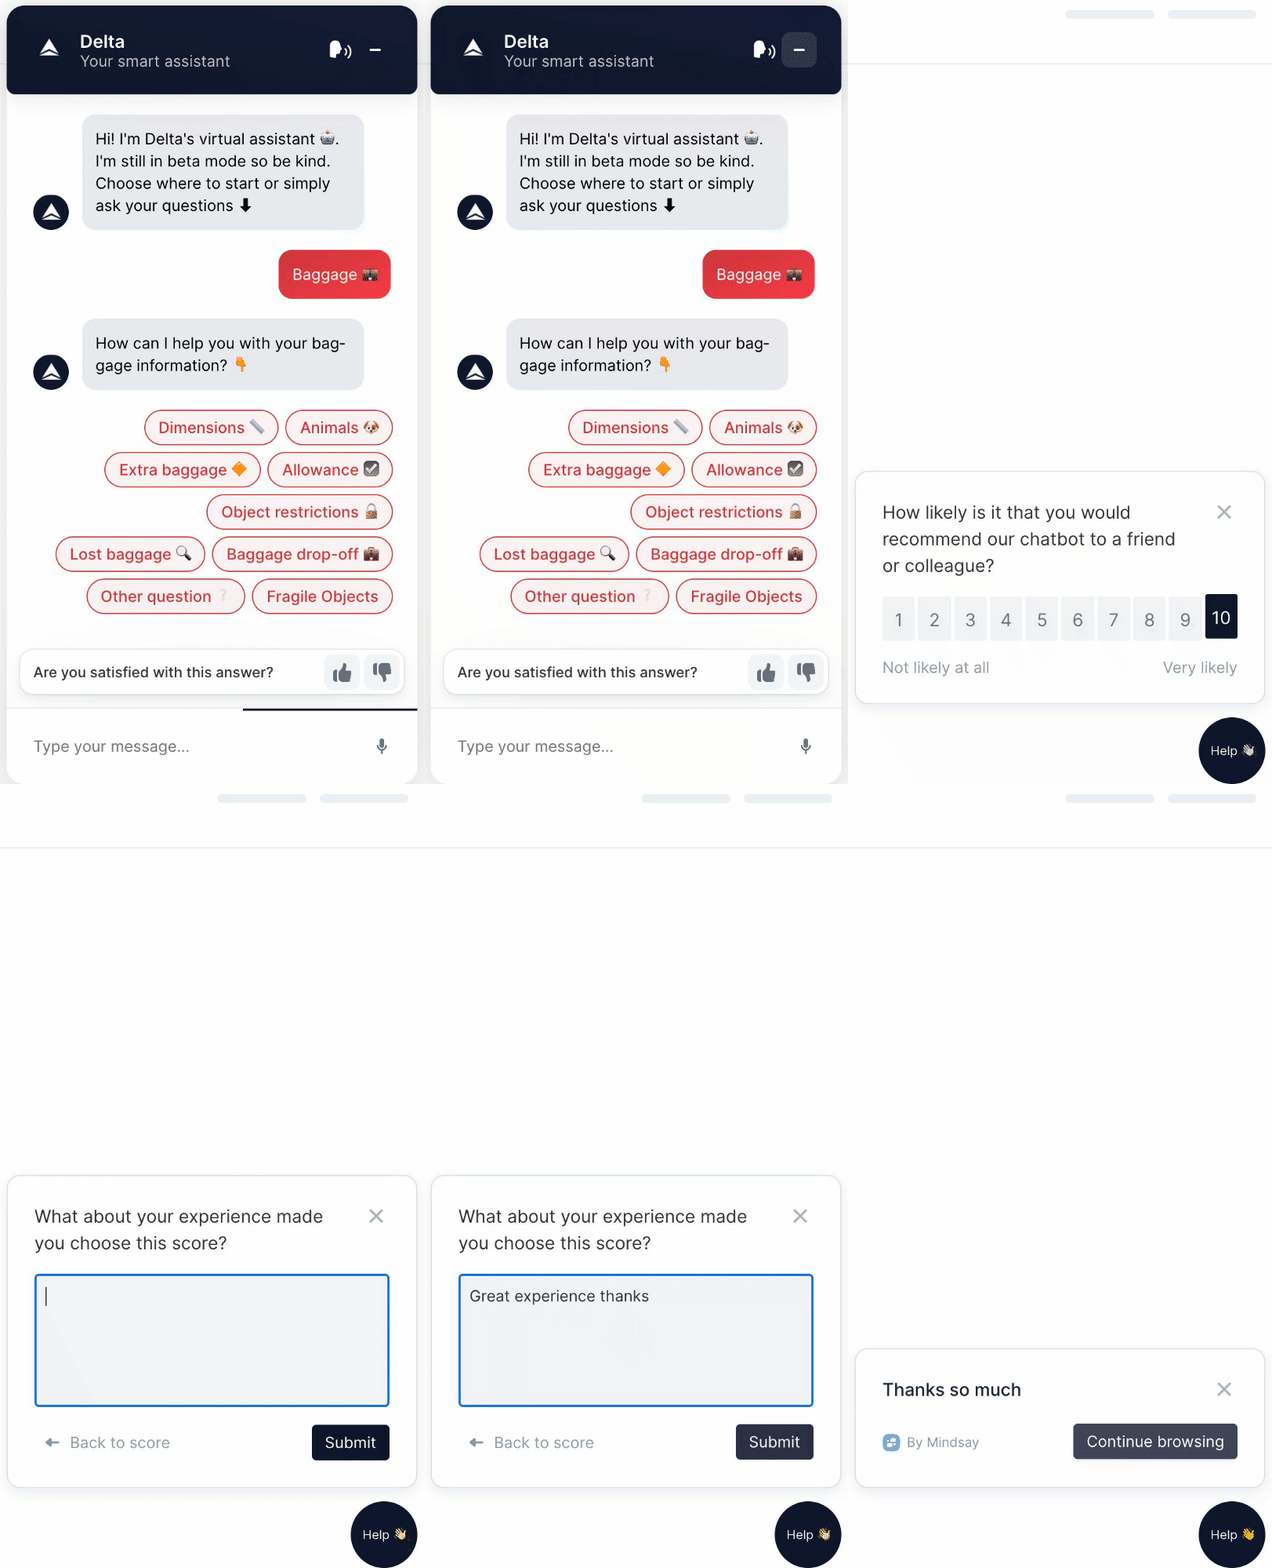
NPS question and follow-up question in the widget
Activate NPS survey
To activate the NPS survey, just click the switch button.
The question is not editable since the NPS question is a market standard:
How likely is it that you would recommend our chatbot to a friend or colleague?
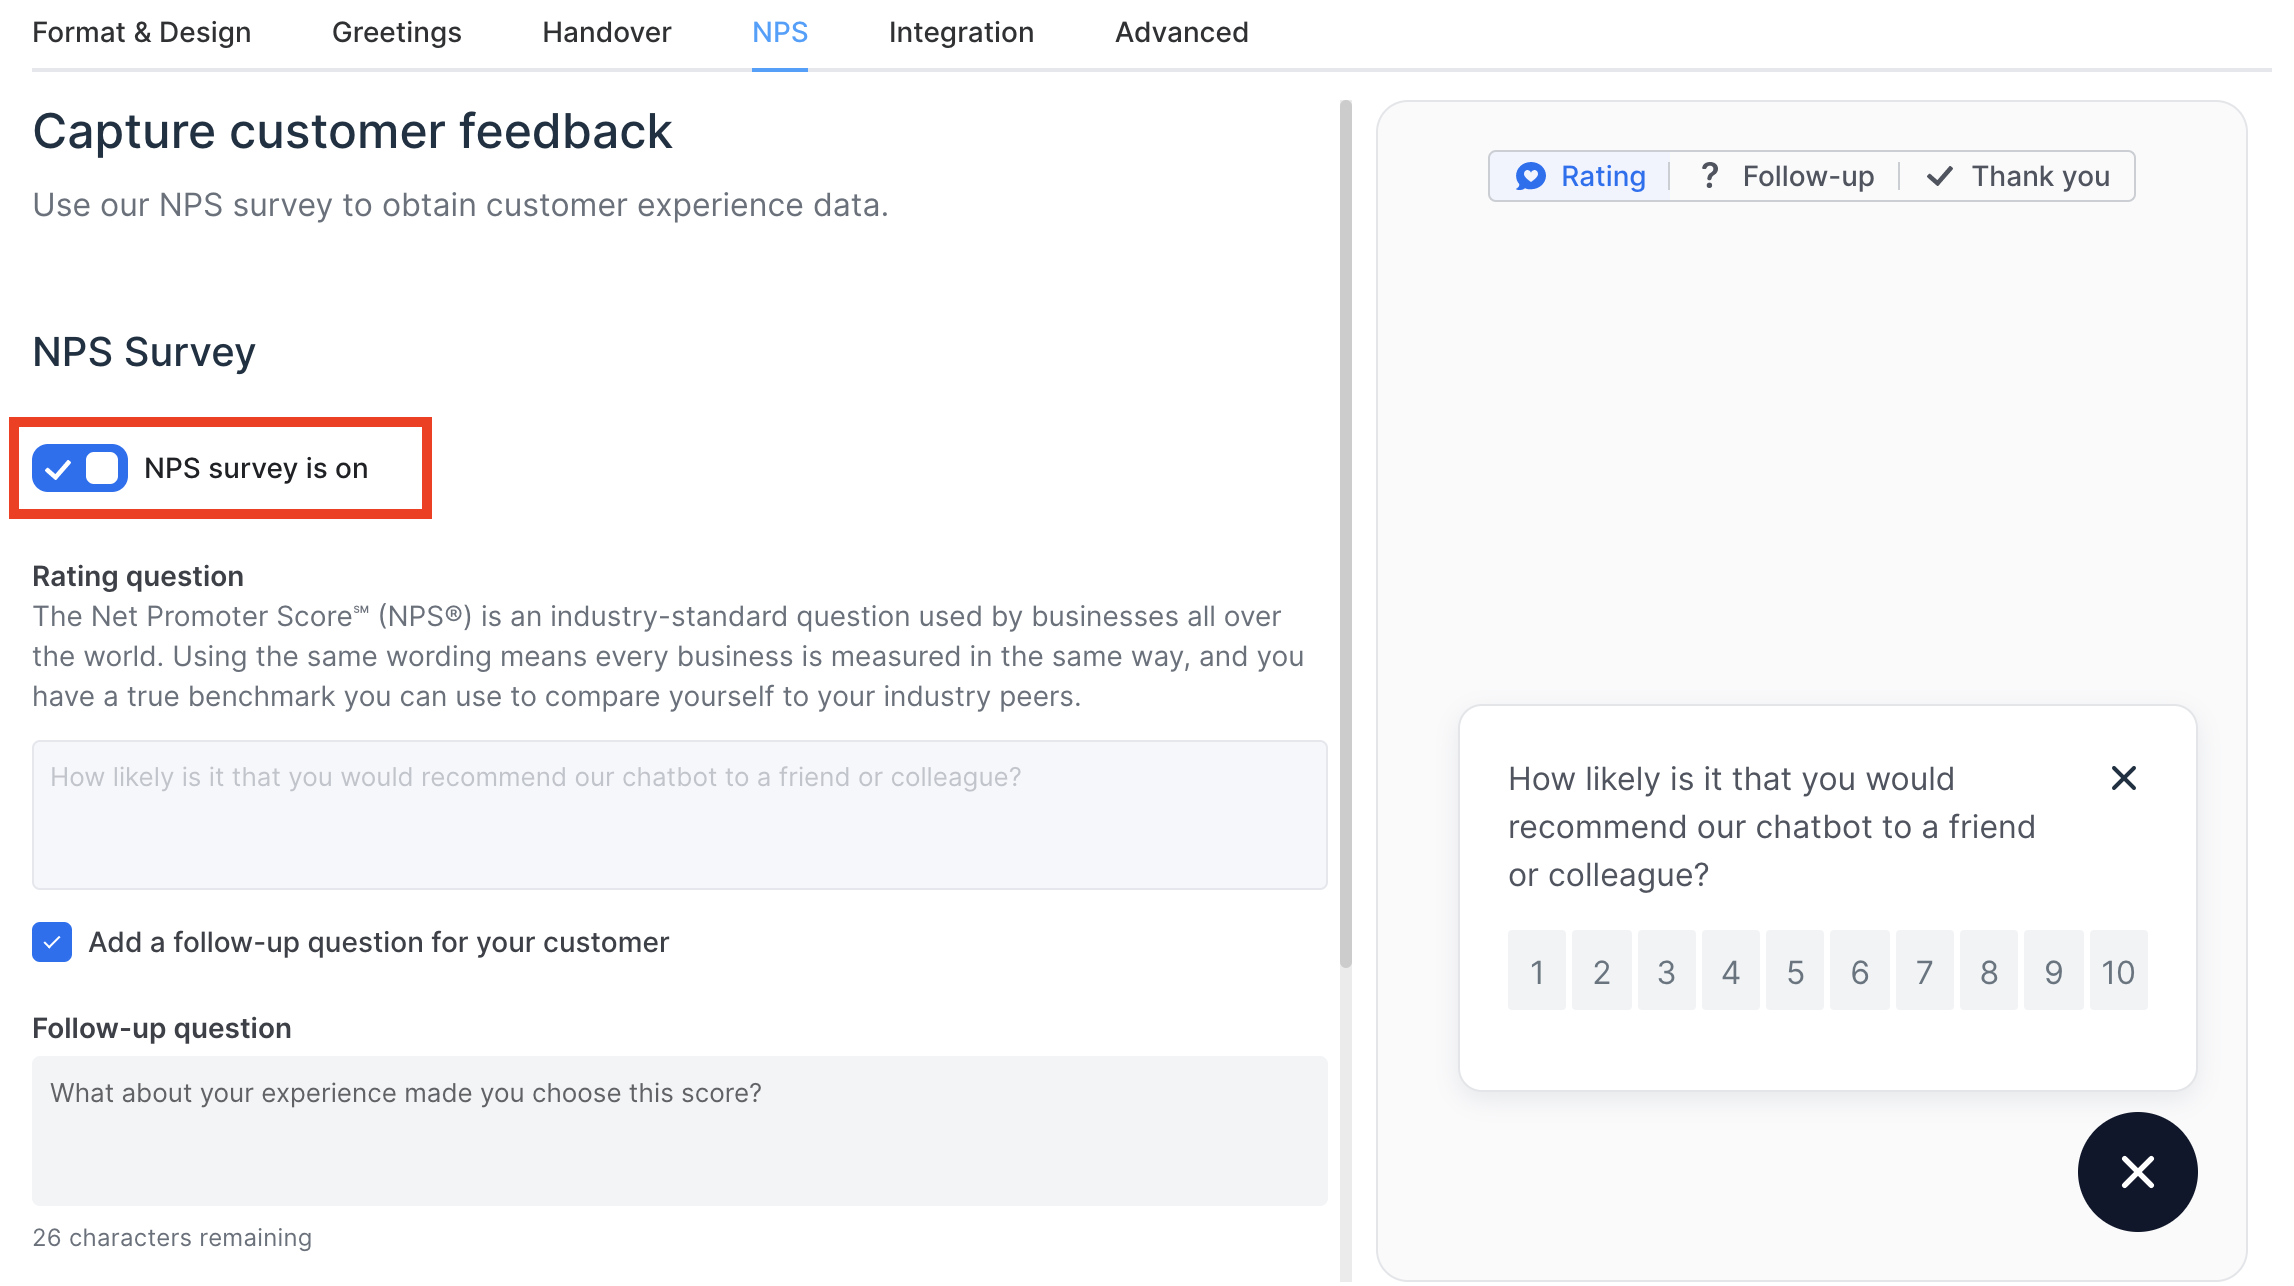
Switch on the NPS survey to activate NPS
On the right-hand side of the page, a preview of the question is provided. Switch the tabs to view the different messages:
- NPS question
- Follow-up question
- Thank you message
Follow-up question
Add a fully customizable follow-up question that will pop up right after the user provides a rating from 1 to 10.
Answers to the Follow-up question
Ask your Account Manager to get access to the results of the Follow-up question. They are not displayed yet in the NPS dashboard.
Thank you message
Customize it to be aligned with your brand's voice.
NPS results
They appear in the Analytics section in the NPS & CSAT tab. More details in the NPS & CSAT dashboards documentation.
Integration
Find in this tab:
- a script to integrate the web widget in your website or mobile app
- a shareable link to a test the widget
- a cursor to limit the audience distribution
Useful resources to help you integrate your widget
Test page
Find a dedicated test page where your widget is displayed and share the link with your team members. This is the easiest way to let anyone testing the bot without having it live on your website.
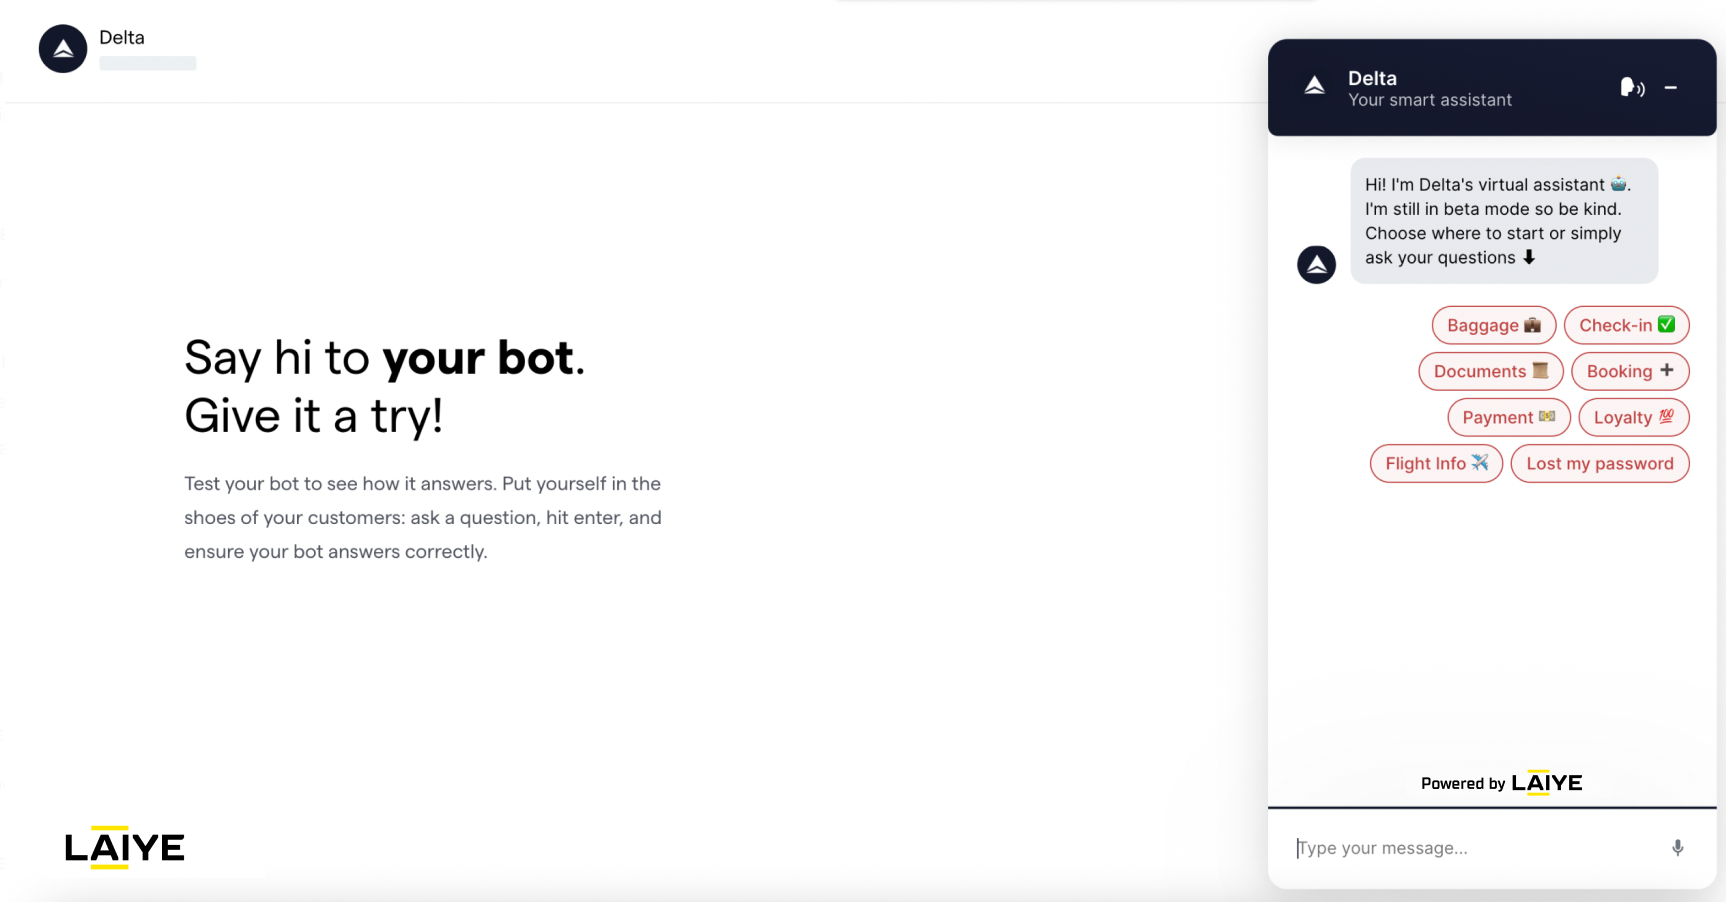
Example of a Test page
Share your Bot Test link
Follow a short video tutorial to share your Bot Test link with internal and external users.
Audience management
Change the percentage of users who will see the widget on your website by moving the slider. Use this to make a "soft launch" of your bot and release it progressively. Reduce to 0% if you want to stop displaying the bot in a minute.

Audience distribution slider from 0 to 100%
Advanced
This section allows you to manage advanced settings of the widget:
- Customer Reference to pass information to the bot's Context
- Open links in a new tab option.
- Starting User Action to place the user in a specific user action at the beginning of the conversation.
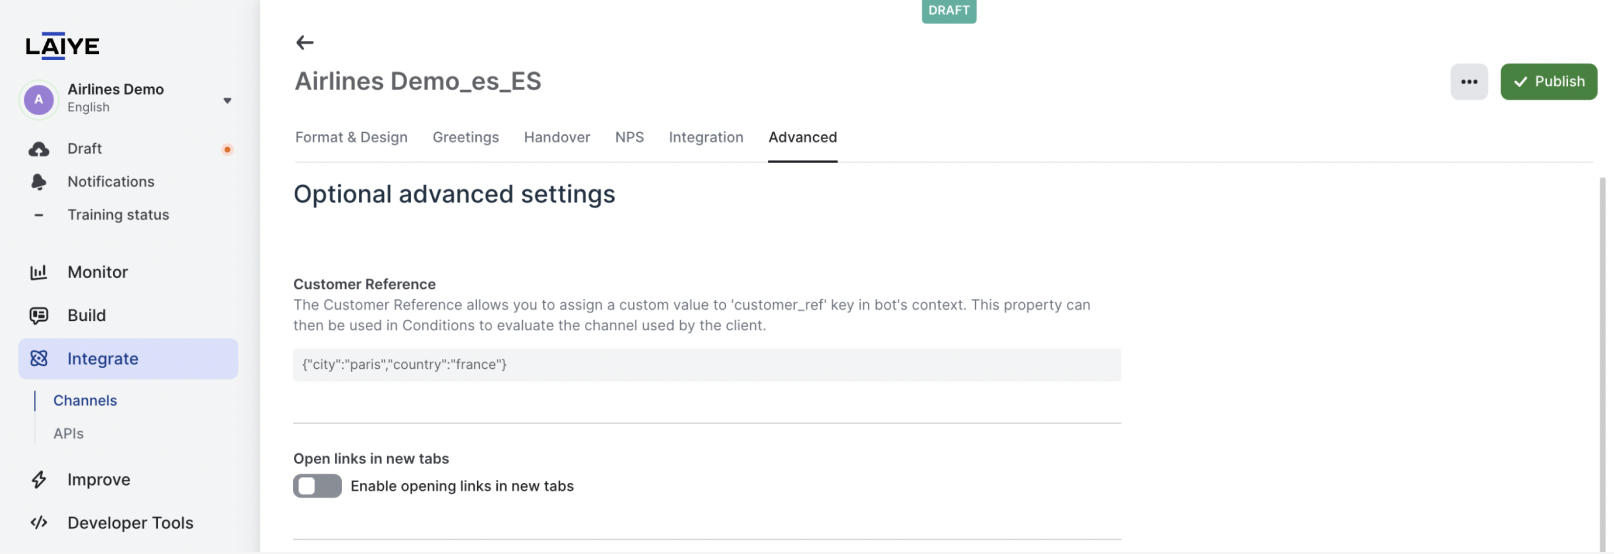
Customer reference
The Customer Reference allows you to pass a specific string to the bot's Context. This is very helpful to variabilize some parts of the bot's content depending on where the user is.
Implementation Example
Let's say you want your bot to change the content of the answer depending on the page where the widget is displayed. You can pass a variable to the widget through the Customer Reference that will be accessible in the Context and be used as a variable in the bot's content to change the answers dynamically.
To do so, you need to have 1 widget configuration with 1 customer reference for each of the pages.
You could even change the content dynamically with a Knowledge Base using the Customer Reference variable to adapt the content dynamically.
Open link in new tab
Activating this option will open a new browser window every time a user clicks on a URL provided by the bot.
By switching the toggle on, all the links of your bot answers will open in a new tab. That way the user can easily go back to the chatbot.
Starting User Action
In some cases, you want the user to start directly within a specific scenario (Use Case). This option lets you select the starting user action.
Implementation example
You could make the bot start from a specific User Action and provide variables using the Customer Reference so that the bot directly provides a specific answer without even asking any question to the user.
Let's say your bot has a Flight Search use case. Your website could gather the information in a Flight Search landing page:
- a departure city
- an arrival city
- a date
and then redirect the user to the bot with the parameters already passed through the URL, with a starting User Action within the Flight Search Use Case and directly provide a list of corresponding flights without asking the user again.
Integration tips
Content Security Policy (CSP) whitelisting
Here are the URLs to whitelist as default-src:
https://*.destygo.com
https://*.mindsay.com
https://*.laiye.com
wss://*.mindsay.com
wss://*.laiye.com
https://fonts.googleapis.com
https://fonts.gstatic.com
If you are using the Zendesk Chat integration, please refer to this page to whitelist Zendesk URLs.
If you are using other services to enrich your bot (ex: TypeForm, Youtube) don't forget to add them.
Updated almost 2 years ago