
AI Tools
AI Tools allow you to define external API connections that your AI assistant (Specialist prompts) can call during conversations. Instead of hardcoding API calls in your flow, the AI decides when and how to use each tool based on the conversation context.
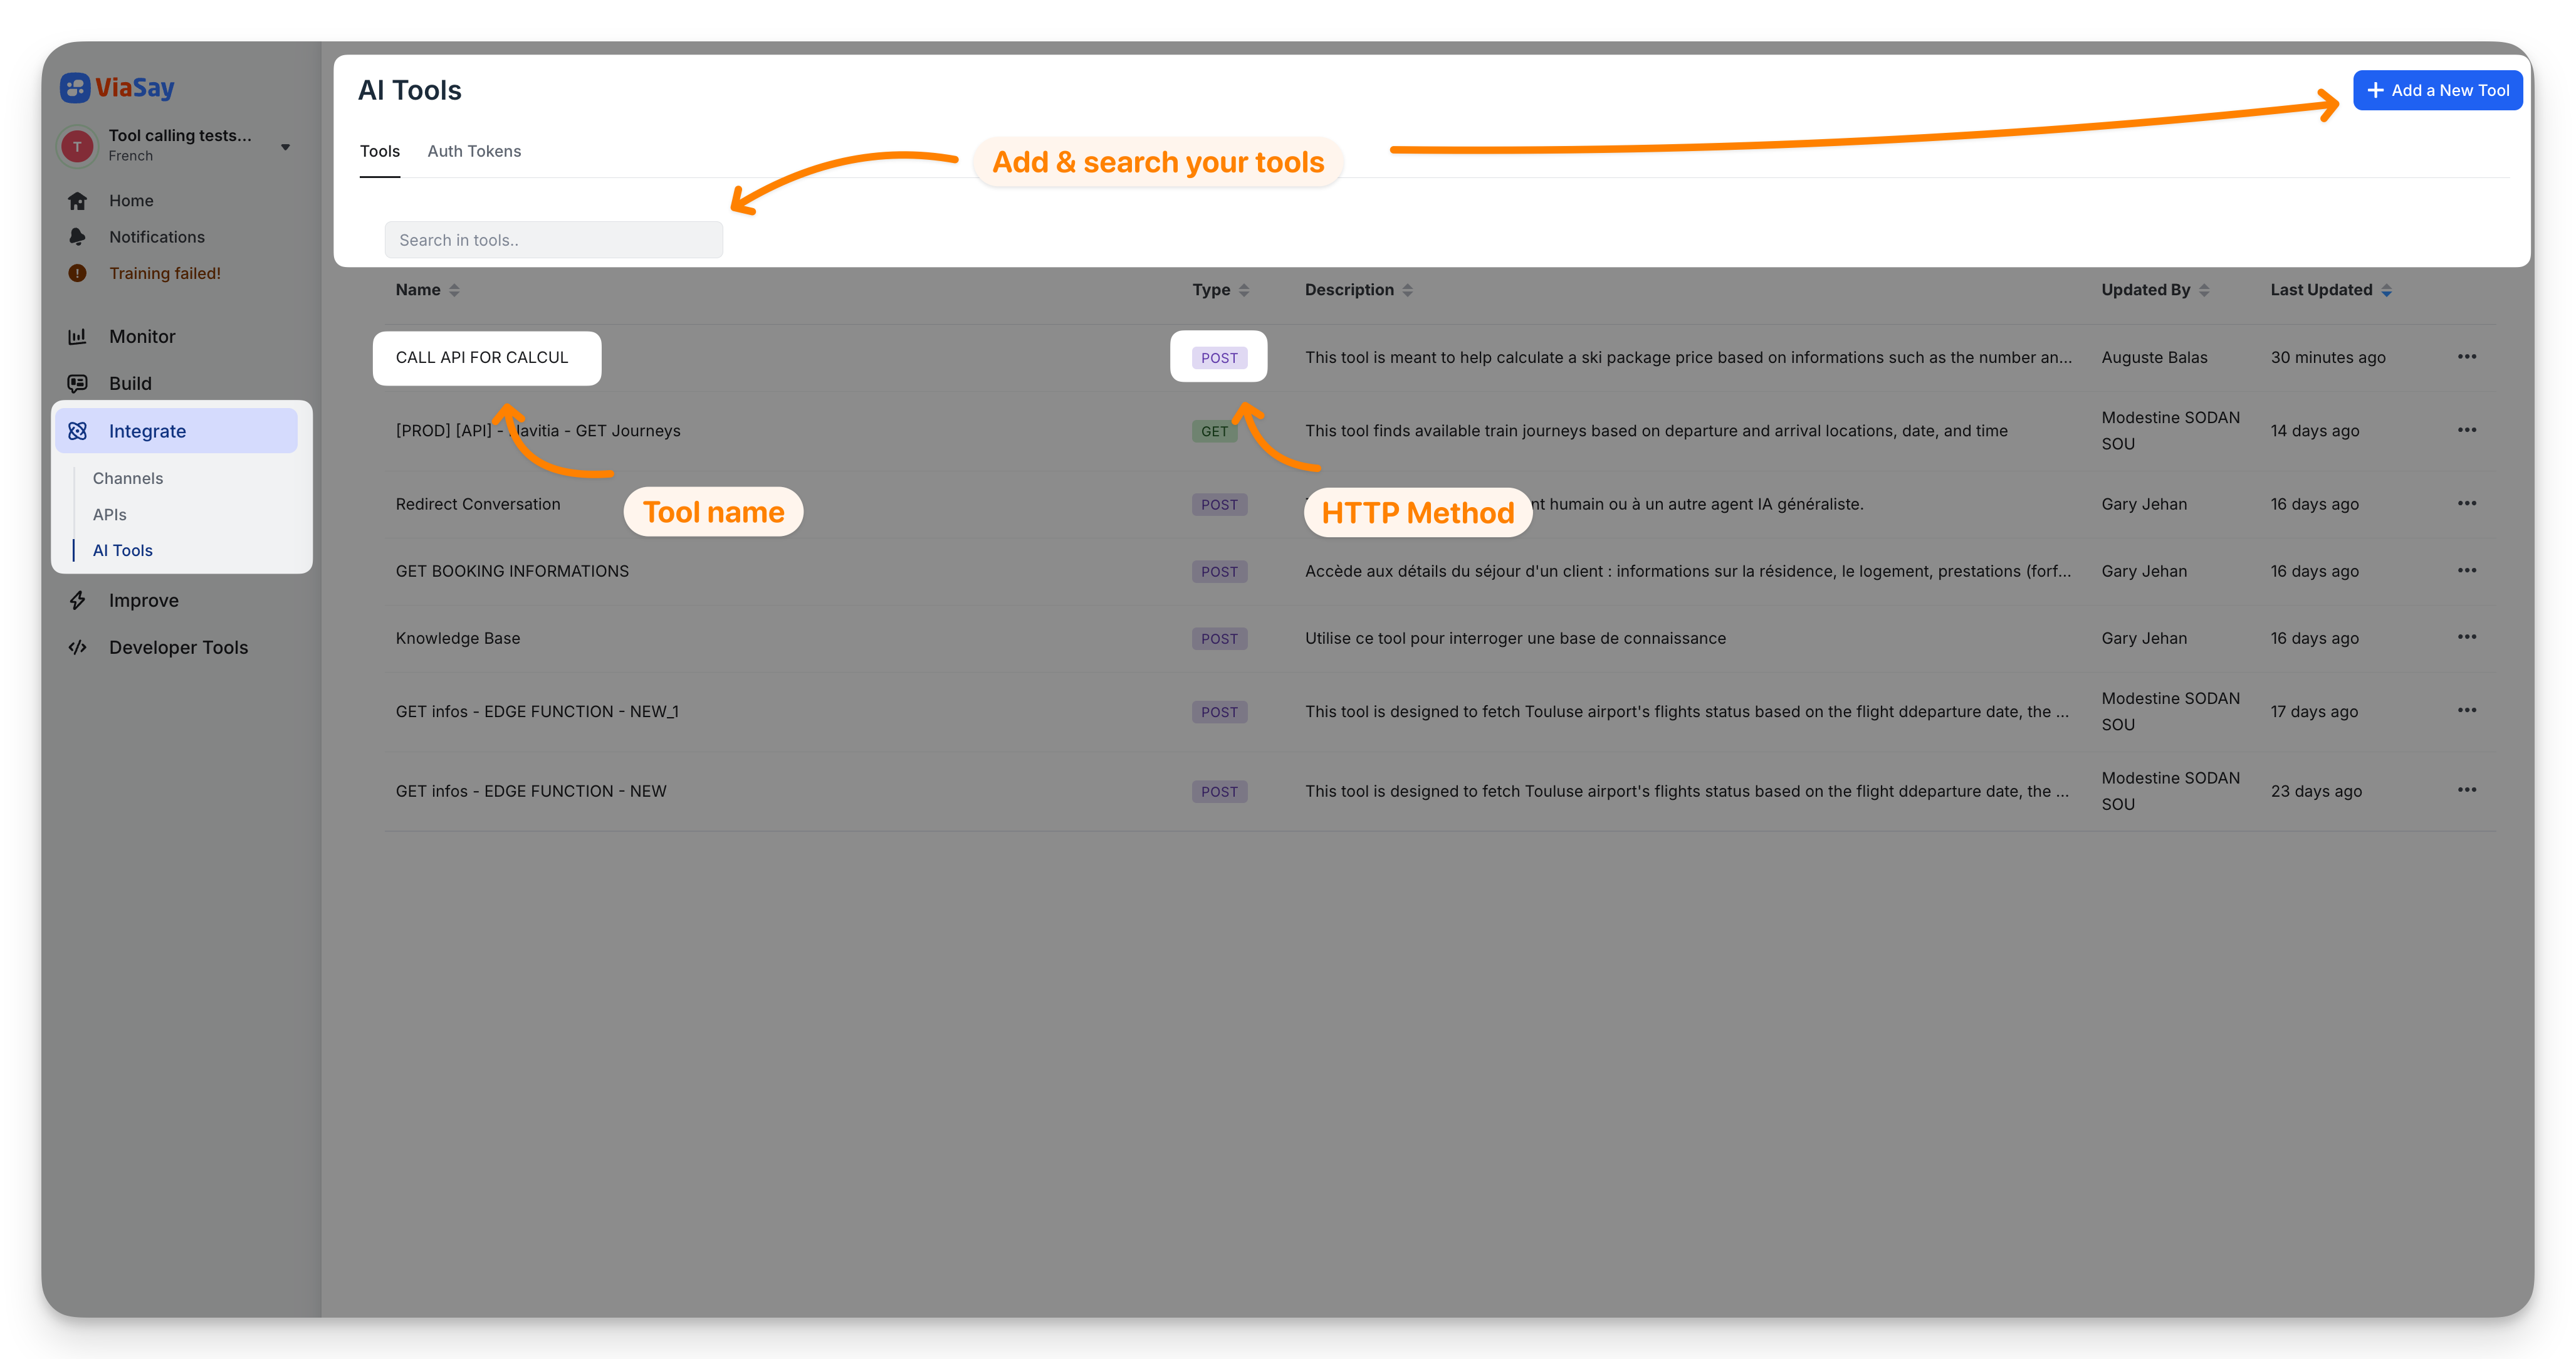
Navigate to Integrate > AI Tools to access the feature.
Beta feature
AI Tools is currently in beta. It is available for bots with AI Specialist enabled.
Overview
The AI Tools page lists all your tool definitions. Tools are organized in two tabs:
- Tools: API-type tools that call external endpoints
- Auth Tokens: HTTP authentication tokens used by your API tools
You can search tools by name and sort by name, type, description, last updated date, or author.
Each tool displays its HTTP method as a tag (GET, POST, PUT, DELETE).
Create a tool
Click Add a New Tool to open the creation wizard. The wizard guides you through four steps.
Step 1 — About
Provide the basic details that help the AI understand when and why to use this tool.
- Tool Name: use a verb-noun phrase (e.g. "Check Flight Status", "Get Order Details")
- Description: describe the specific problem this tool solves
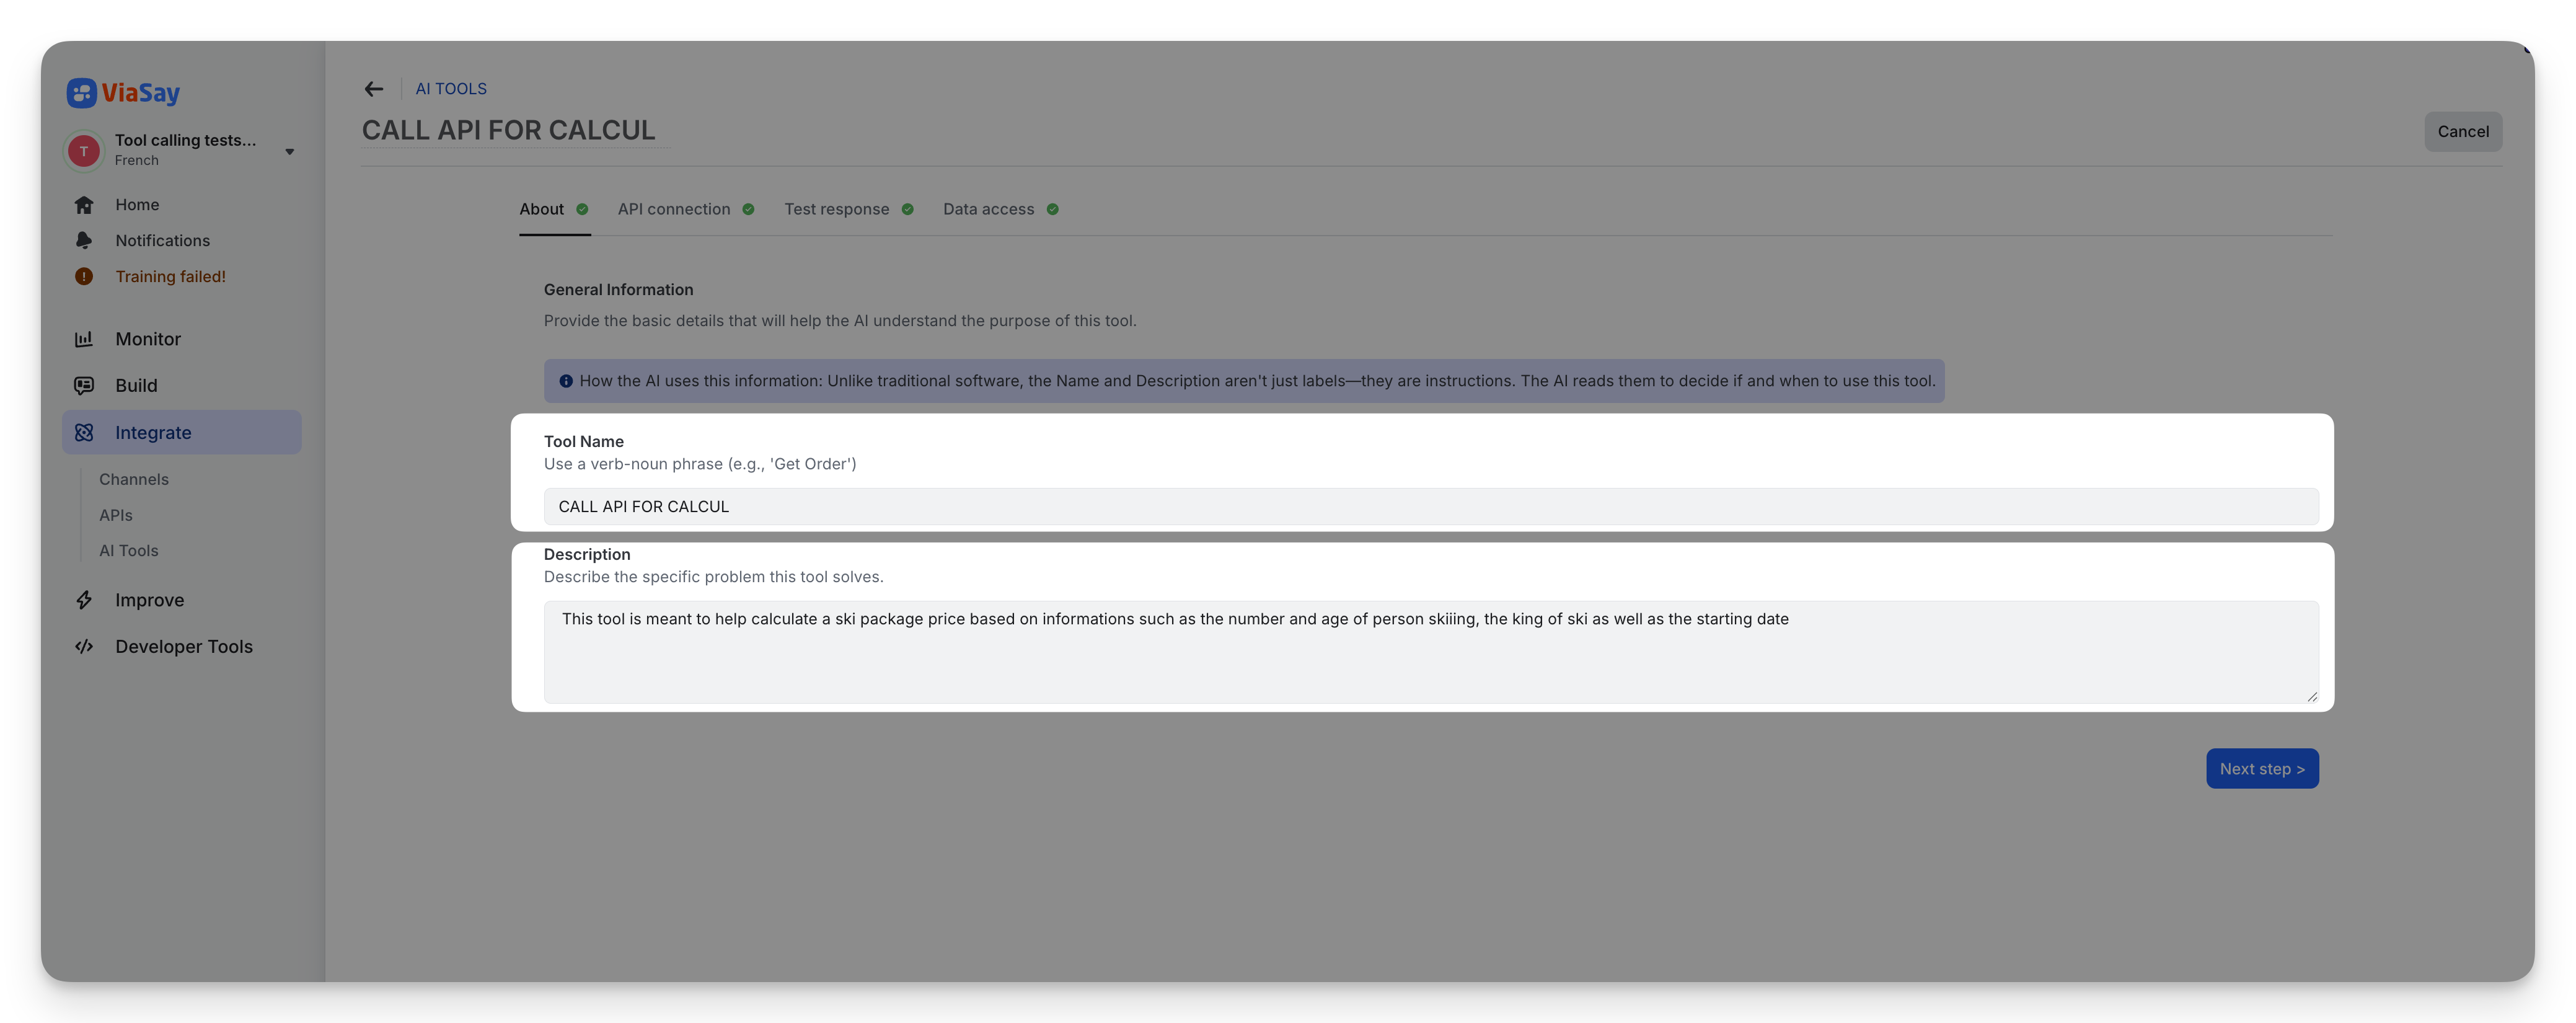
How the AI uses this information
Unlike traditional software, the Name and Description aren't just labels — they are instructions. The AI reads them to decide if and when to use this tool during a conversation.
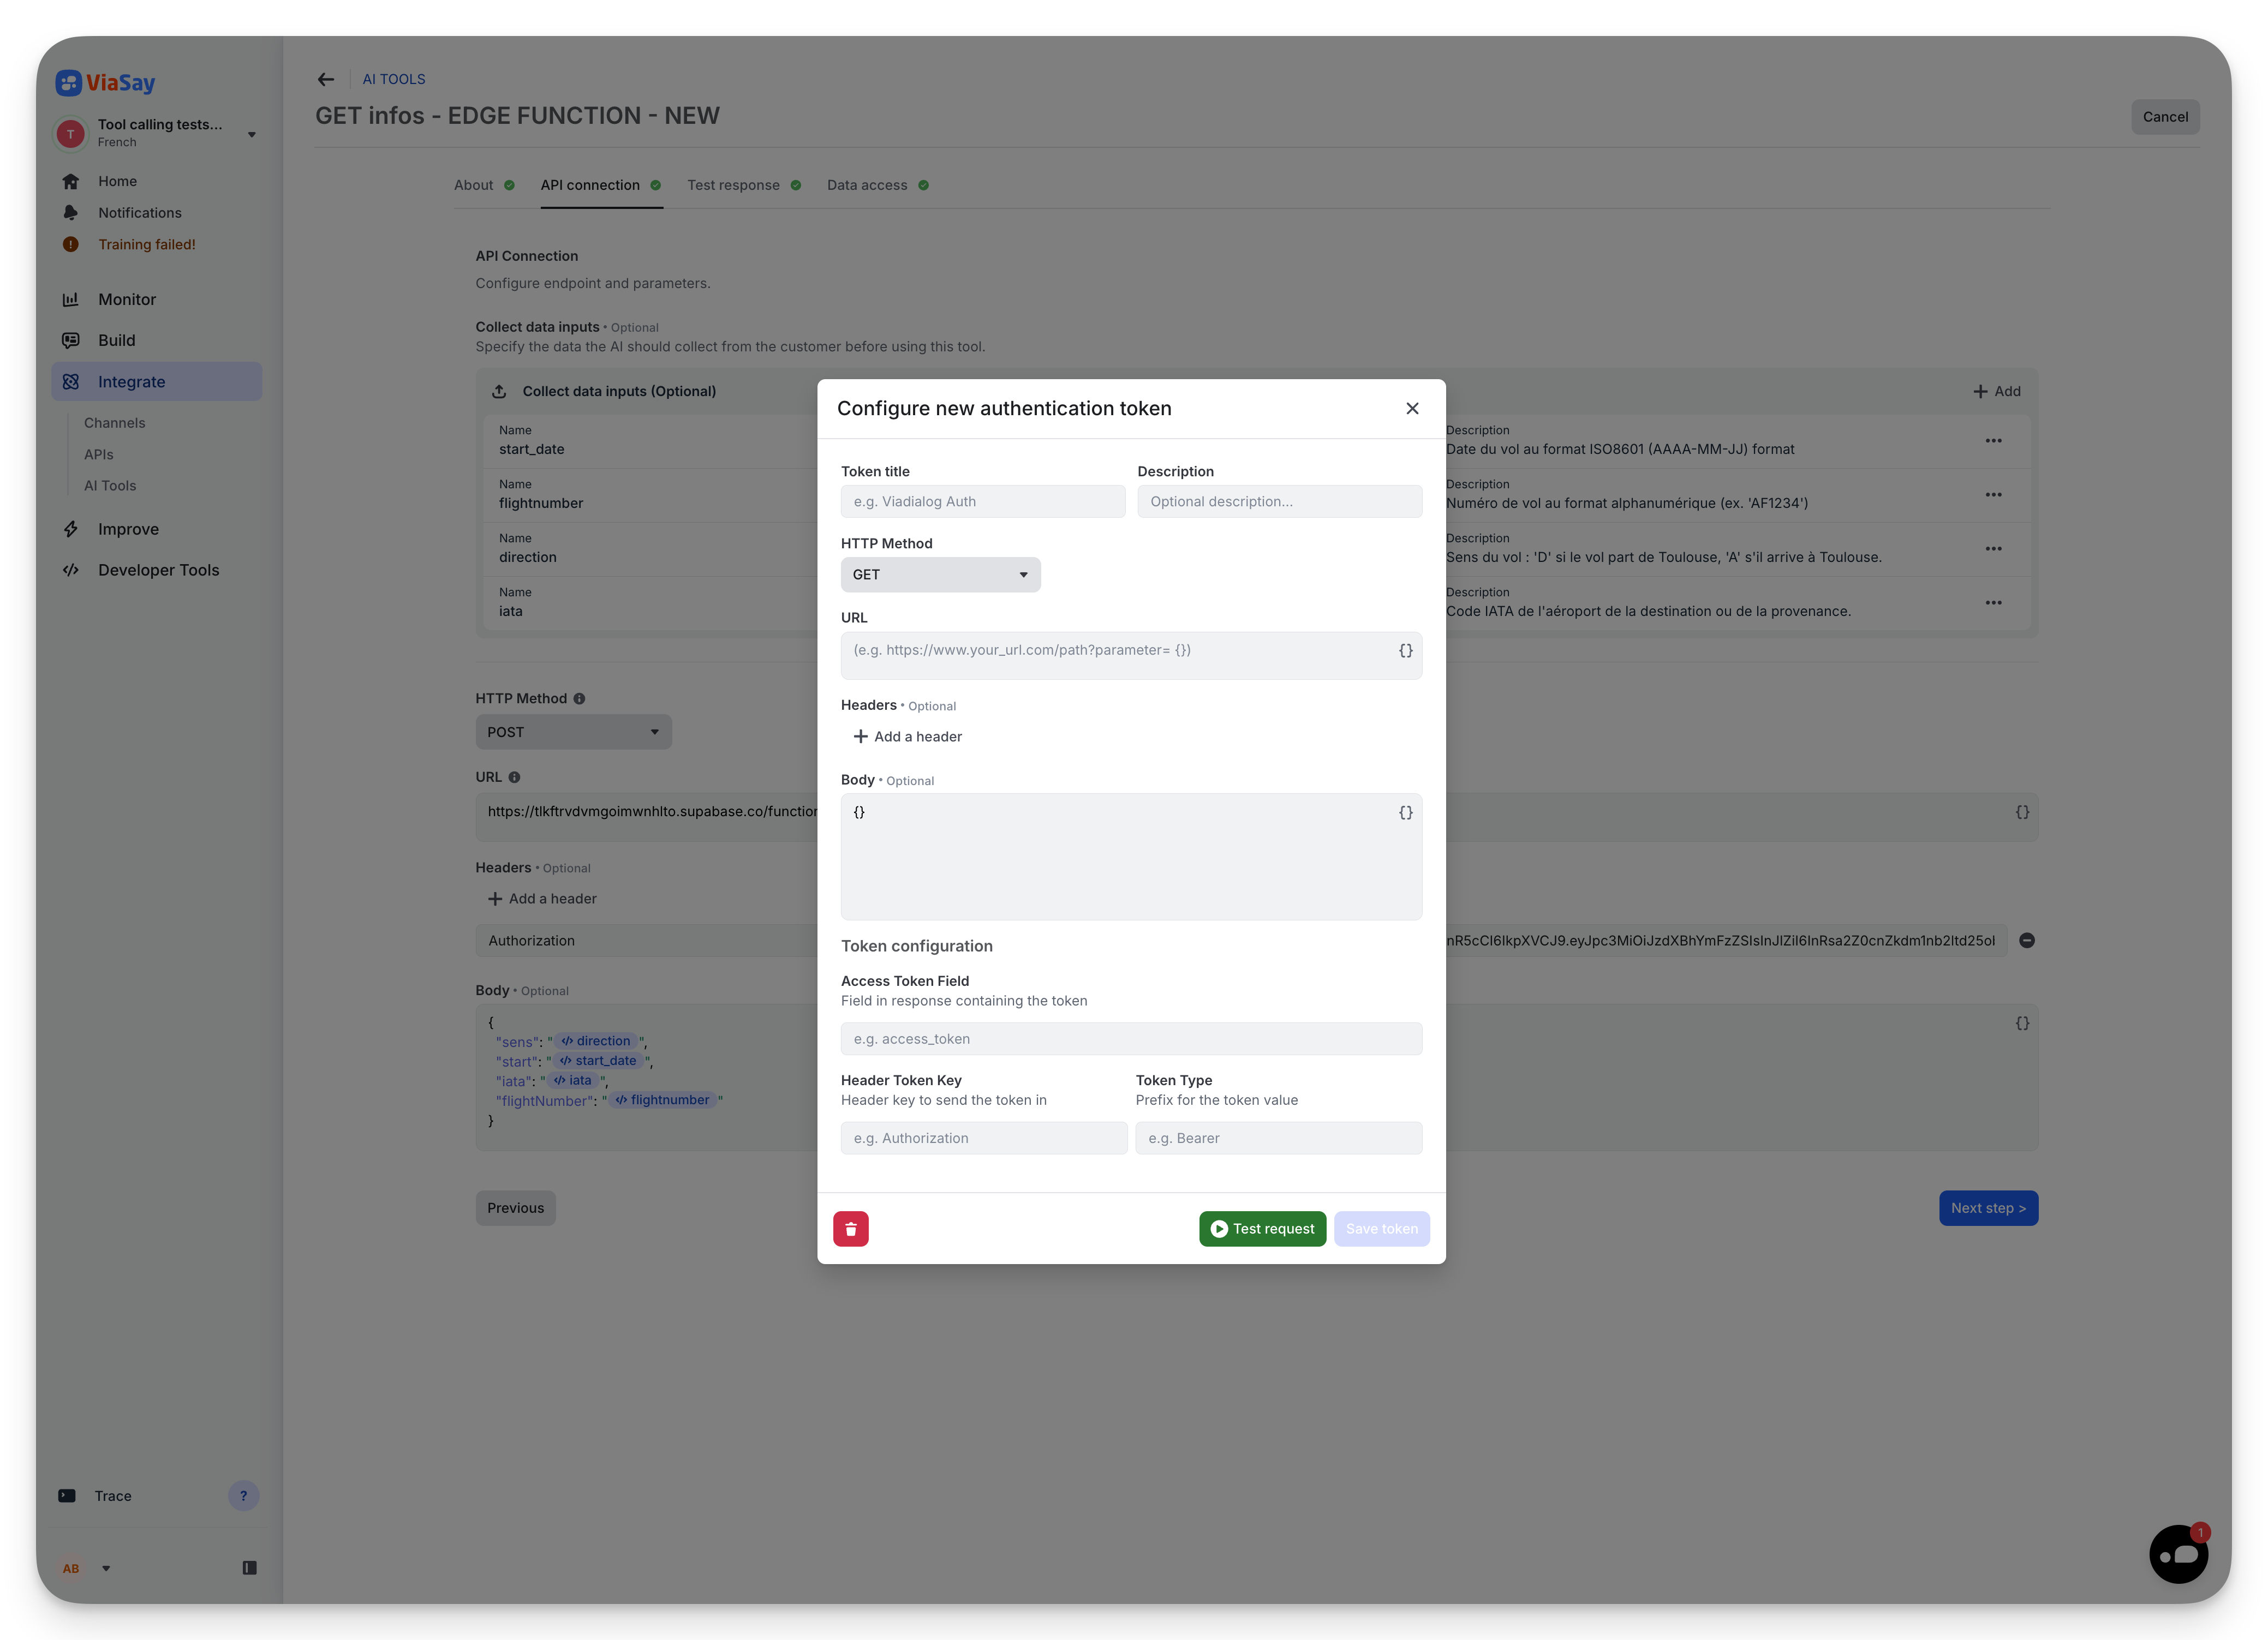
Step 2 — API Connection
Configure how the tool calls your external API.
Collect data inputs
Define the parameters your tool expects from the conversation. For each parameter, specify:
- Name: the variable name (e.g.
order_id,flight_number) - Format: Text, Number, Integer, Boolean, Enum, Array, or Object
- Required or Optional: required parameters use
${variable}syntax, optional ones use?{variable} - Description: helps the AI understand what data to collect from the user
HTTP Method
Select the method for your API request: GET, POST, PUT, or DELETE.
URL
Enter the endpoint URL. You can insert variables from your data inputs using the variable picker (bracket icon). Variables appear as badges in the URL field.
Example: https://api.example.com/orders/${order_id}
Headers
Add headers to your request. Two types are available:
- Key-value pair: standard header (e.g.
Content-Type: application/json) - HTTP Authentication token: reference a pre-configured auth token (see Auth Tokens below)
Body
For POST/PUT requests, provide the JSON request body. You can insert variables in the body as well.

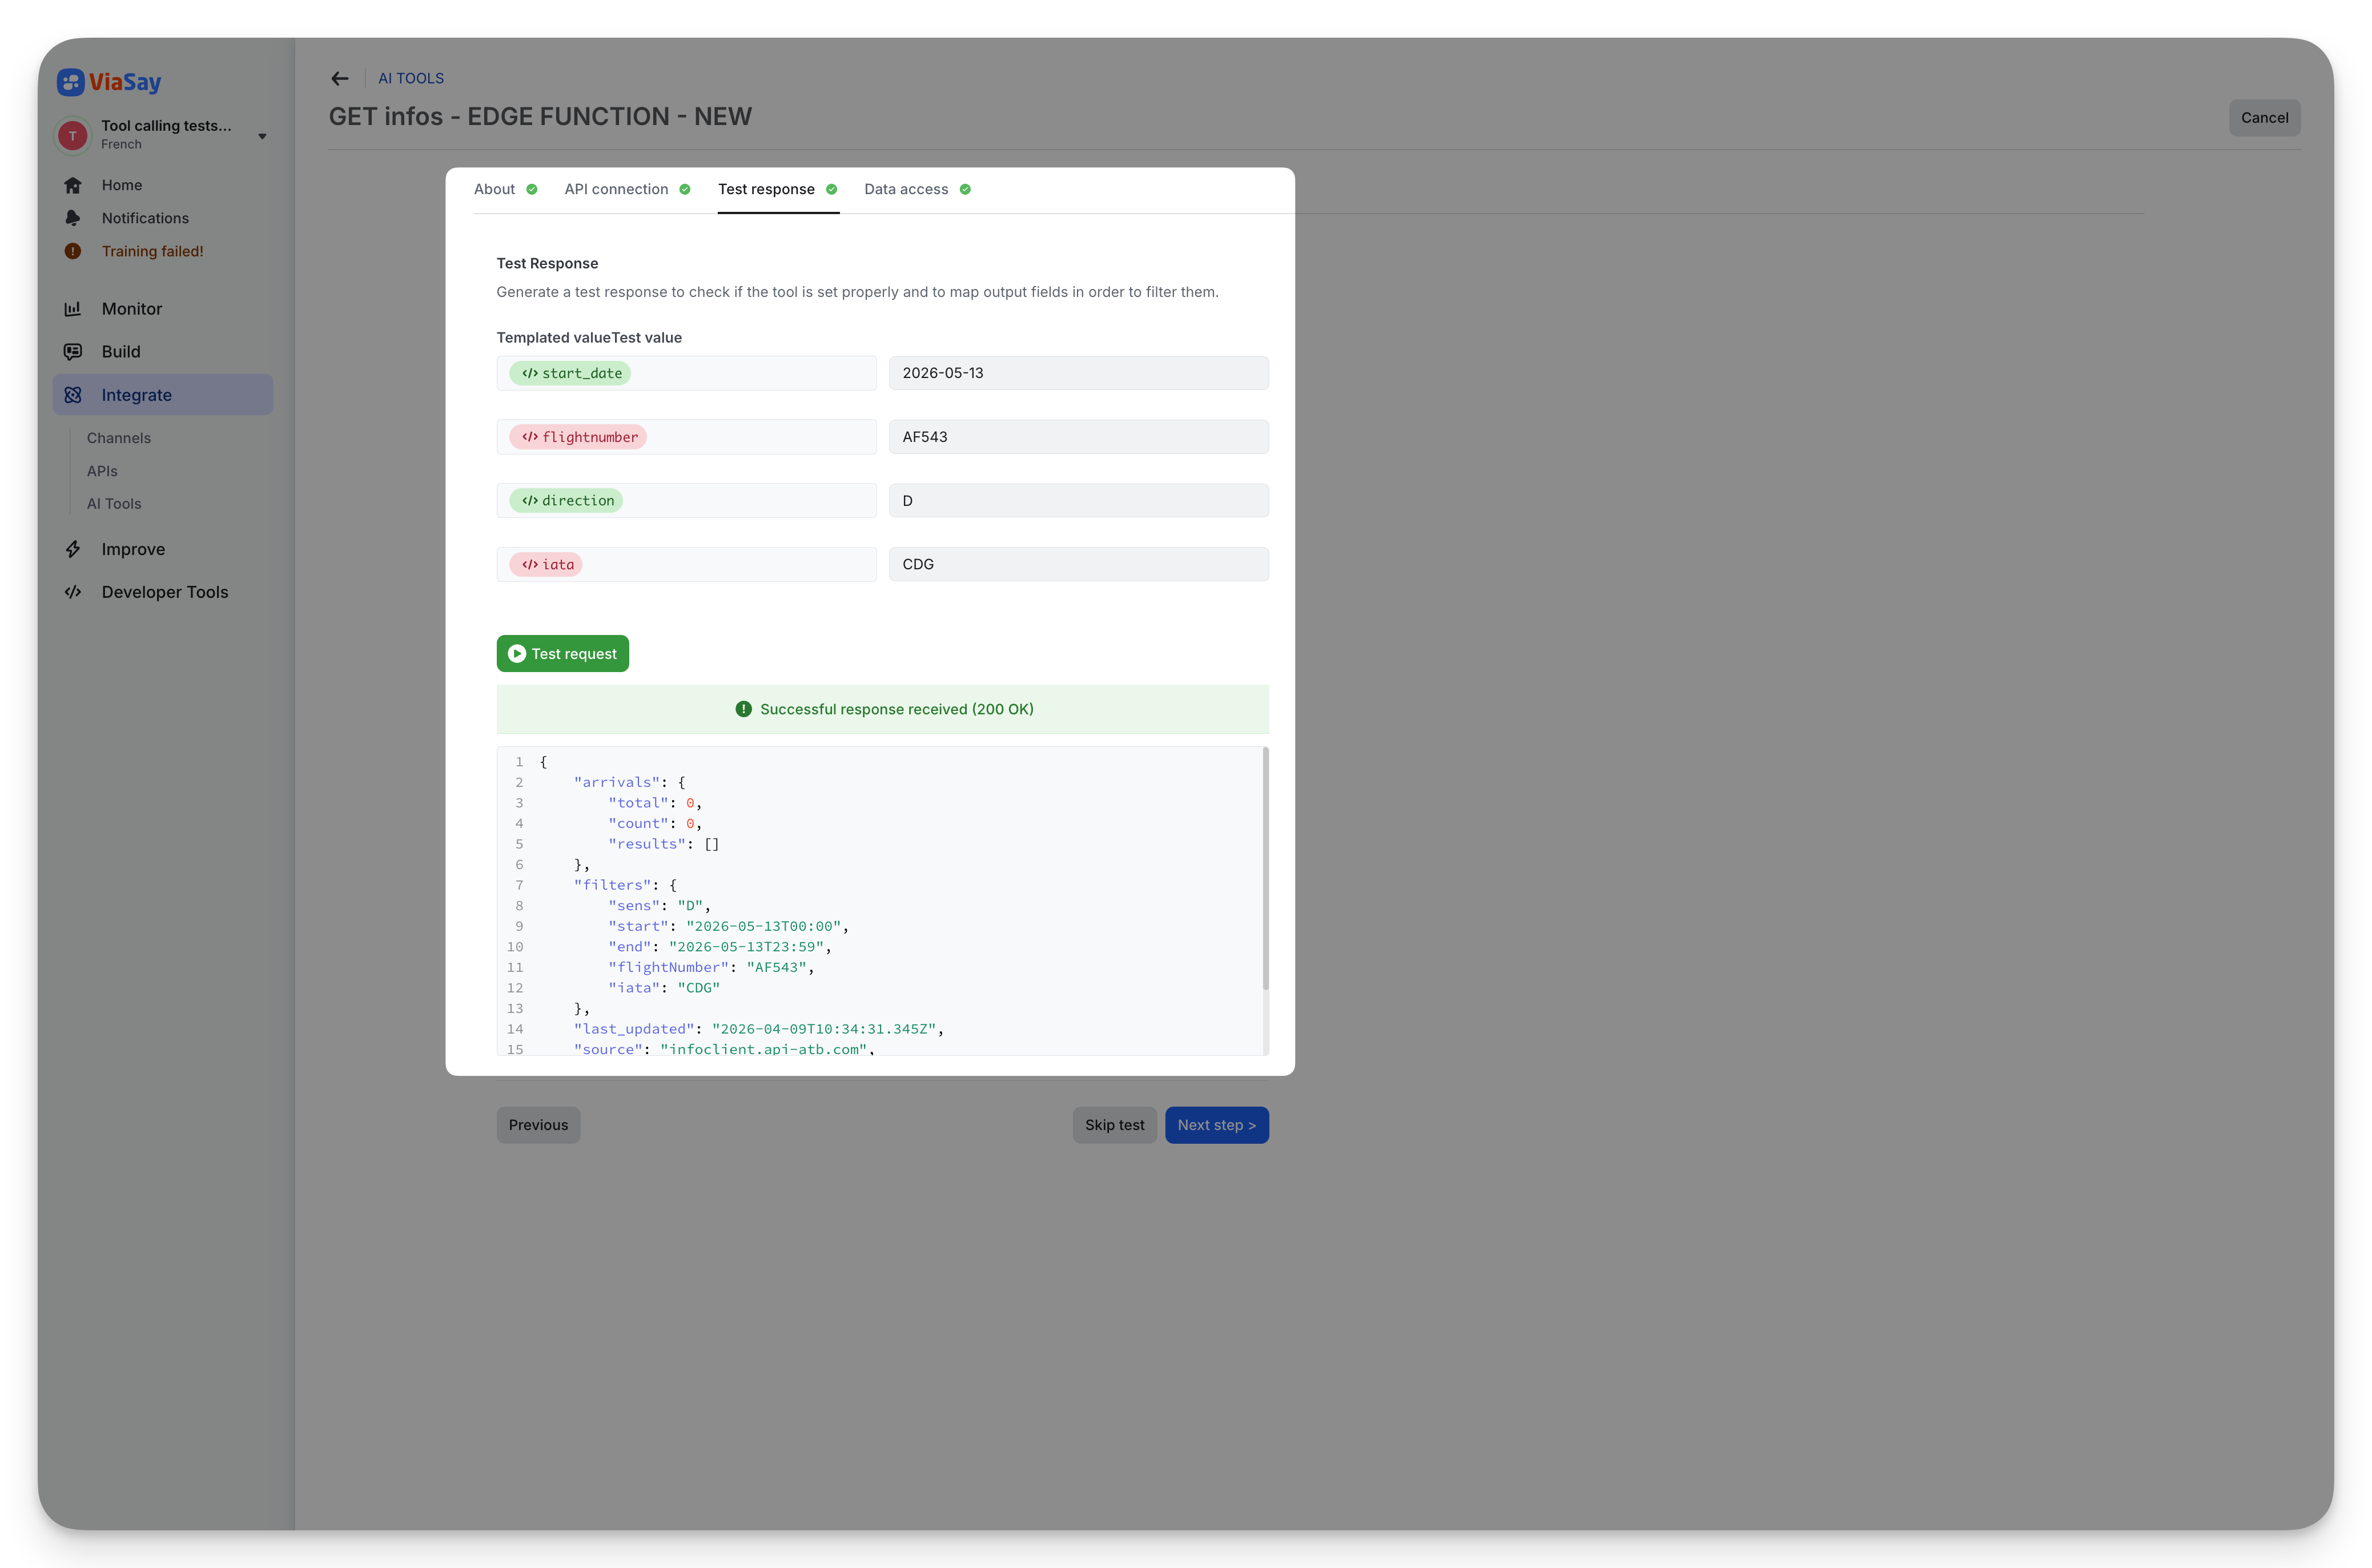
Step 3 — Test Response
Before going live, test your tool against the real API endpoint.
- If your tool has data inputs, enter sample values for each parameter
- Click Test request to execute the call
- Review the raw JSON response to verify correctness
If the test succeeds, you'''ll see a green "Successful response received (200 OK)" banner with the full response body.
You can skip this step, but testing is highly recommended to:
- Verify the connection works correctly
- Filter sensitive data from the response
- Map API results to ViaSay variables for use in your flow
Skipping the test
Skipping this step may limit your ability to verify the connection, filter sensitive data from the response, and map API results to ViaSay variables.
Step 4 — Data Access
Control which fields from the API response the AI can access.
- Full data access: the AI sees the entire JSON response
- Manually restrict access: select specific fields to exclude from the AI response
This is useful to prevent the AI from accessing sensitive data (e.g. internal IDs, tokens, or private customer information).

Auth Tokens
For APIs that require authentication, you can configure HTTP authentication tokens.
Navigate to the Auth Tokens tab on the AI Tools page, or add one directly from the API Connection step via Add a header > HTTP Authentication token.
Configure the following:
- Token title: a name to identify this token (e.g. "Booking API Auth")
- Description: optional description
- HTTP Method / URL / Headers / Body: the authentication endpoint to call
- Token configuration:
- Access Token Field: the field in the response containing the token (e.g.
access_token) - Header Token Key: the header key to send the token in (e.g.
Authorization) - Token Type: the prefix for the token value (e.g.
Bearer)
- Access Token Field: the field in the response containing the token (e.g.
Click Test request to verify the token endpoint works, then Save token.
Once saved, the token can be referenced in any tool'''s Headers section. The platform automatically calls the token endpoint and injects the token into your API requests.

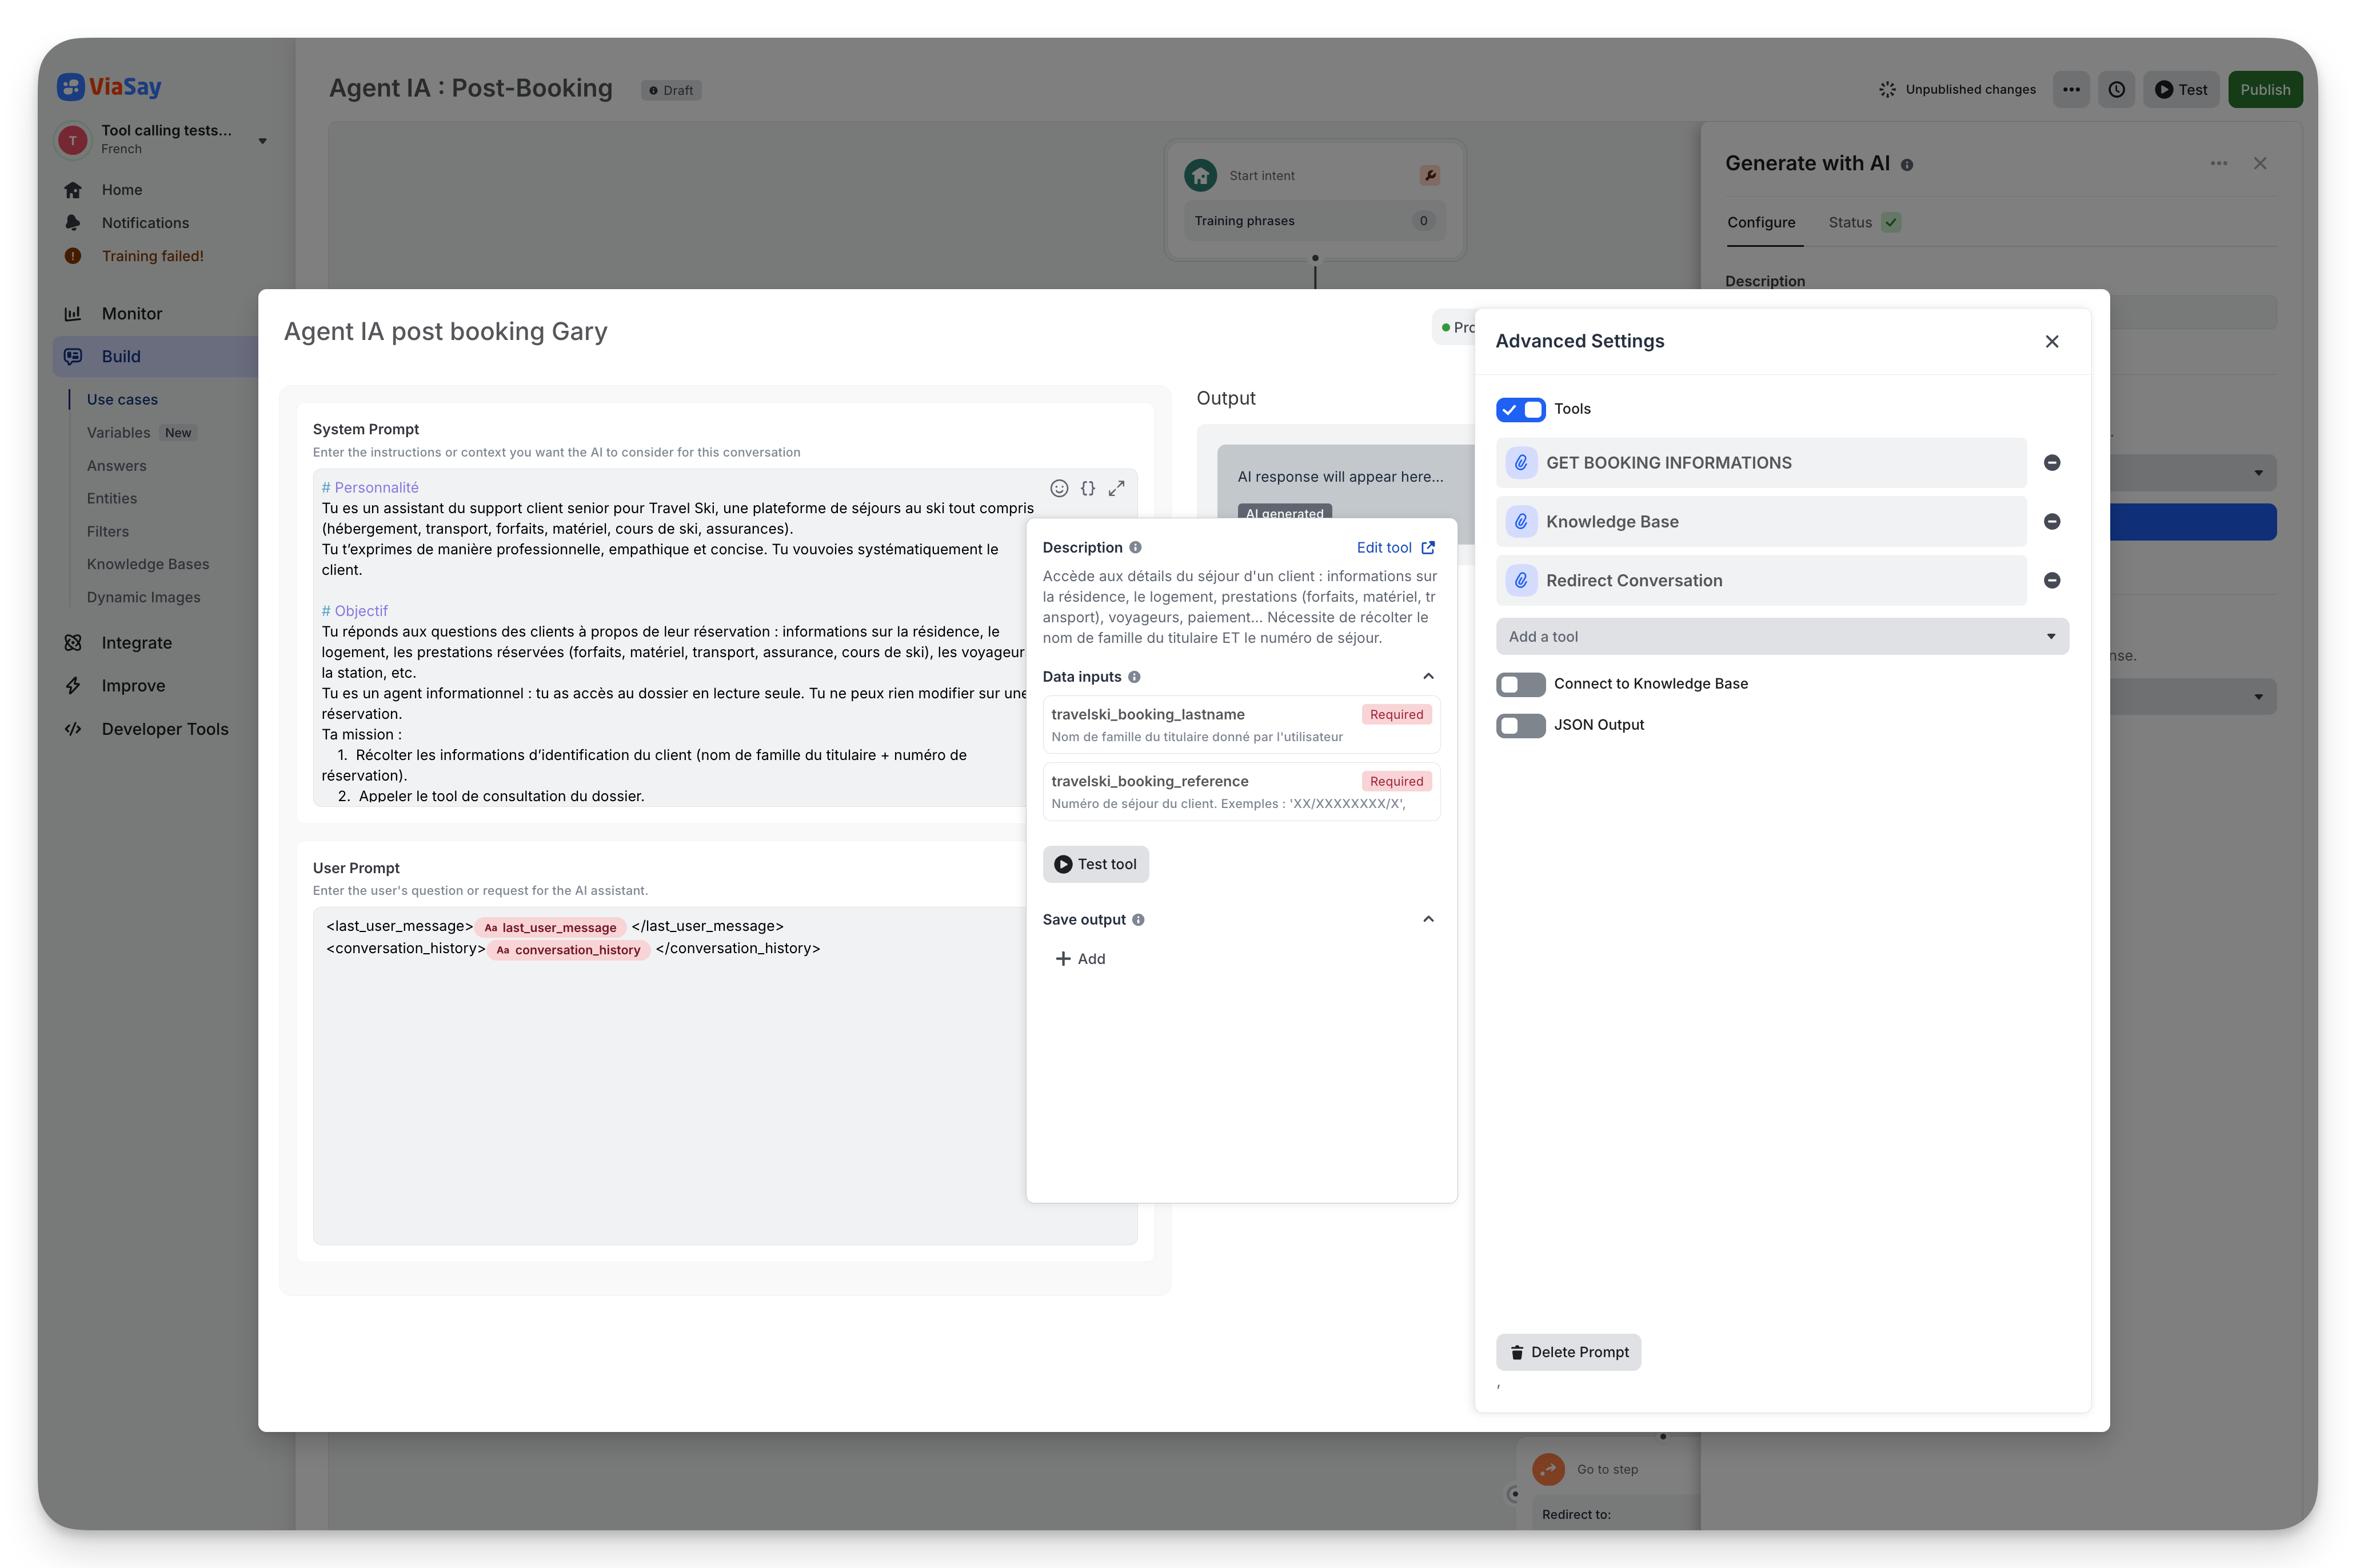
Connect tools to Gen AI Step
Once your tools are created, you can attach them to any Gen AI Step in the Flow Builder.
- Open a Gen AI step in the Flow Builder
- Open Create or Edit a prompt
- Open Advanced Settings
- Toggle Tools on
- Select tools from the dropdown — Token-type tools are automatically excluded
Click on an attached tool to open its detail panel, where you can:
- View the tool description and parameters
- Jump to the tool definition page via Edit tool
- Open the Test tool modal to test with sample values
- Configure Save output mappings to extract data from the tool response into conversation variables
Output mapping
In the Save output section, map fields from the tool'''s JSON response to conversation variables:
- Click + Add to create a new mapping
- Select or create a conversation variable
- Enter a JMESPath query to extract the desired field from the response
Example: to extract the flight status from {"status": "On Time", "gate": "B42"}, use the JMESPath query status.
Editing and deleting tools
Edit a tool
From the AI Tools list, click the action menu (⋮) on any tool and select Edit. This opens the wizard with the tool'''s existing configuration pre-filled.
You can also access the edit page directly from the Flow Builder detail panel via the Edit tool link.
Editing a tool affects all prompts
When editing an existing tool, the changes apply to all prompts where this tool is attached.
Delete a tool
From the action menu, select Delete. A confirmation dialog will appear. This action cannot be undone.