
Install the Widget on Your Website
Deploy ViaSay's chat widget across your entire website by adding a code snippet to your HTML.
Prerequisites
Make sure you have created a ViaSay Widget on the integrate section
Visit this page for guidances.

Technical prerequisites
- Access to your website's HTML source code
- Widget token from the Integration tab in your ViaSay dashboard
- Basic HTML knowledge
Installation
Deploy Invisible, Launch When Ready
Set Audience Distribution to 0% during setup. The widget code deploys to production but remains hidden. When ready to launch, adjust the percentage in Integration to control visibility—no code changes required.
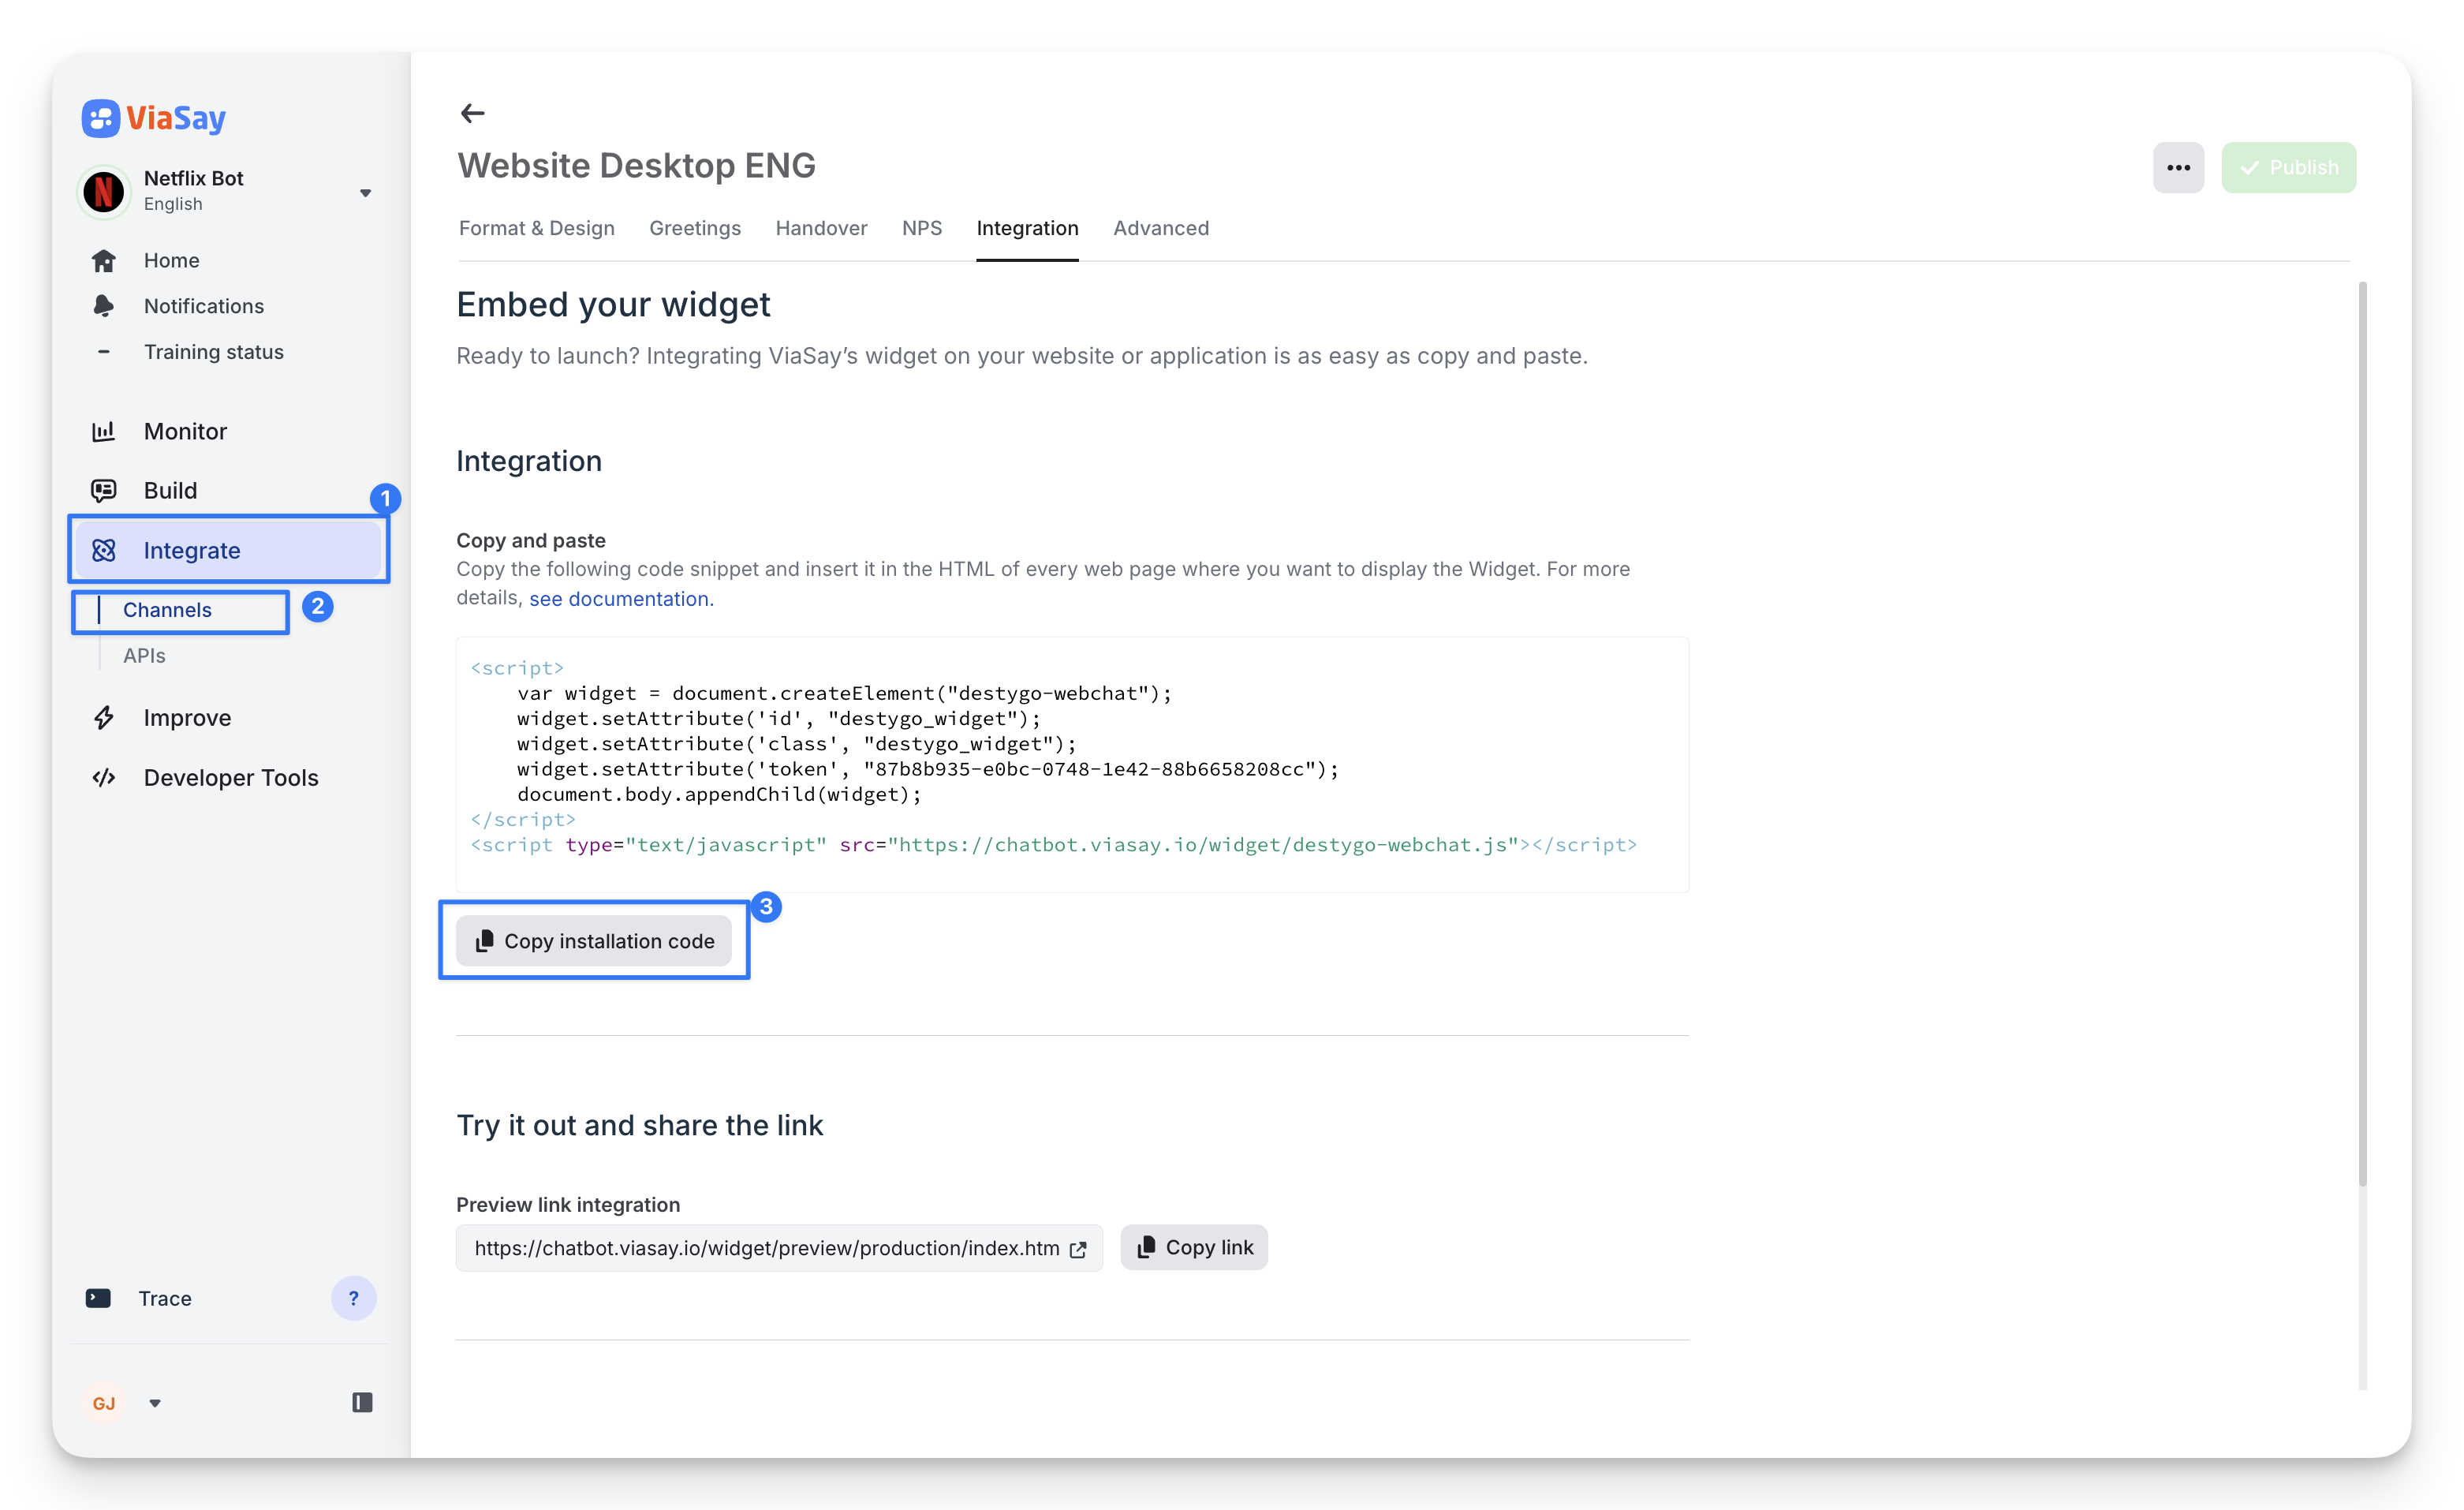
1. Copy Your Widget Code
Navigate to Build > Integrate > Channels in your ViaSay dashboard. Copy the installation code snippet provided.
2. Add Code to Your Website
Paste the widget code at the end of the <body> tag, just before the closing </body> in your HTML template.
<!DOCTYPE html>
<html>
<head>
    <title>Your Website</title>
</head>
<body>
    <!-- Your website content -->

    <!-- ViaSay Widget - Add before closing body tag -->
    <script>
        var widget = document.createElement("destygo-webchat");
        widget.setAttribute('id', "destygo_widget");
        widget.setAttribute('class', "destygo_widget");
        widget.setAttribute('token', "YOUR_TOKEN_HERE");
        document.body.appendChild(widget);
    </script>
    <script type="text/javascript" src="https://chatbot.viasay.io/widget/destygo-webchat.js"></script>
</body>
</html>
Why at the end of the body? Placing the widget code before </body> ensures your page content loads first, preventing the widget from blocking critical page rendering.
3. Deploy Changes
Save your HTML file and deploy to your web server. The widget loads automatically on every page that includes this code.
Verification
Confirm Widget is Live
- Open your website in a browser
- Check the bottom-right corner for the ViaSay chat icon
- Click the icon to open the chat interface
- Send a test message
Common Implementation Patterns
Single Page Applications (SPA)
For React, Vue, or Angular apps, add the snippet to your main index.html file in the public directory.
Template-Based Sites
For WordPress, Shopify, or similar platforms, add the code to your theme's footer template file to apply across all pages.
Static Site Generators
For Next.js, Gatsby, or Hugo, add the snippet to your layout component or base template.
Troubleshooting
| Issue | Solution |
|---|---|
| Widget not appearing | Verify the token in your code matches the Integration tab |
| Widget loads slowly | Move script to end of <body> if placed in <head> |
| Multiple widgets appear | Ensure code snippet is only included once in your template |
| CORS errors in console | Check your domain is whitelisted in ViaSay dashboard settings |
⚠️ Do not place the widget code in the <head> section. This delays page load and degrades user experience.
Integration Tips
Ensure proper Content Security Policy (CSP) whitelisting:
- https://_.destygo.com
- https://_.mindsay.com
- https://_.laiye.com
- wss://_.mindsay.com
- wss://*.laiye.com
- https://fonts.googleapis.com
- https://fonts.gstatic.com
For Zendesk integration or other services, refer to their specific documentation
Advanced Options
URL-specific deployment: Use Google Tag Manager to control which pages display the widget and customize trigger rules. [See GTM Integration Guide →]
Custom styling: Modify widget appearance and position through the Format & Design tab in your dashboard.
Multiple environments: Generate separate tokens for staging and production environments in Advanced settings.
Next Steps
- Configure widget appearance in Format & Design
- Set up custom greetings in Greetings
- Explore GTM integration for advanced URL targeting