User Data
Managing User Data with UCI
ViaSay Chatbot uses the UCI (Unique Chatter Identifier) to associate individuals with their conversation data. This enables you to manage user data efficiently and comply with applicable laws (e.g., GDPR) through options like data export and data deletion. Proper data mapping is essential for exhaustive identification of all conversation data.
Understanding how Flow Builder variables work is crucial before using UCI to manage user data.
About UCI
The UCI (Unique Chatter Identifier) is a flagged Flow Builder variable that links all conversation records to a specific value, such as a user ID or email address.
Key Points About UCI
- Only one variable can be flagged as UCI, and it must be either a user channel variable or a custom variable.
- Once flagged, the variable's value is retained beyond the default 7-day limit of other Flow Builder variables.
- UCI is compatible with Advanced Builder use cases, provided the naming conventions match.
- While it’s possible to change the UCI, it is not recommended as it only applies to new conversations.
- For security reasons, transmitting an unencrypted UCI via a user channel variable is discouraged.
Choosing the Right Variable Type
| Specificity | User Channel Variable | Custom Variable |
|---|---|---|
| Color | Yellow | Violet |
| Data Source | User channels (e.g., Widget, WhatsApp) | User input, API output, data manipulation steps |
| Implementation | Integration script | Use case steps |
| Scope | Bot-wide | Use case-specific |
| Data Coverage | Covers all use cases, including flat ones | Can target specific, sensitive use cases |
Selecting and Saving UCI
-
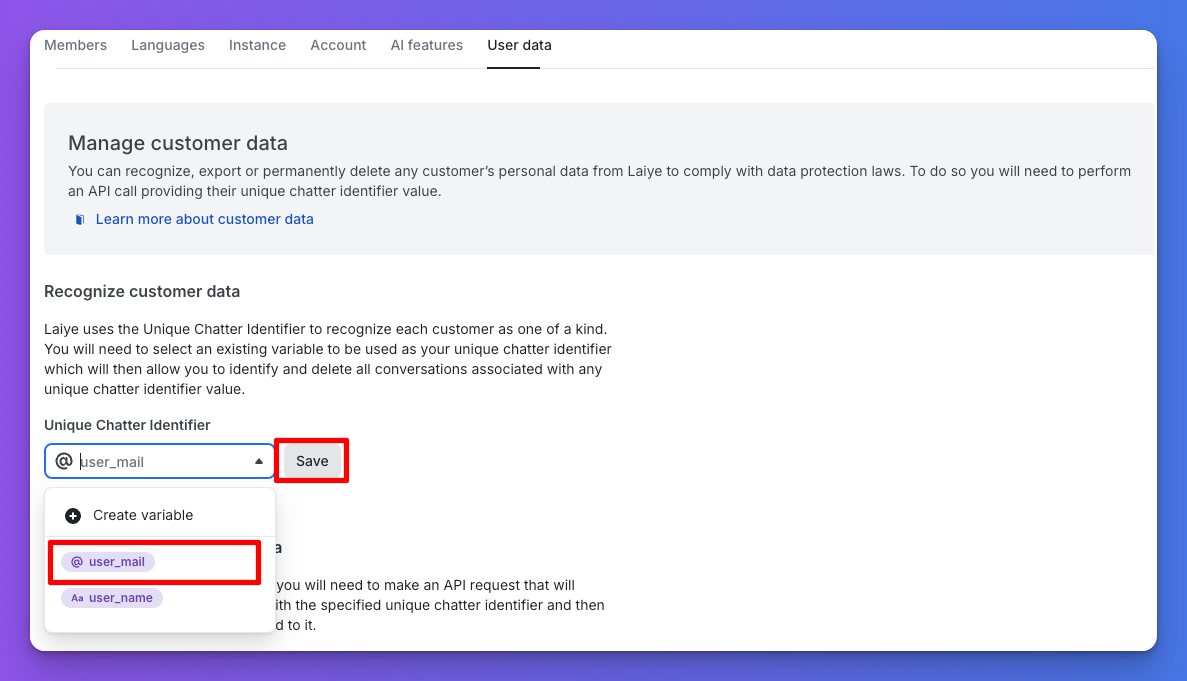
Choose an existing Flow Builder variable from the dropdown menu as your UCI and click Save.

Selecting and Saving UCI
-
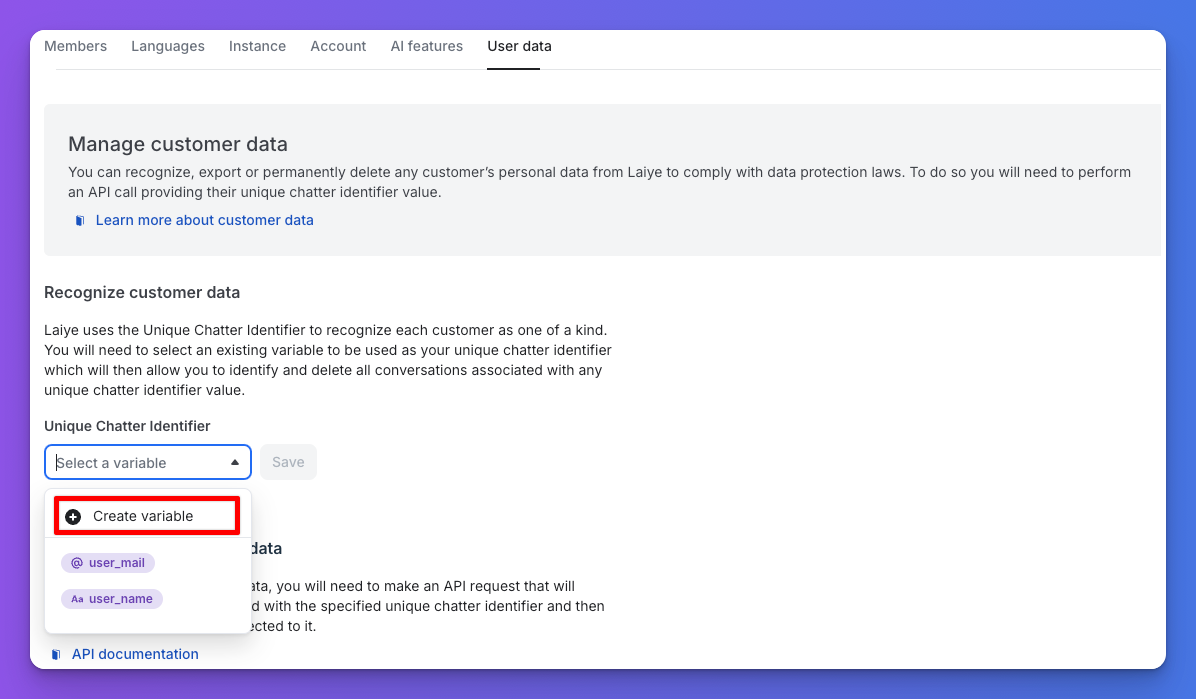
Alternatively, create a new Flow Builder variable by clicking Create Variable. Follow the instructions in the pop-up window.

Create a new Flow Builder variable
Note: Data mapping will only begin once a variable is designated as UCI.
Data Export
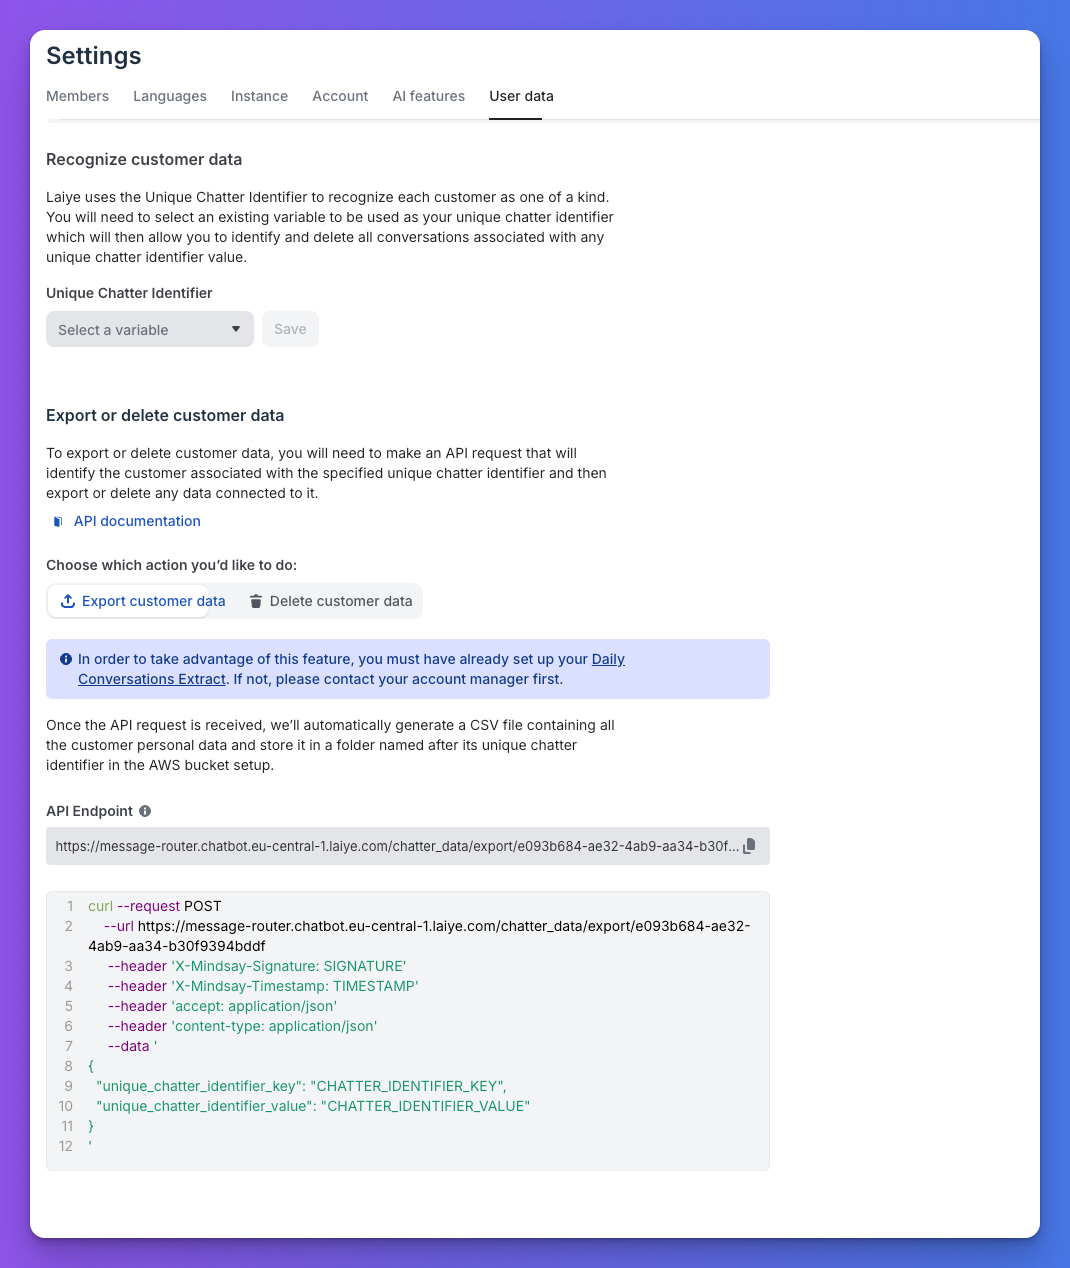
After data mapping starts, you can export a user’s conversation data to your AWS S3 bucket using their UCI value.
- Set up your Daily Conversations Extract by following the AWS S3 Bucket configuration.
- Use the Data Export API to initiate the export.
Once completed:
- A folder named chatter_data_exports is created in your AWS S3 bucket.
- Subfolders are named after the UCI value.
- Data export files follow the naming pattern:
date_time_conversation_export.csv.

Example: For UCI key "my_uci" and value "111", two files exported on October 6, 2023, would appear
Exported CSV files contain the columns described in this section.
- Column separator: Comma
- String delimiter: Double quote
Storage Information:
- Files stored in ViaSay's AWS account are automatically deleted after 40 days.
- Files stored in a customer's AWS account are managed by the customer.
Data Deletion
The User Data tab includes a section for managing data deletion requests.
- Use the UCI and the Data Deletion API to process requests.
- Once processed, the conversation data will be permanently deleted from ViaSay’s servers.

Important: Data deletion is non-reversible. Ensure compliance before proceeding.
Updated 12 months ago
