
ViaFlow
Integrate Your ViaFlow Chat Account
Create a ViaFlow Channel on ViaSay Platform
How to do it :
-
Where to start the creation :
- Go to integrate ✚
- Explore tab 🔍
- Agent Channels section 👨💼 and click on Add next to ViaFlow
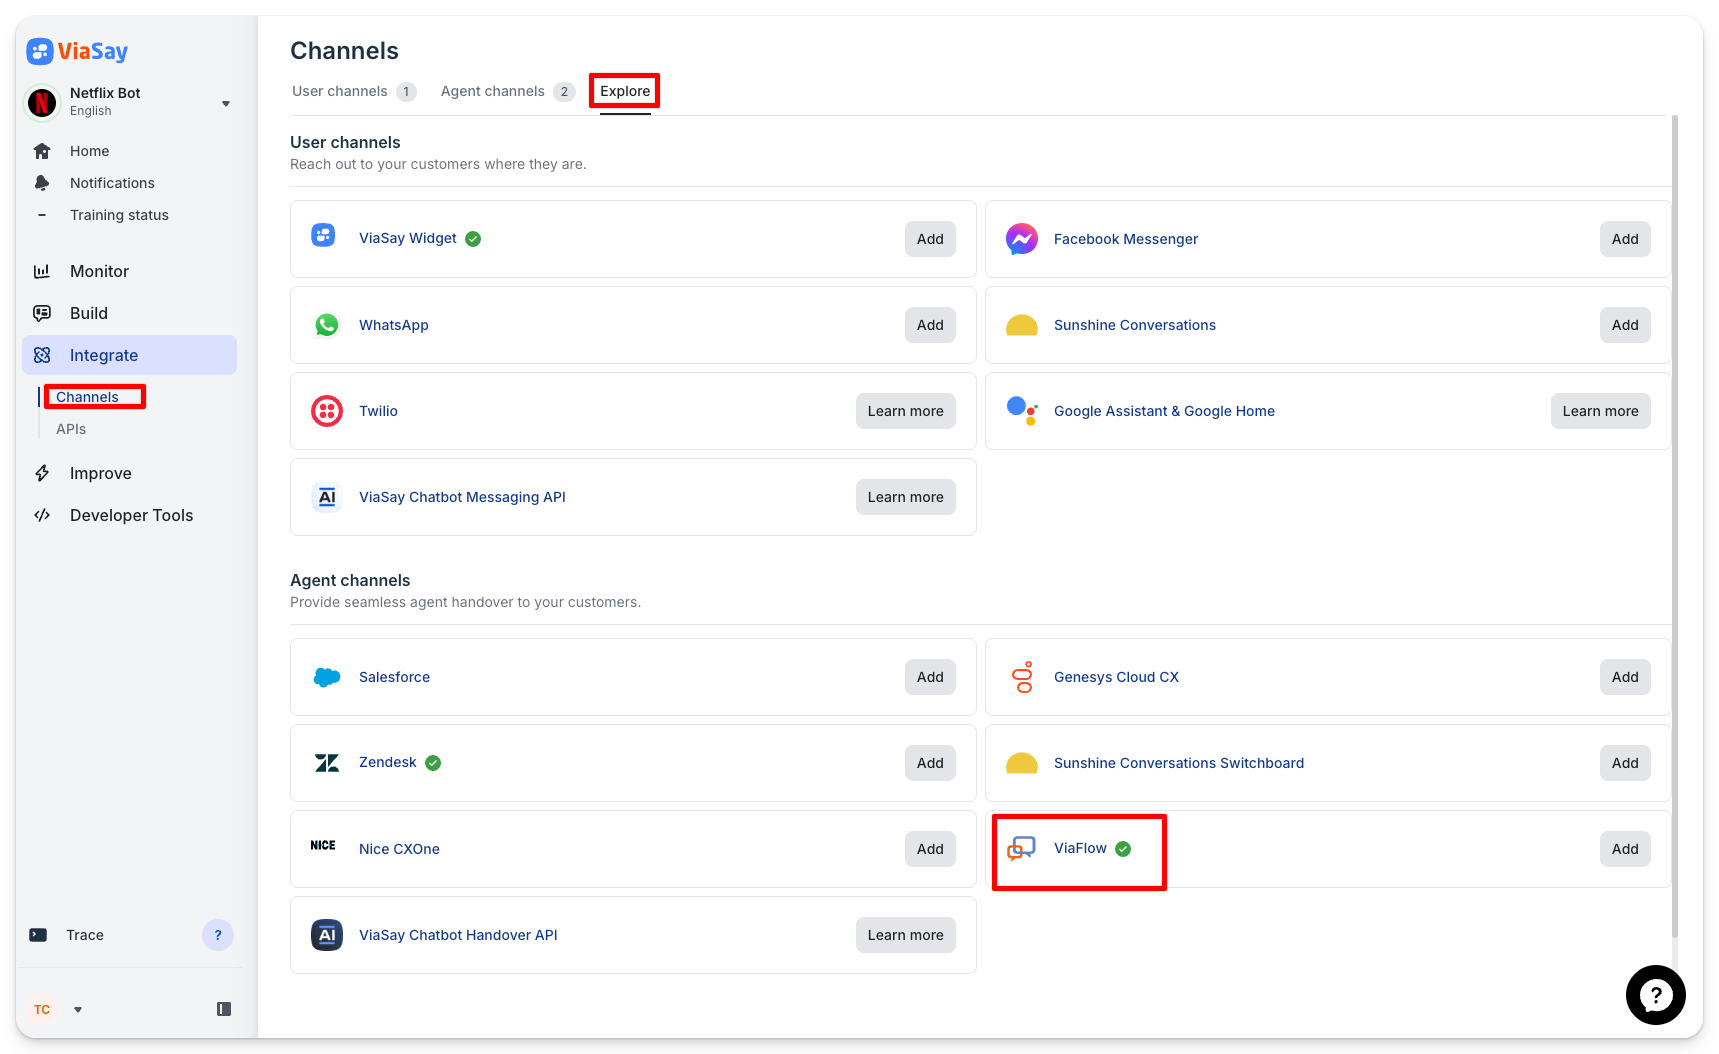
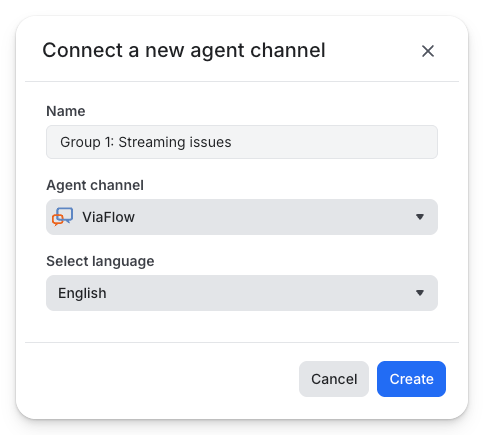
- A Pop-up will open; in that pop up choose :
- The name of your channel which should correspond to the name of the group of agents that will respond to the specific category of issues ✍️
- Its language 🗣️
- Create ✨
Connect to Your ViaFlow Chat Account
Fill in the information available in your ViaFlow admin account or ask your ViaFlow CSM. You will be able to click "Publish" once the setup information is correctly filled in.
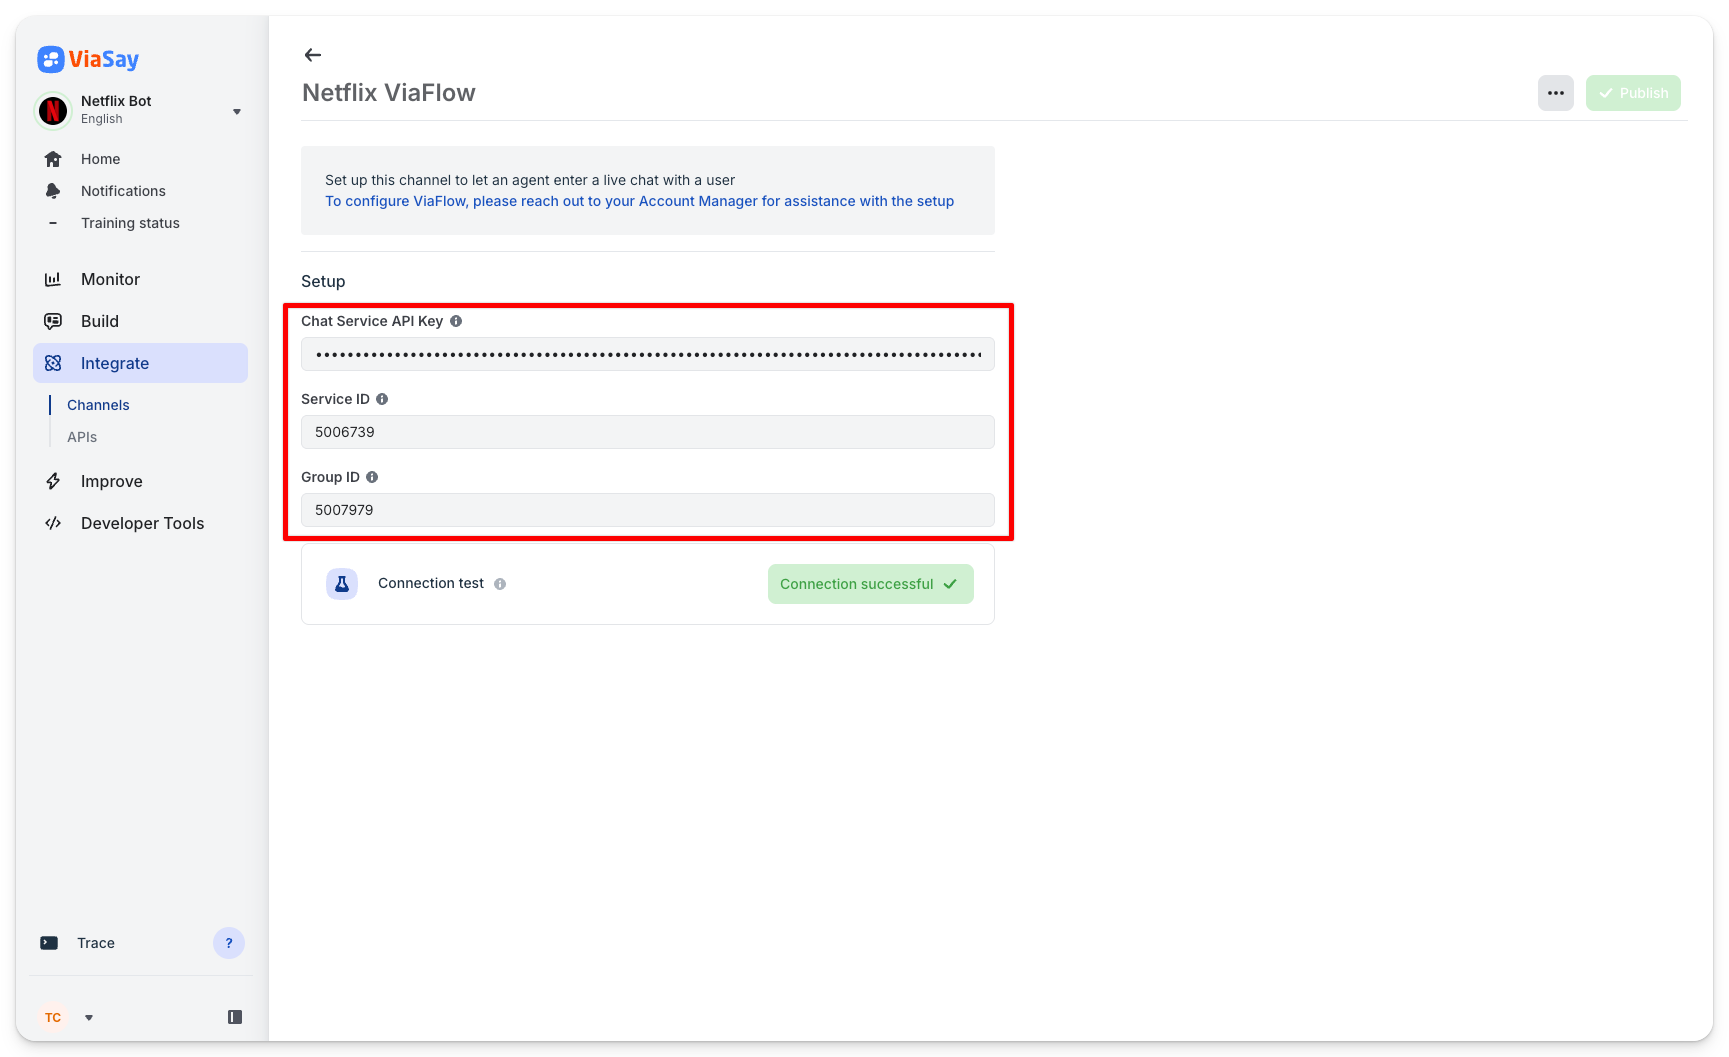
"After publishing the setup information, a 'Connection Successful' message will appear. Well done! That's it—your Viaflow agent is now connected to ViaSay!"
Troubleshooting: the agent doesn’t receive user messages during tests
Sometimes, even if you followed all the setup steps, you may notice this problem during testing:
- Users send messages
- The agent does not receive those messages
A common cause is an old webhook still connected in Viaflow. That old webhook can block the new connection from being created.
Fix: delete the old webhook in Viaflow
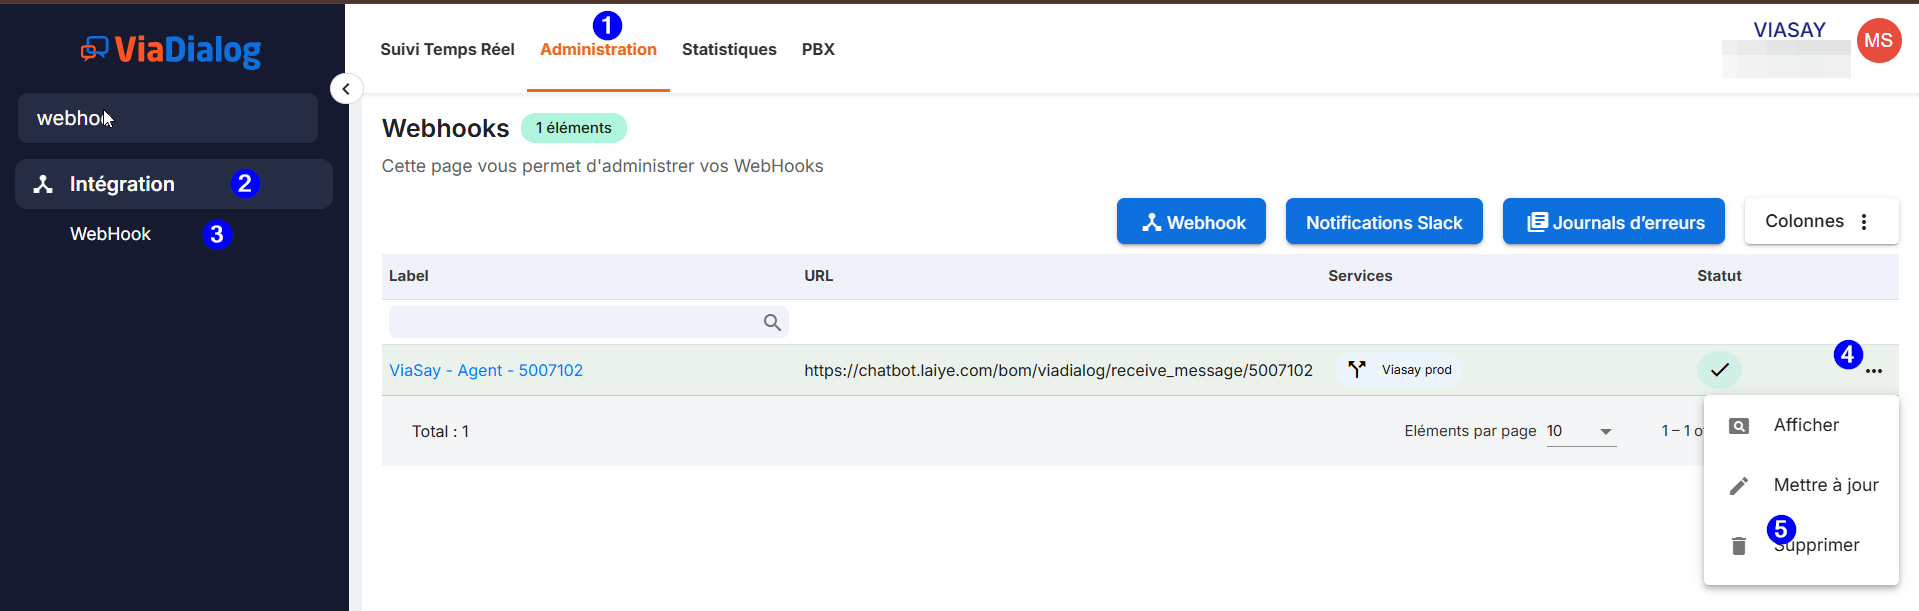
Delete the old webhook in Viaflow
- Log in to the Viaflow dashboard using your admin credentials. Use the admin link
- Go to Administration.
- Find the Webhooks section under the Integration section.
- Delete the existing webhook connection (the old one).
- After deletion, a new webhook connection will be created automatically by ViaSay.
Expected result
Once the new webhook is created:
- the connection is restored
- the agent should start receiving user messages normally during tests