Zendesk
Connect Zendesk to your ViaSay Chatbot
I. Zendesk Chat Integration
Compatibility Requirements```
- An Enterprise Plan is required to enable connections between Zendesk Chat and a Chatbot.
- User Channel must be a ViaSay Widget.
1. Integrate Your Zendesk Chat Account
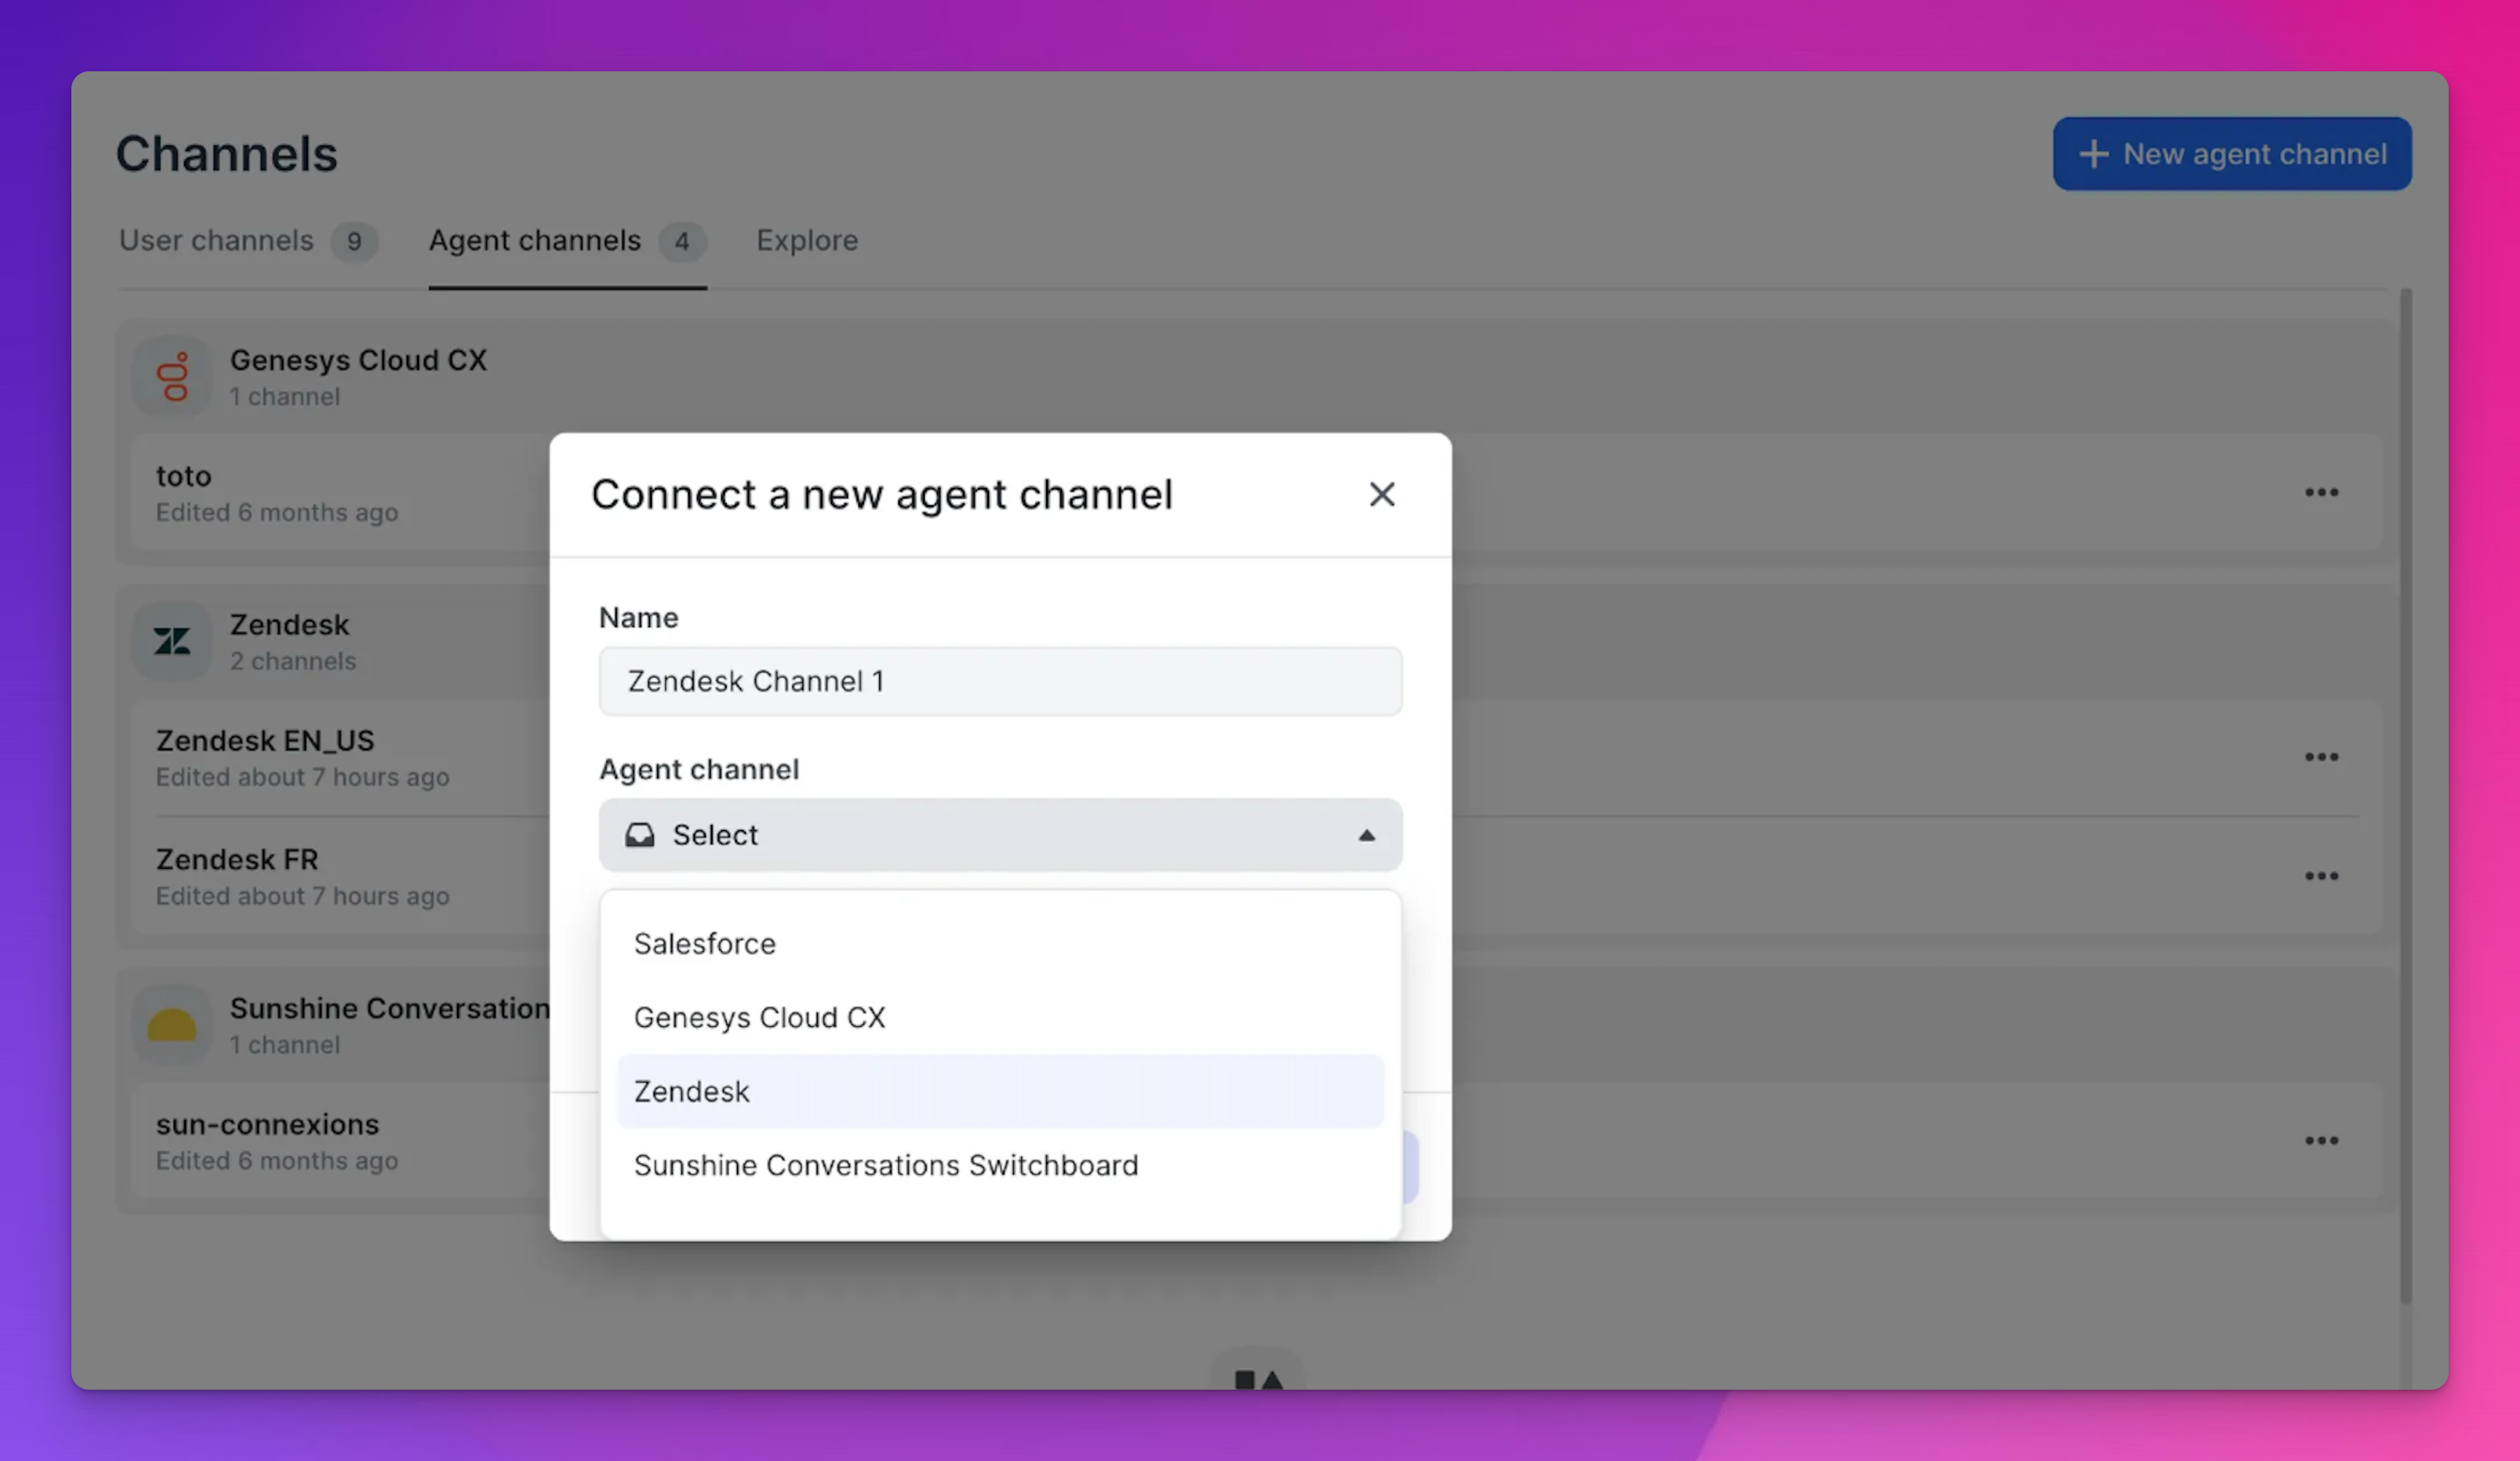
Create a Zendesk Channel on ViaSay Platform
-
Go to Integrate > Channels > Agent Channels.
-
Click on New Agent Channel in the top right corner.
-
Name your new Agent Channel, select the Zendesk channel, and choose the bot's language for this channel.
Connect to Your Zendesk Chat Account
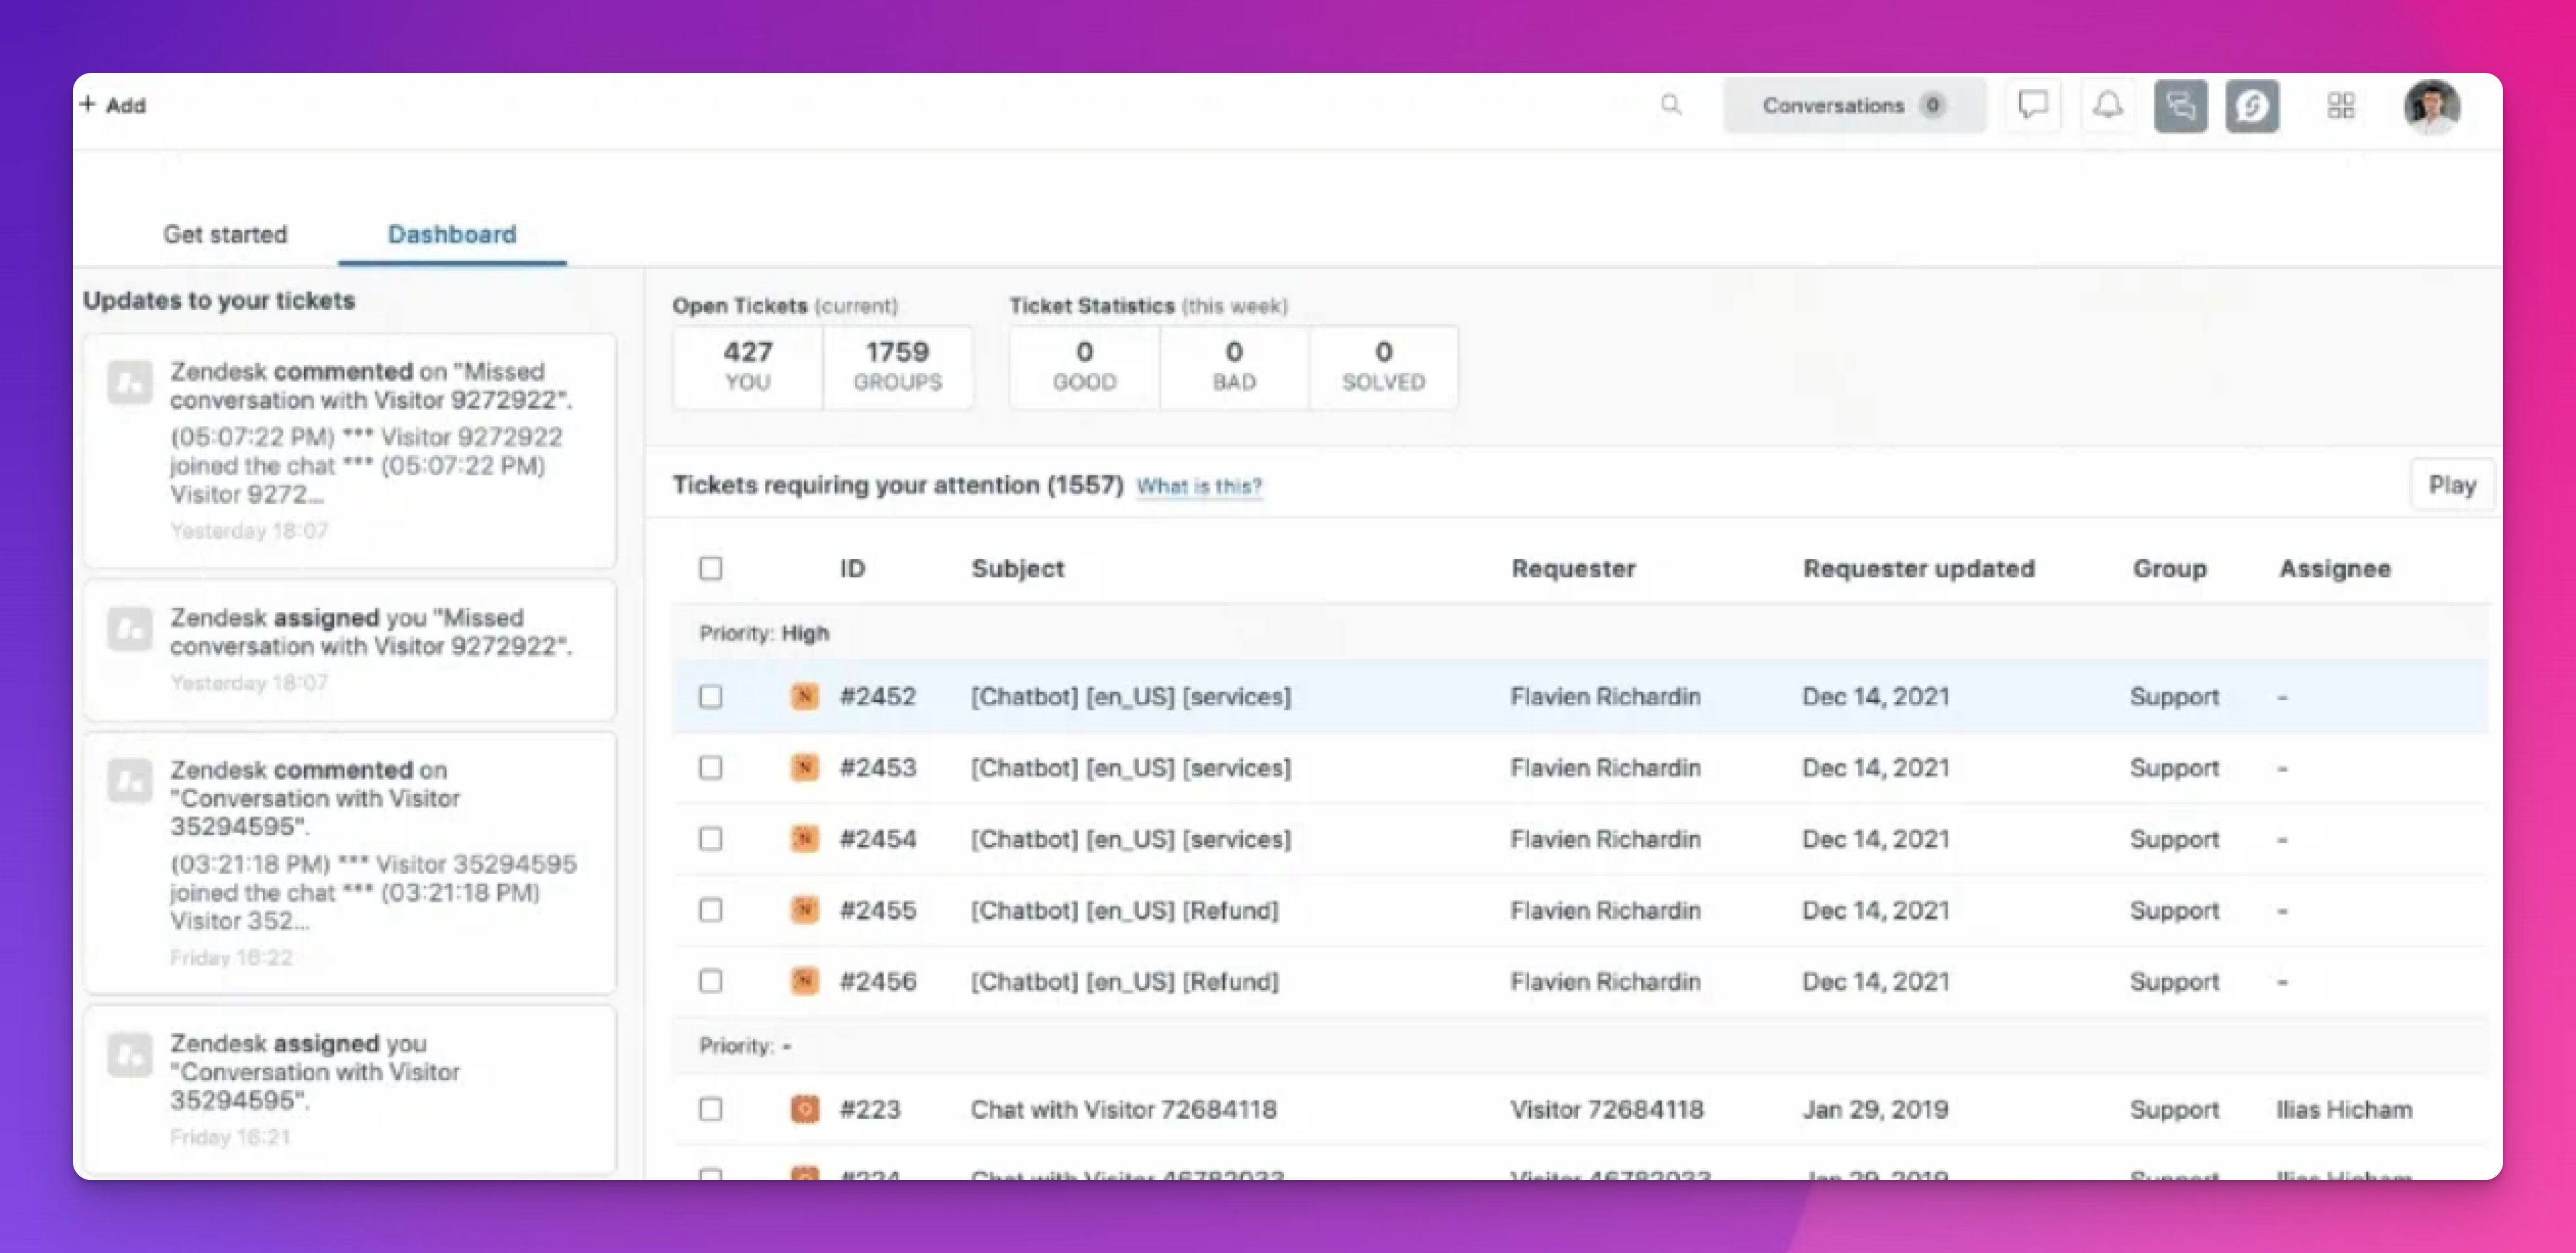
Log in to your Zendesk Chat account and ensure you are in the correct Zendesk Product.
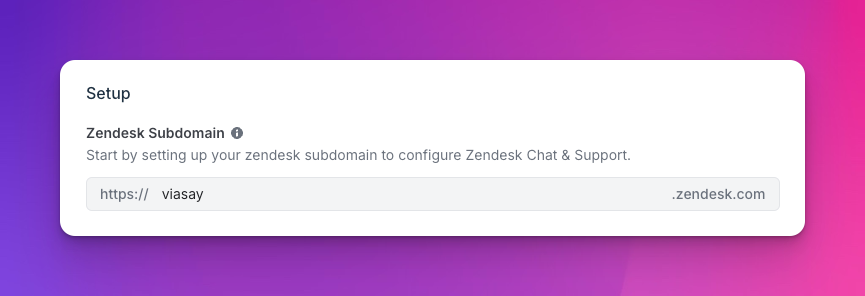
Enter Your Zendesk Subdomain on the ViaSay Platform
Find your Zendesk subdomain in the URL of your Zendesk Chat product and enter it in the dedicated field on the ViaSay platform.
Add a New Zendesk API Endpoint
- In Zendesk Chat, navigate to Settings > Account > API & SDKs.
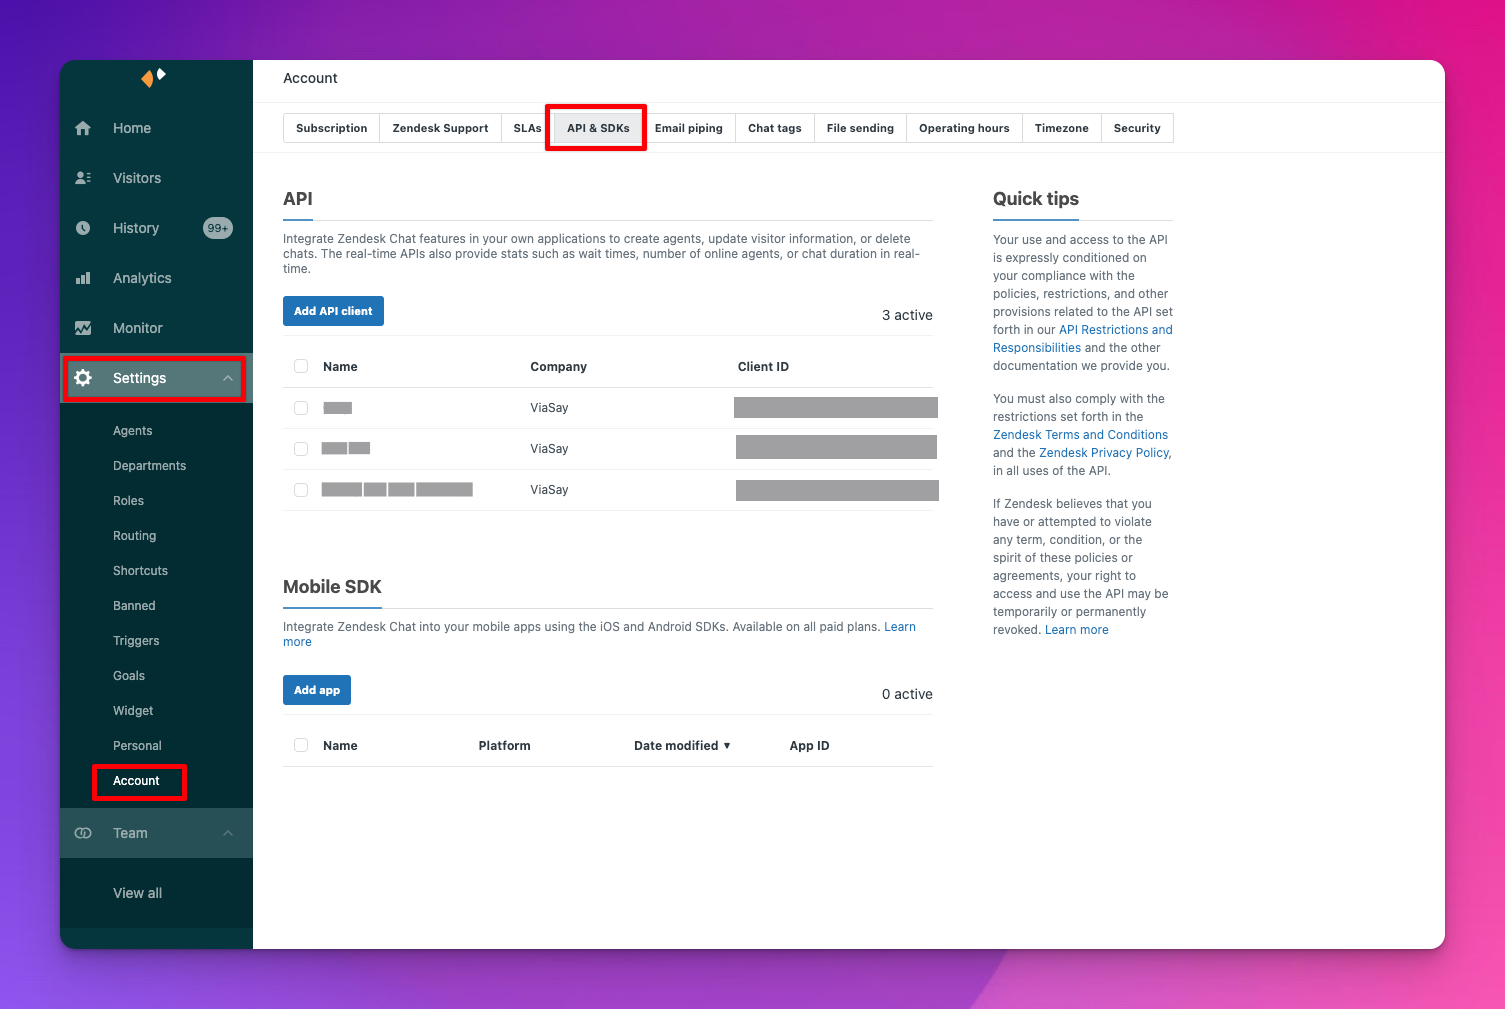
- Click Add API client and provide the following details:
-
Name: (e.g., "ViaSay Chatbot")
-
Company Name
-
Redirect URL:
https://chatbot.laiye.com/zendesk_redirect/
- Save the Client ID and Client Secret provided by Zendesk. Note: The client secret is only displayed once, so save it safely.
Configure Zendesk Chat on the ViaSay Platform
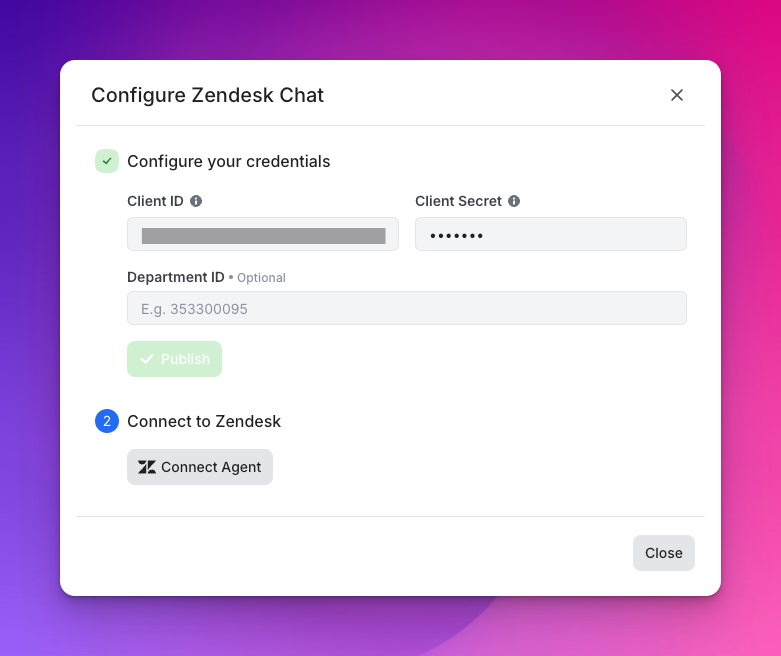
Copy/Paste a Department ID (Optional)
If you have departments like Legal, Payments, Orders, etc., in Zendesk, you can assign chats to specific groups. You can create multiple Zendesk channels in ViaSay, each linked to a different department. Refer to the Zendesk Documentation for Creating Departments.
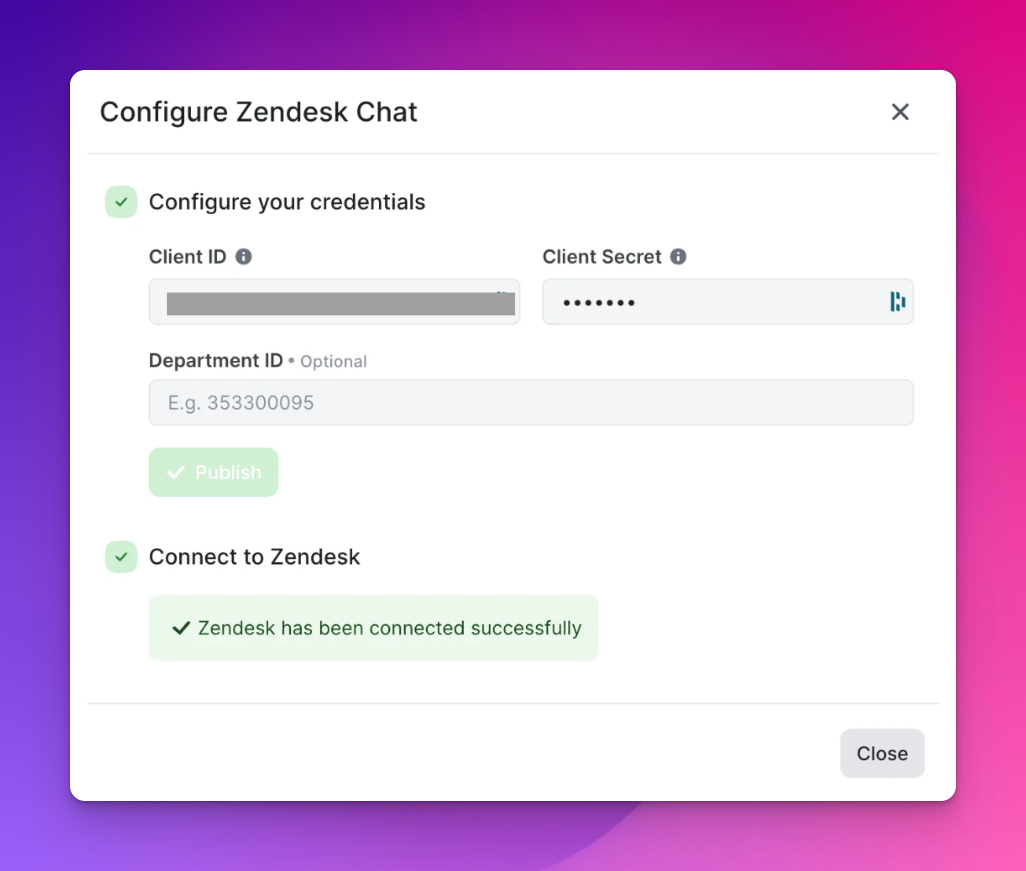
Connect to Zendesk
- Use the same Admin account you used to create the API client.
- Click the Connect Agent button. Allow the connection in the Zendesk window that opens.
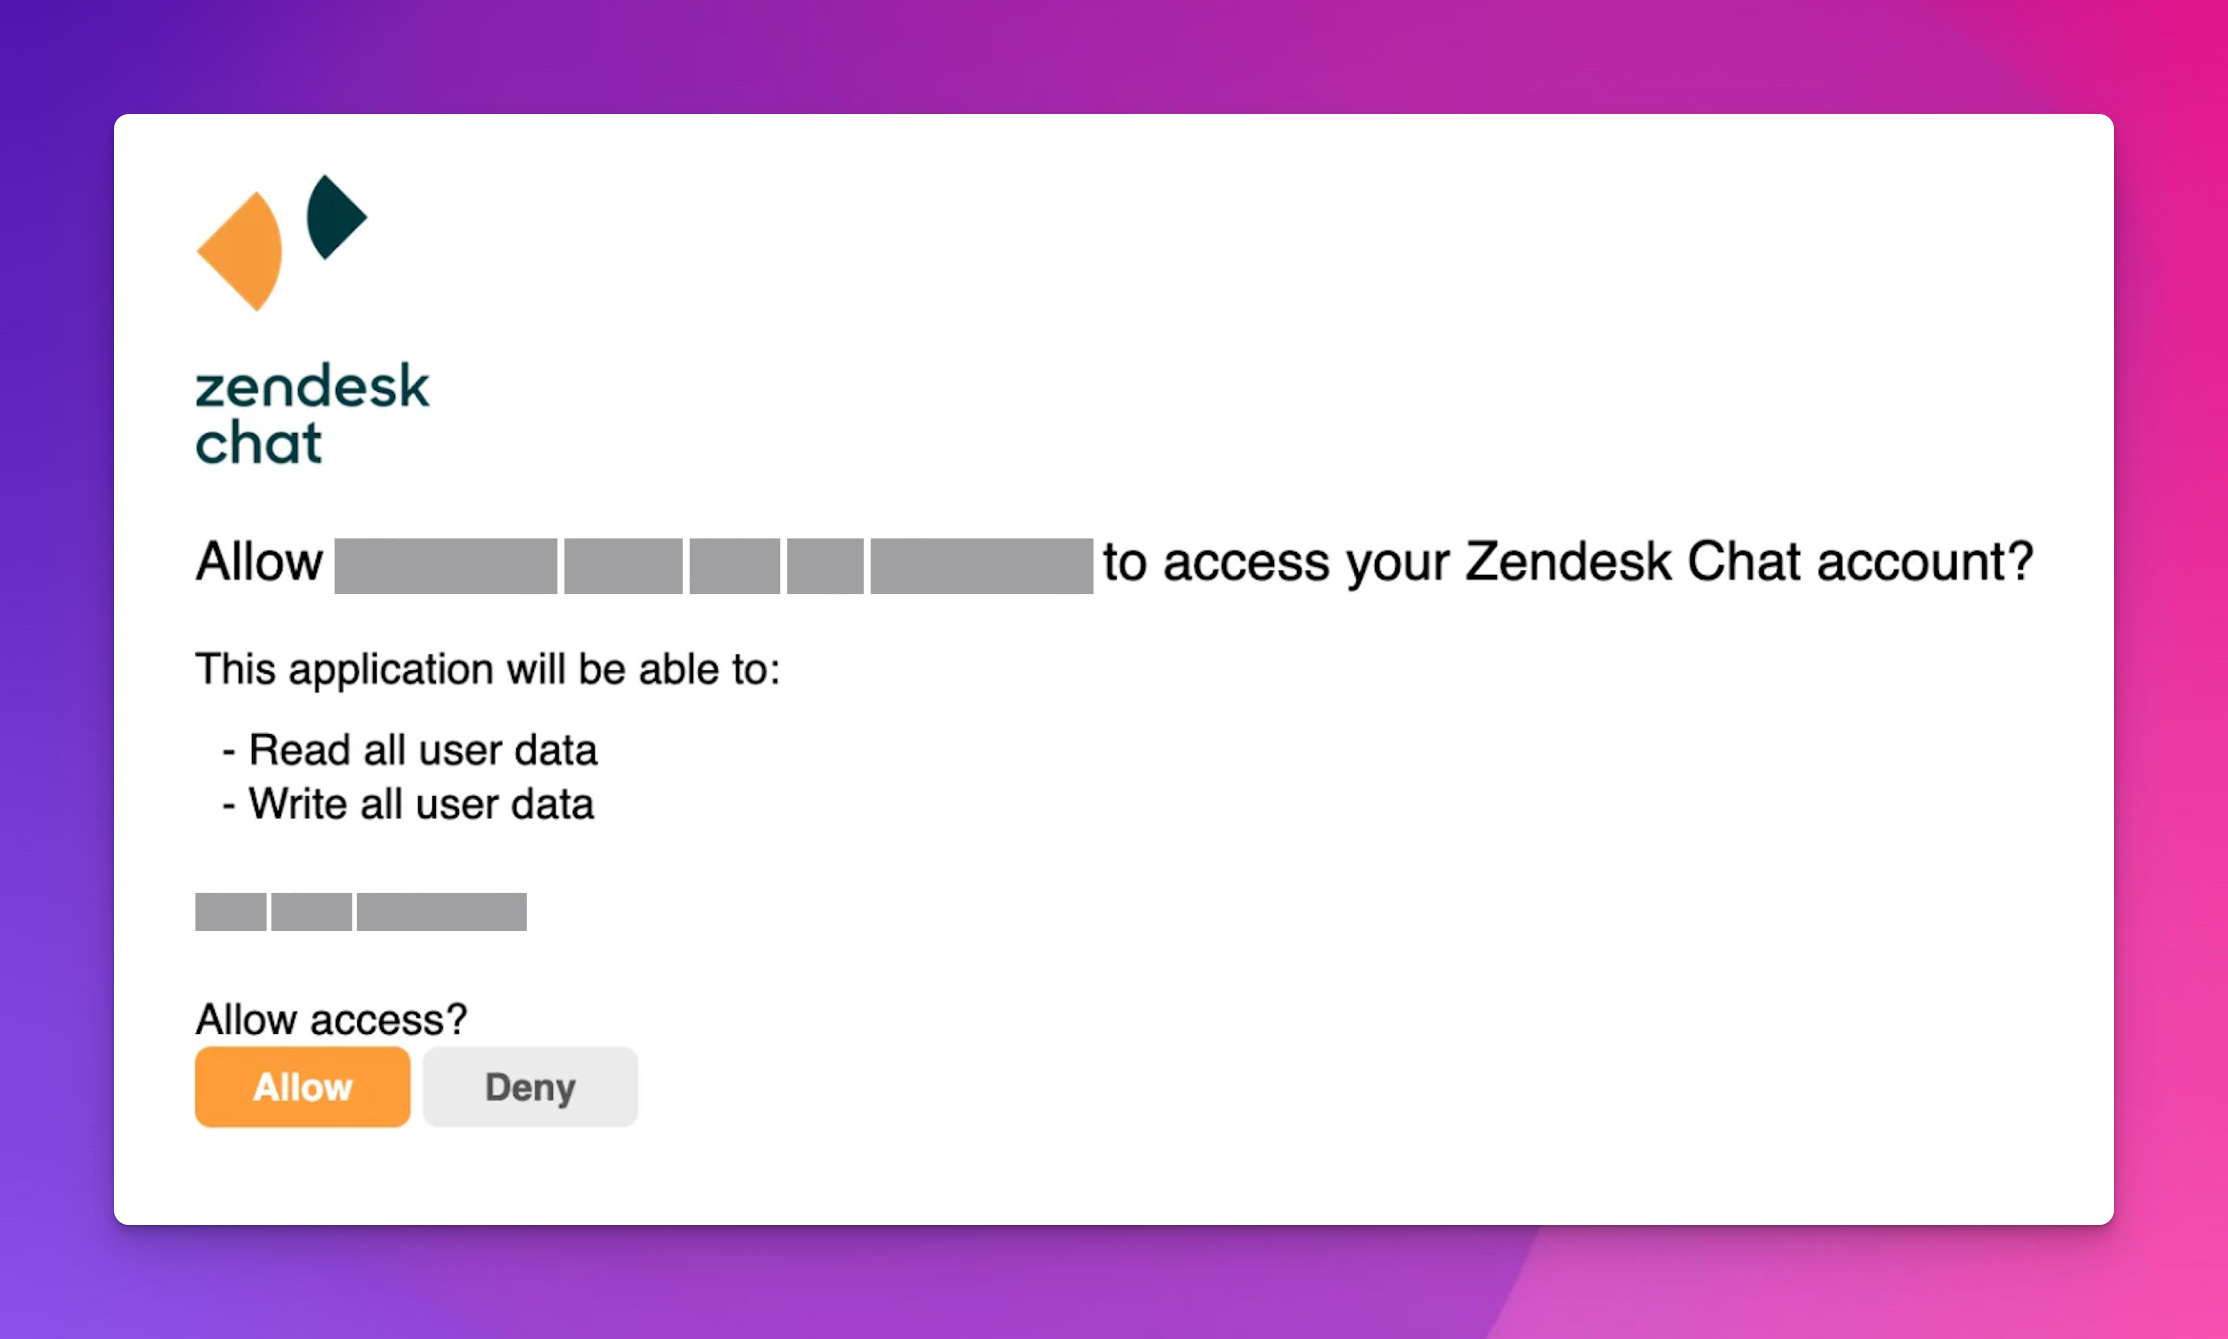
- After approval, close the window. You should see a checkmark indicating the connection is properly set up.
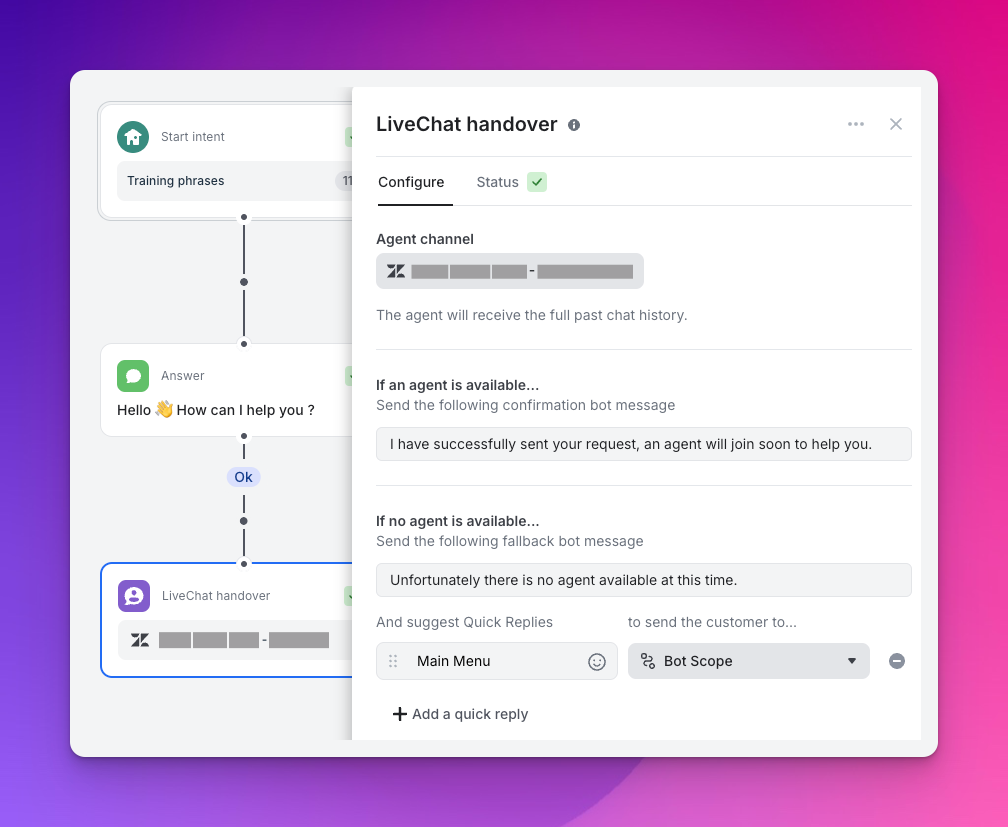
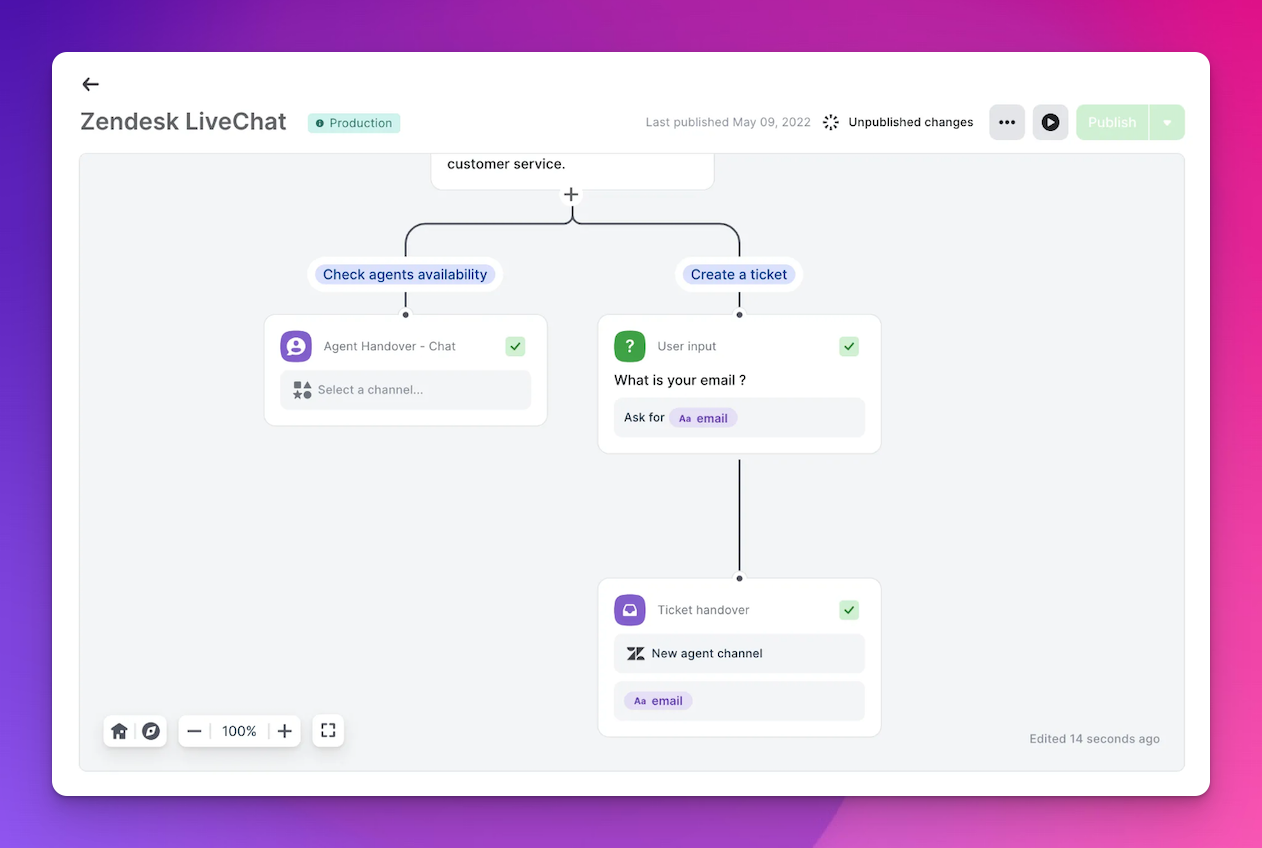
2. Setup a LiveChat Handover
To transfer a customer to Zendesk Live Chat during a conversation:
In the Flow Builder
- Add a LiveChat Handover step to your flow.
- Configure messages for when an agent is available or unavailable. The chatbot will check Zendesk for online agents in the specified department (if configured).
3. Advanced Configurations
Agent Joins/Leaves
When an agent joins or leaves, notifications are sent to both agents (via Zendesk) and customers (via the ViaSay widget).
Agent Picture
Agents' profile pictures on Zendesk are transferred and displayed on the ViaSay widget.
File Upload Activation
To enable file uploads:
Go to Settings > Account > File Sending in Zendesk and enable it.
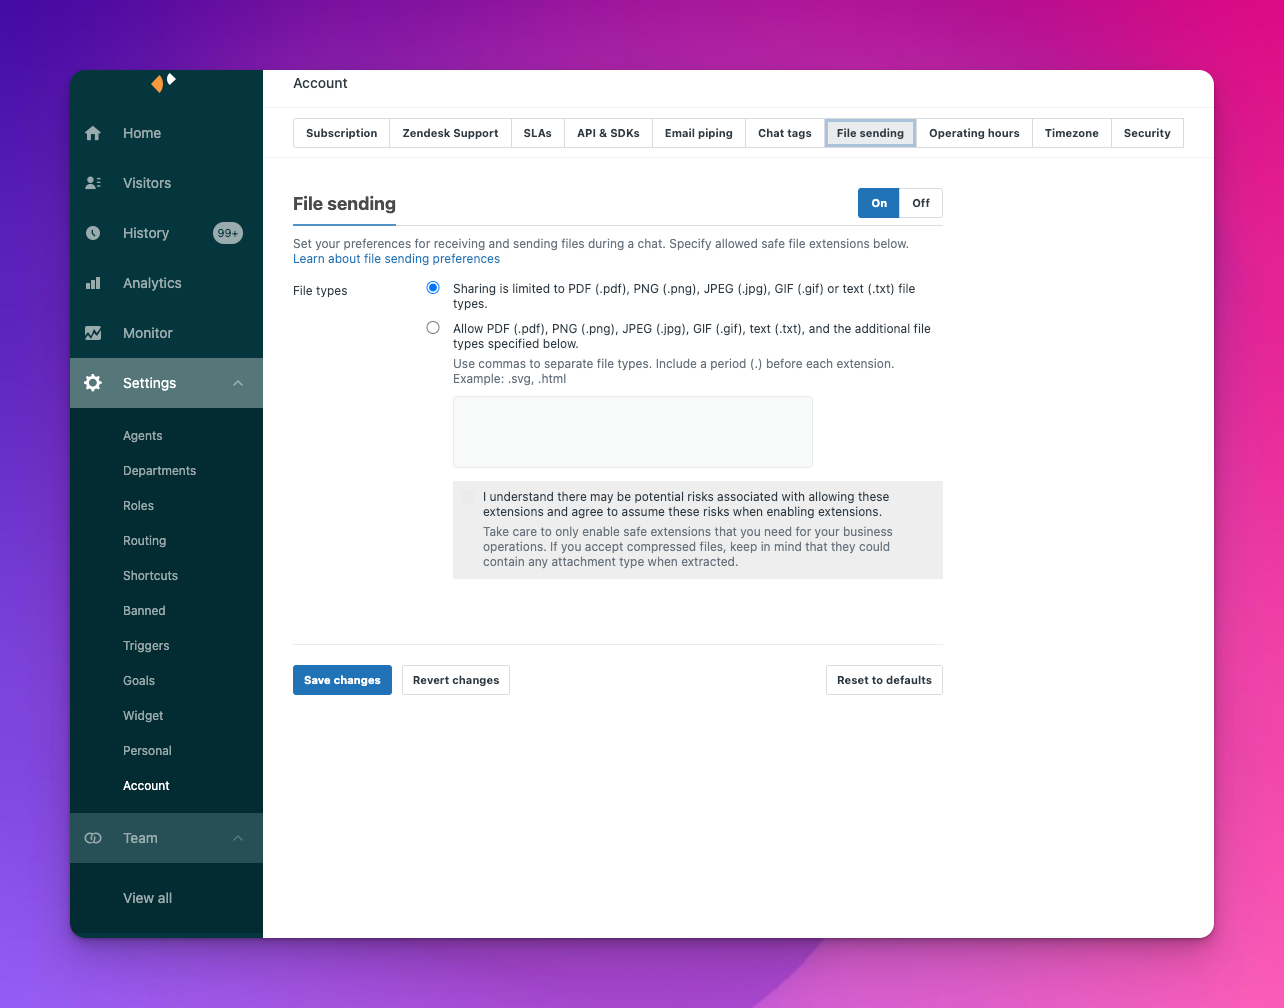
A file upload icon will appear in the ViaSay widget text input once enabled.

File upload icon appears only after an agent joins the chat.
Agent Rating with Zendesk CSAT
Agents can request CSAT ratings from customers using the ViaSay widget.
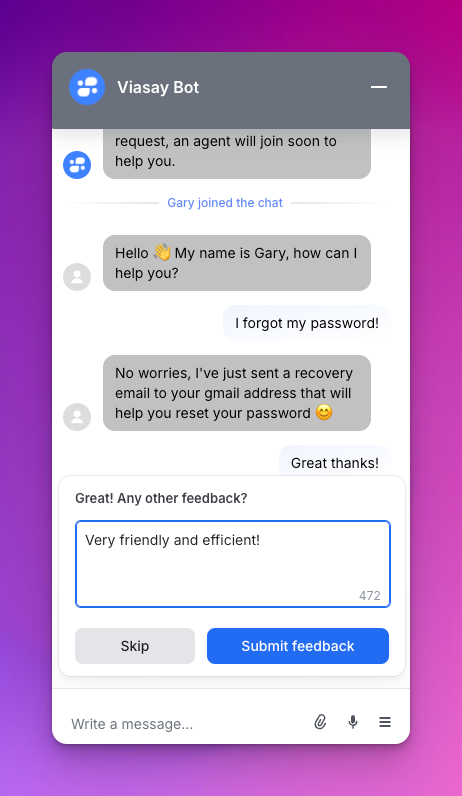
This option is activated by default.
CSAT data is sent directly to Zendesk; ViaSay does not store it.
Troubleshooting
If you encounter issues connecting ViaSay Chatbot to Zendesk Chat ensure the following:
- You have a Zendesk Enterprise Plan.
- The API client was created with an admin account.
- The same admin account is used to perform the connection on the ViaSay platform.
- The Client Secret and Client ID are correctly filled.
- The Zendesk Subdomain is correctly filled and matches the workspace.
If the Admin Account used to create the API client is deleted or demoted, the API client will be removed, and the connection will no longer work.
II. Zendesk Support Integration
Automate ticket creation from your chatbot.
This section covers handover to Zendesk Support using the Flow Builder.
1. Connect to Your Zendesk Support Account
- Ensure you have an Agent Channel Zendesk ready or create a new one (go to: Integrate > Channels > Agent Channels).
Enter Your Zendesk Subdomain
Enter your Zendesk subdomain in the dedicated field and hit Publish to access the Chat and Support sections.
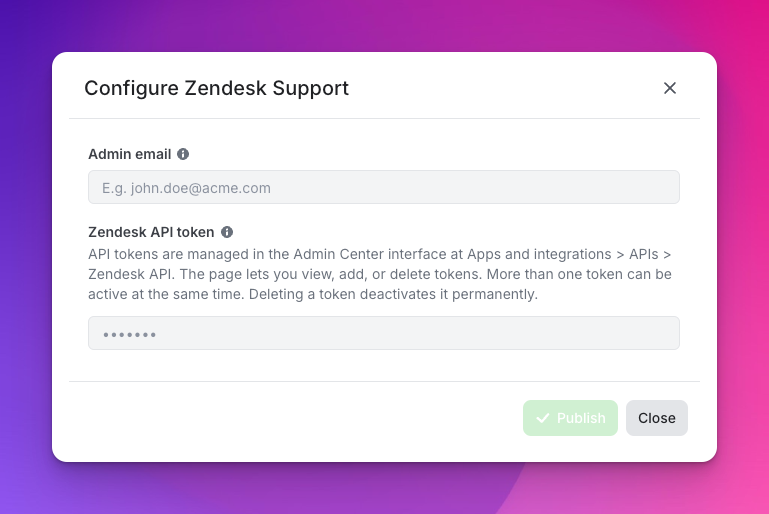
Configure Zendesk Support Section
- Provide the email of an Admin account from your Zendesk Workspace.
- Add an API token from the same Zendesk Workspace (find more in Zendesk Docs).
- Click Publish.
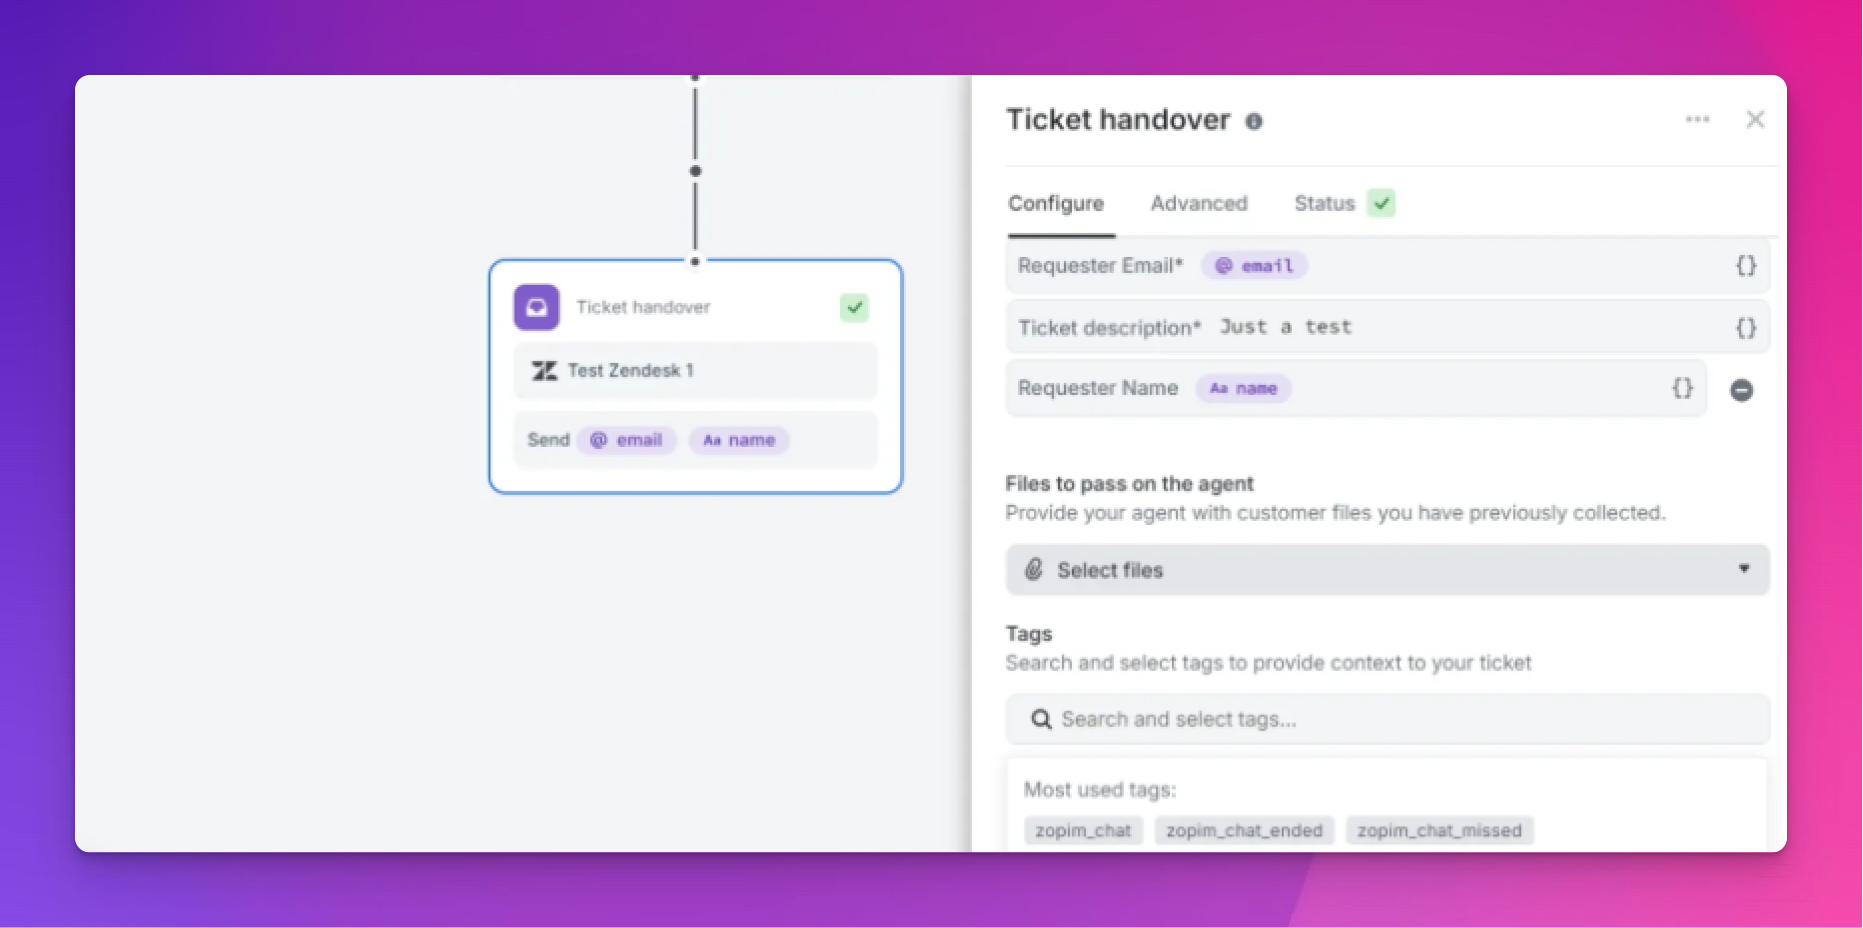
2. Setup a Ticket Handover Step
Once connected, your chatbot can create and send tickets to Zendesk Support.
Build a Pre-qualification Flow
Collect relevant information for agents using steps like User Input, File Upload, and Data Verification.
Notes for Ticket Creation
requester_emailandticket_descriptionare mandatory fields.
The chatbot sets ticket_description as private in Zendesk.
Configure a Ticketing Step
-
Select an agent channel to send tickets to.
-
Fill in Zendesk Fields (system or custom).
-
Set a confirmation message.
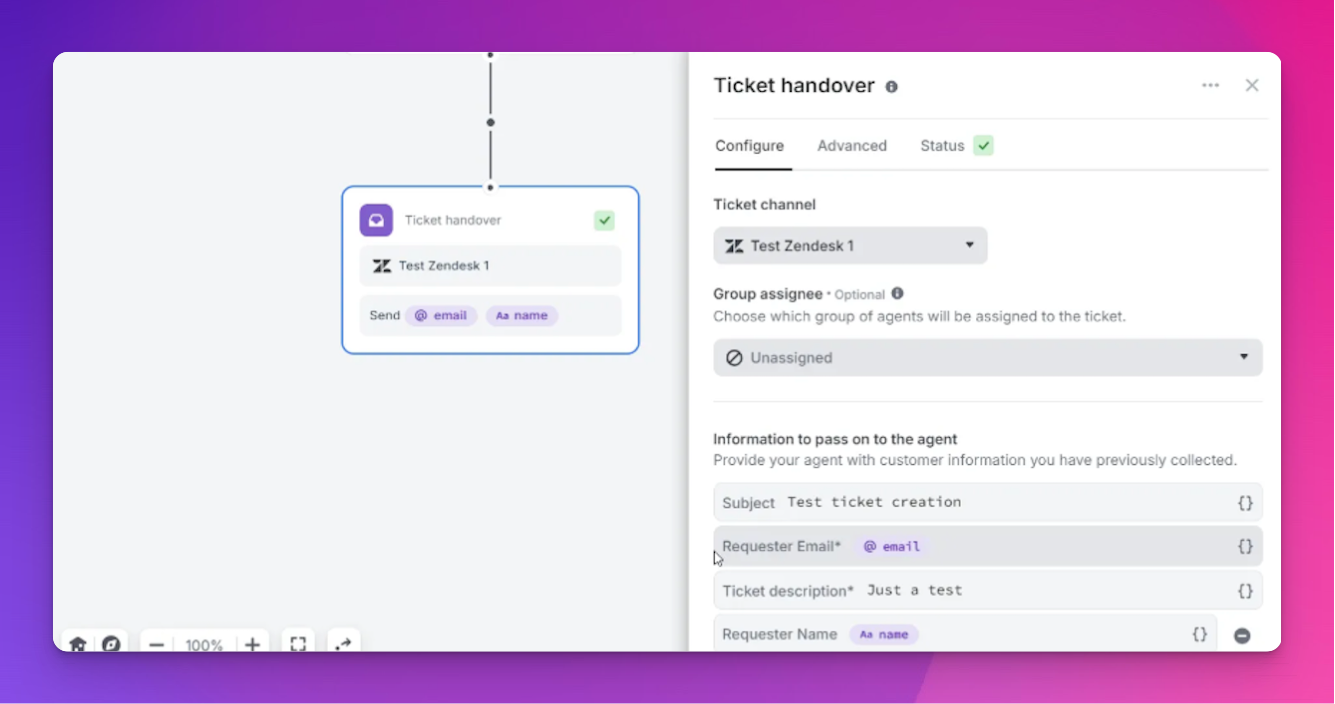
Additional Configurations:
-
Assigning Tickets to a Team: If no group is selected, tickets are assigned to the default group in your Zendesk Workspace.
-
Tagging Tickets: Use Zendesk’s tagging system to organize tickets.