
Zendesk Ticket Handover
To get started, ensure your Zendesk account is connected in the Integrate > Agent Channel section.
Setup a Ticket Handover
Once connected, your chatbot can create and send tickets to Zendesk Support.
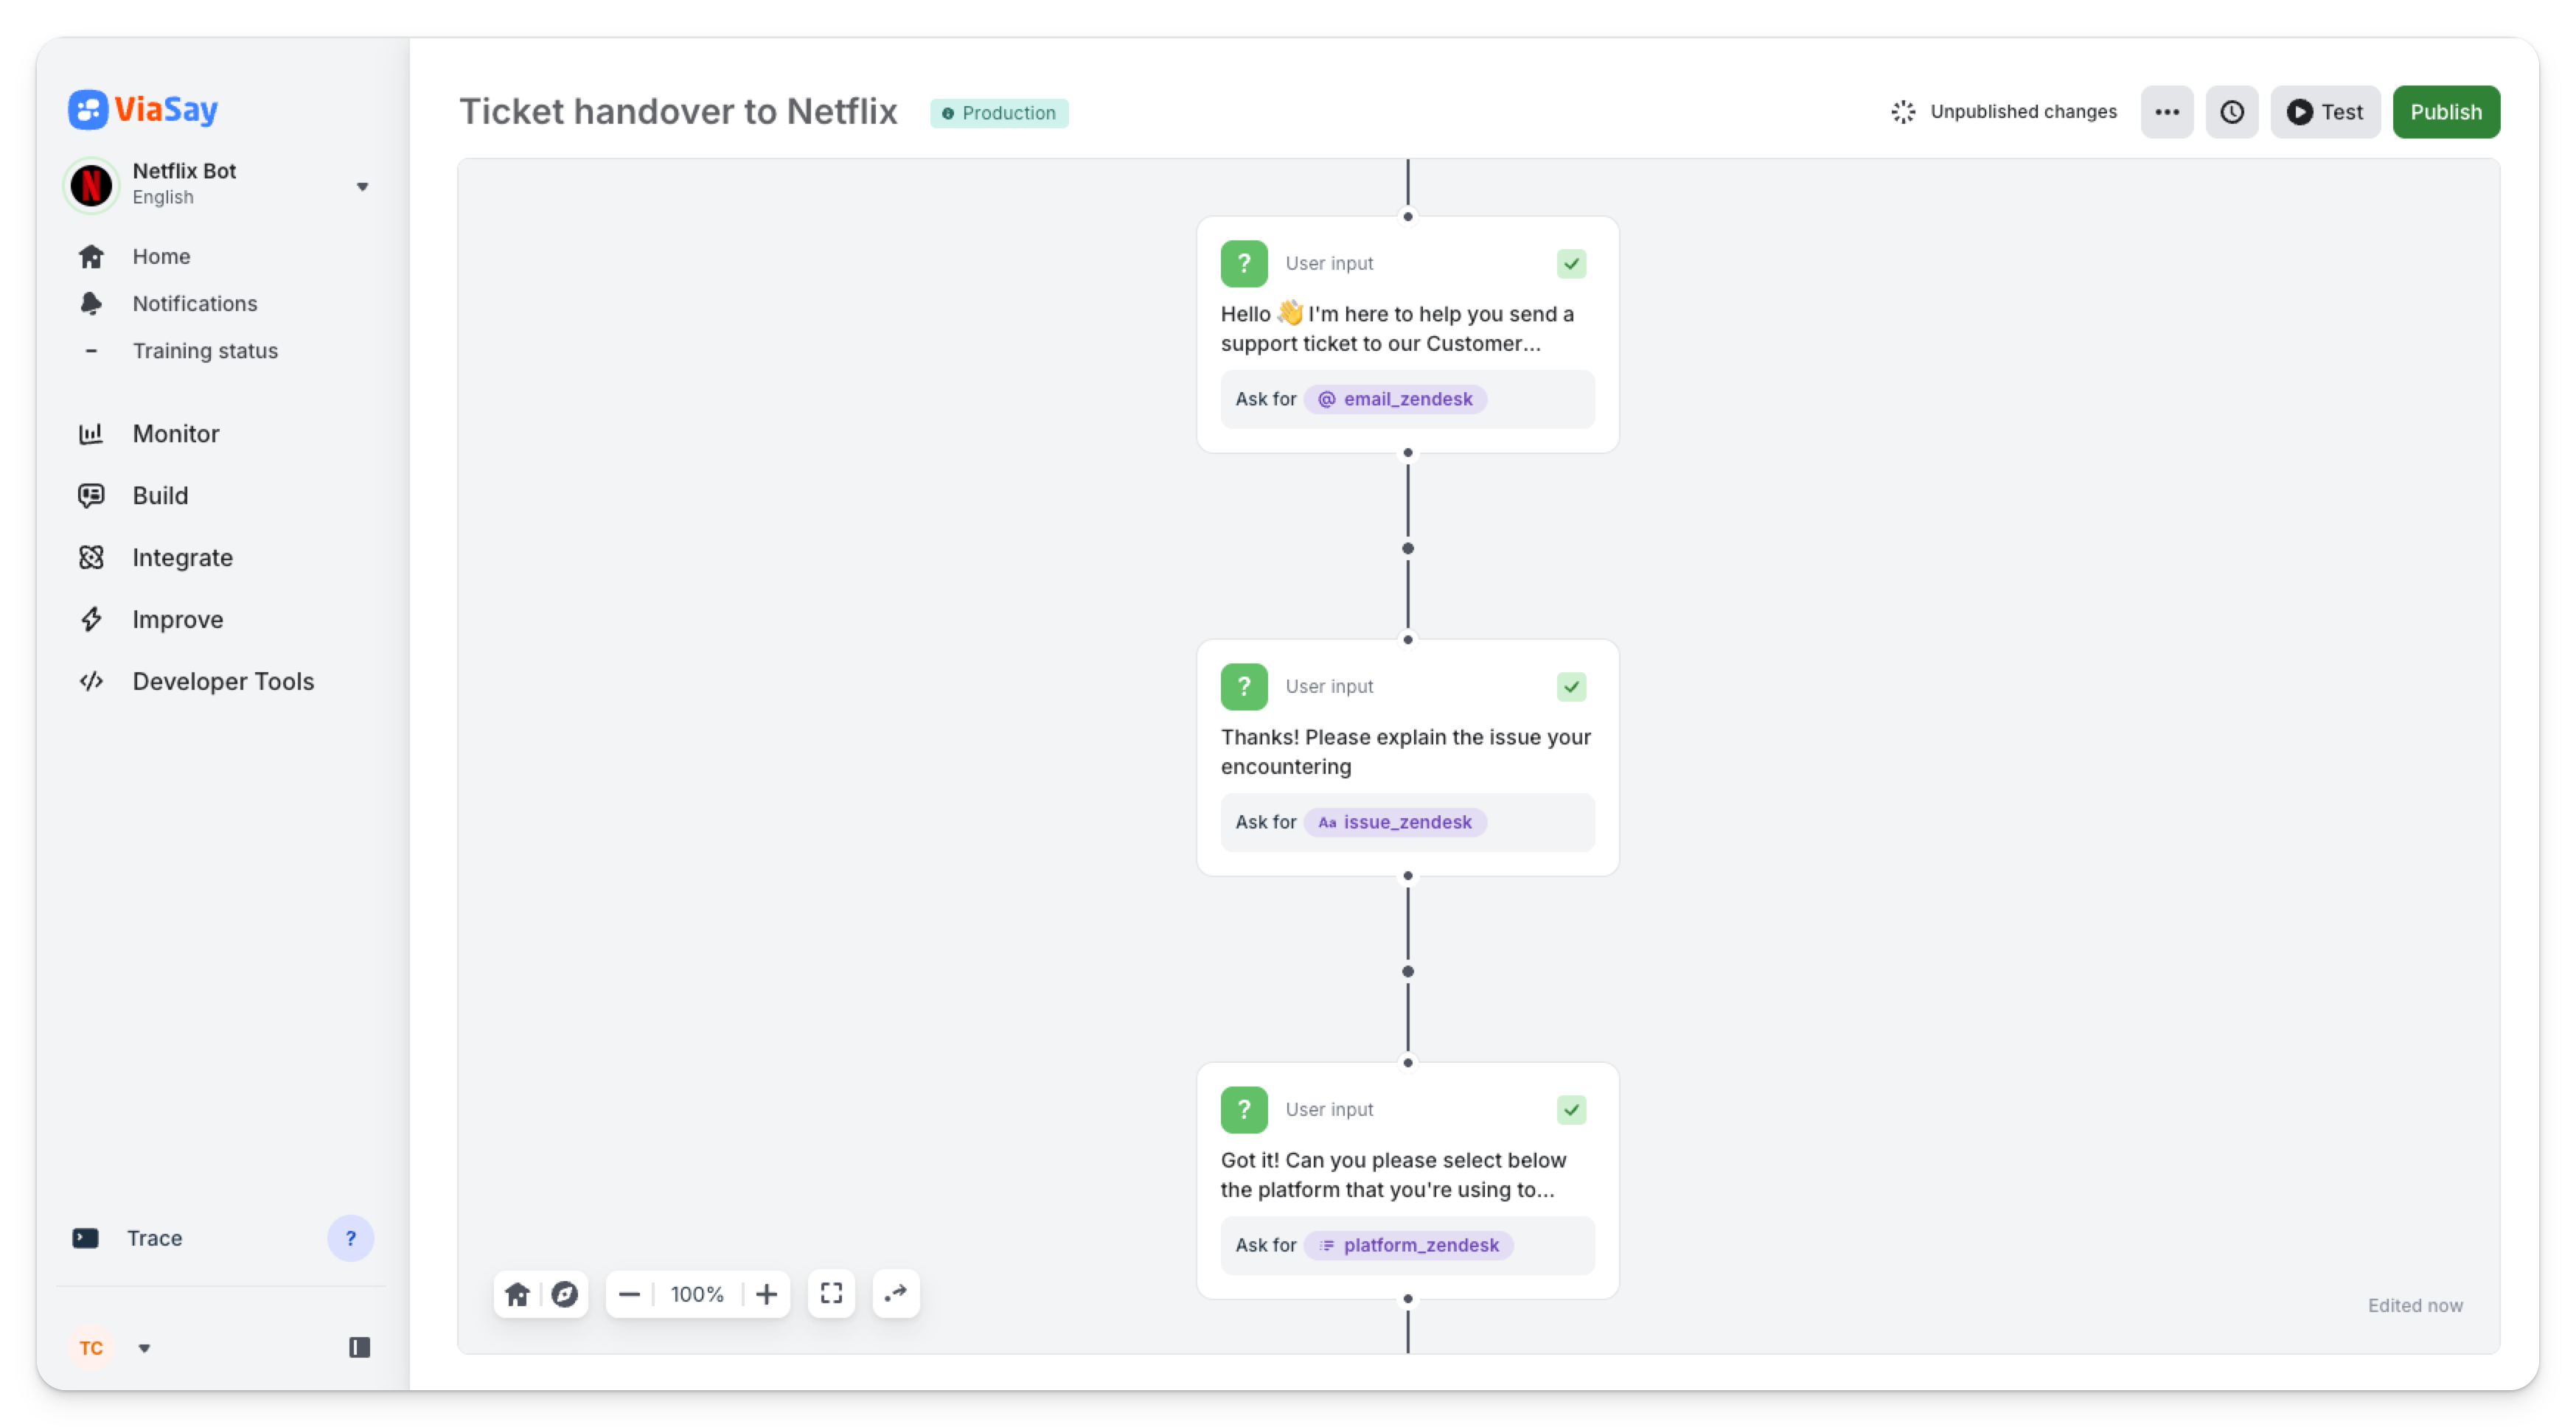
Build a Pre-qualification Flow
Collect relevant information for agents using either of the following steps
- User Input: lets you capture the answer of the user in a variable. Variables can be of 4 different types:
- Free text: a simple word or phrase
- Email address: the user must type a valid format
- Regex: the user's answer must match a predefined format (example a date in a DD/MM/YYYY format)
- Select: a list of options is proposed to the user to choose from
- File Upload: lets the user upload a file (example a screenshot of an error). Files must not exceed 10MB and should be in one of the following formats: PNG, JPEG, JPG, Doc, Docx.
You can set up a Data Verification step before the ticket handover that shows a recap of the answers provided by the user and allows them to make modifications if needed.
Configure a Ticketing Step
- Select an agent channel to send tickets to.
- Fill in the Zendesk Fields (system or custom). More on Zendesk fields is described later below 👇
- Set a confirmation message.
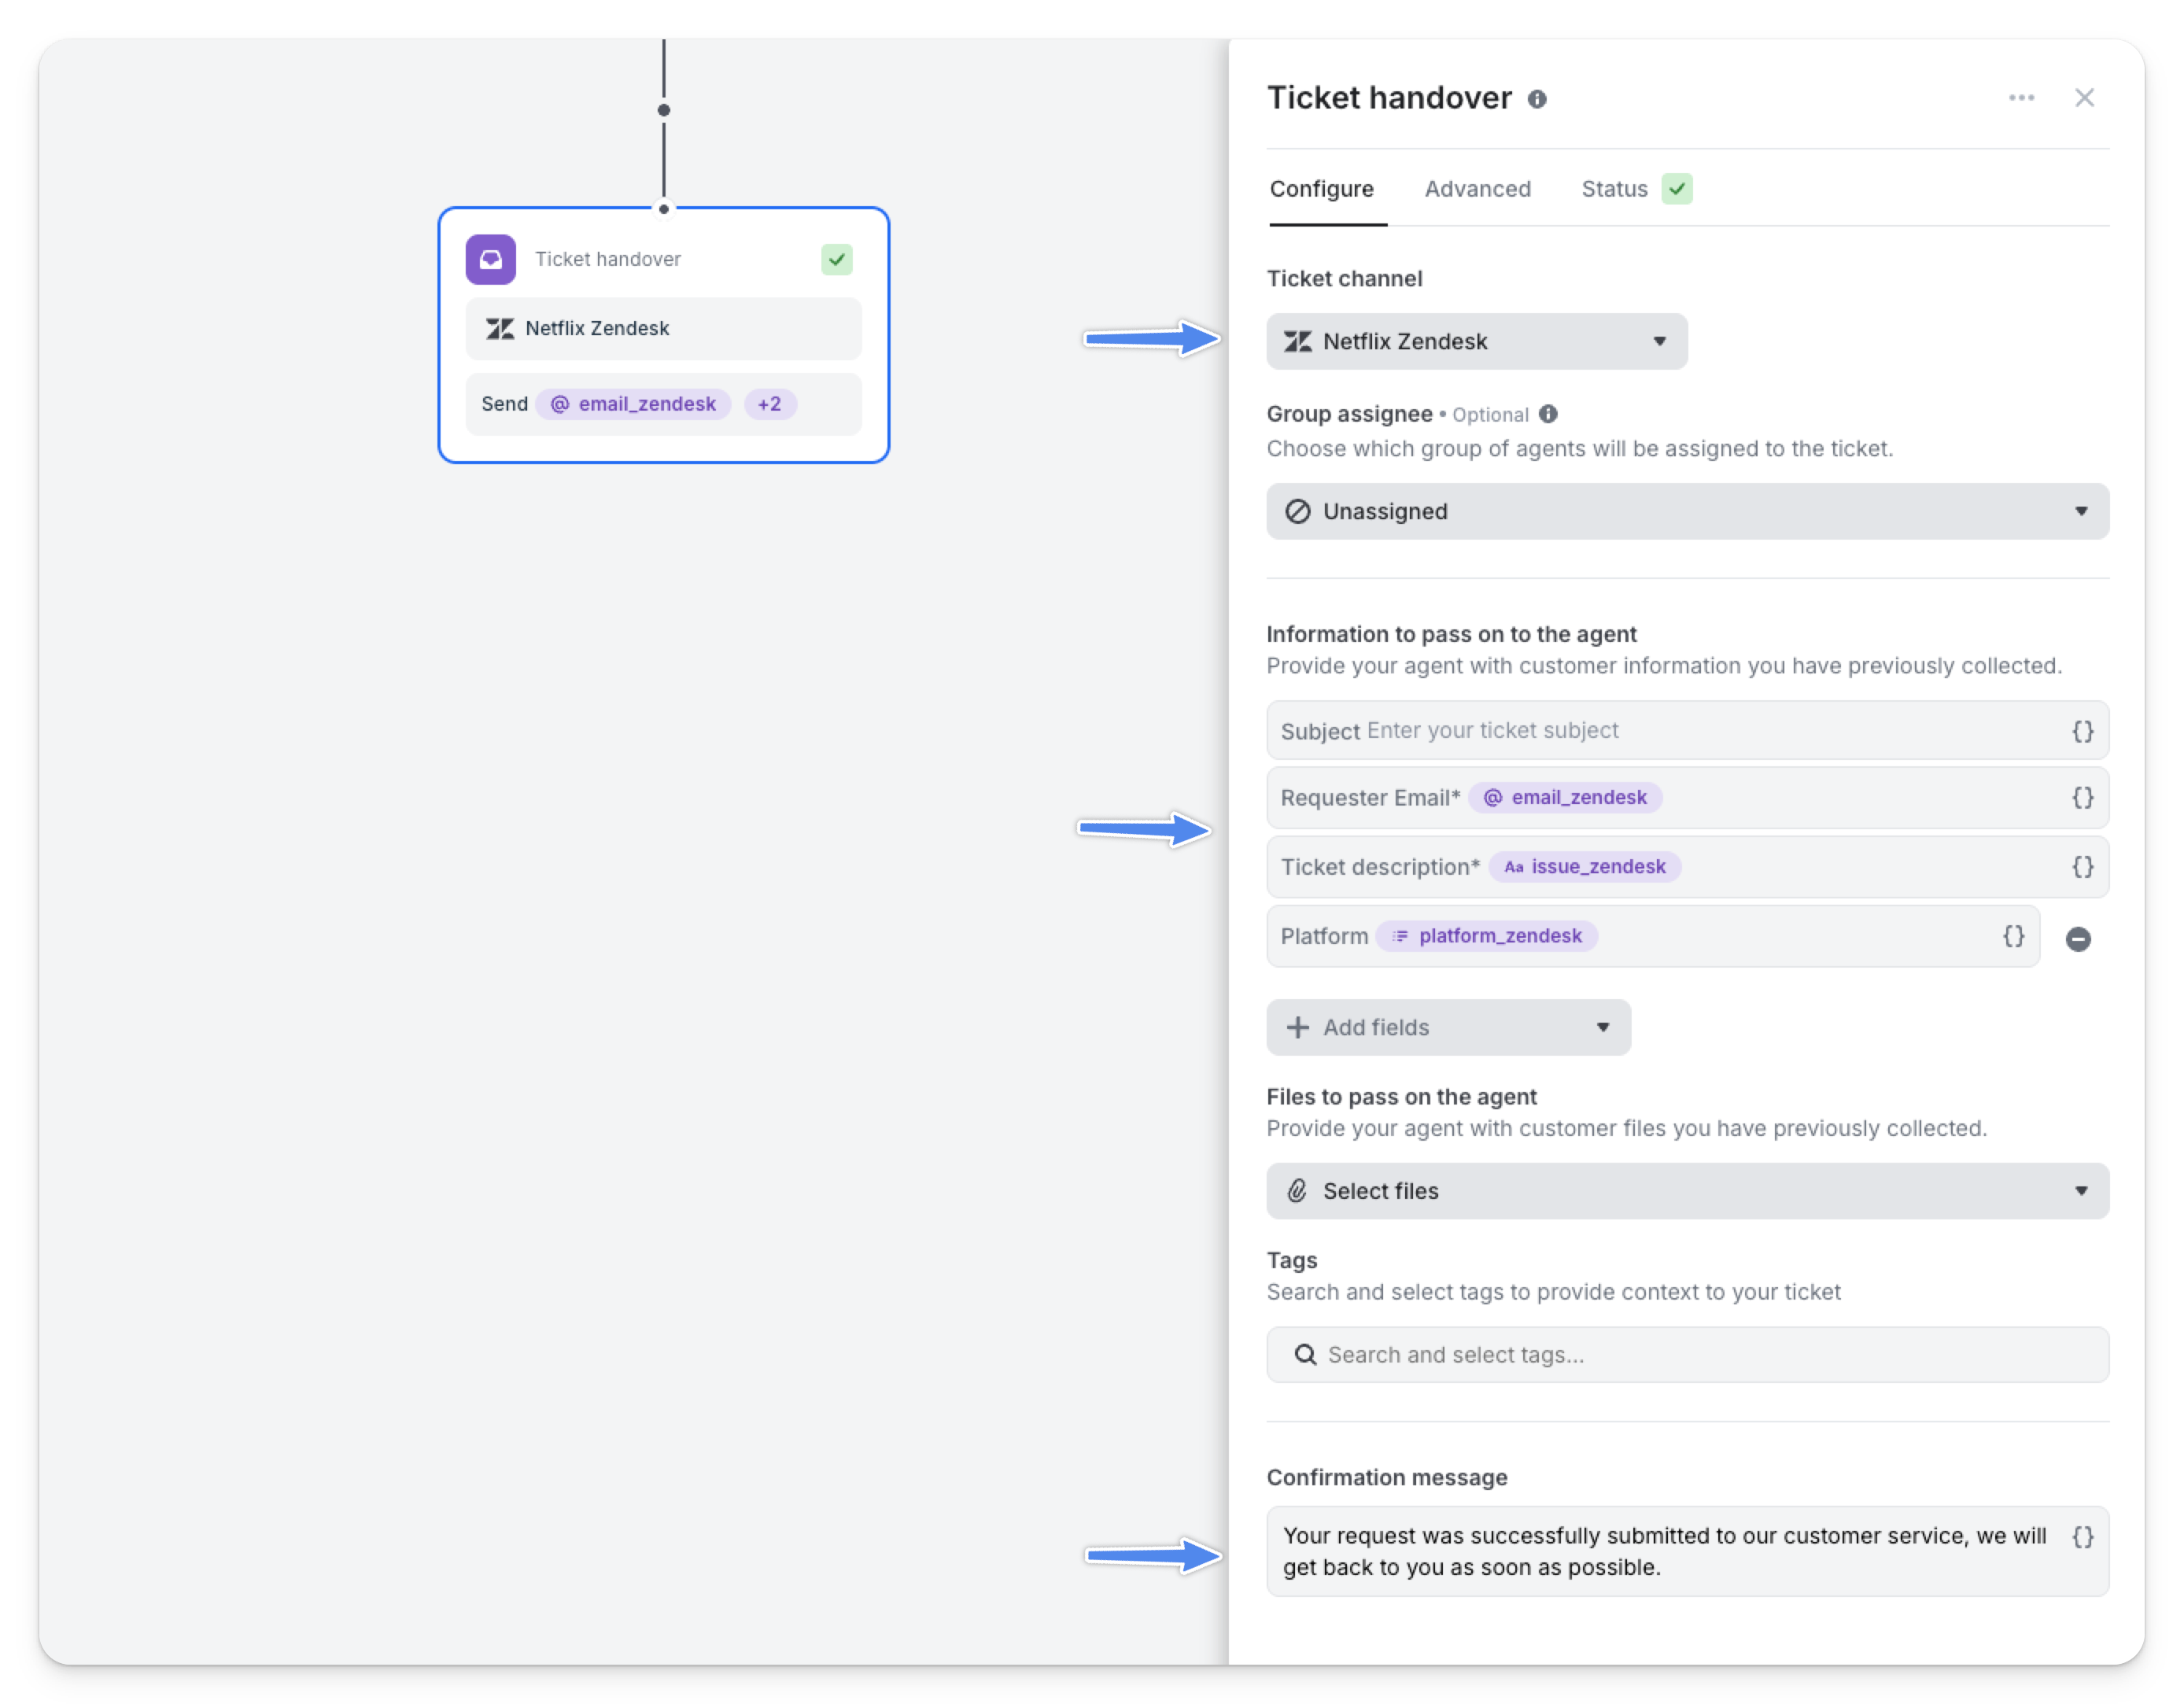
Notes for Ticket creation
Requester EmailandTicket Descriptionare mandatory fields.The chatbot set the Ticket Description as private in Zendesk.
Additional Configurations:
- Assigning Tickets to a Team: If no group is selected, tickets are assigned to the default group in your Zendesk Workspace.
- Tagging Tickets: Use Zendesk’s tagging system to organize tickets.
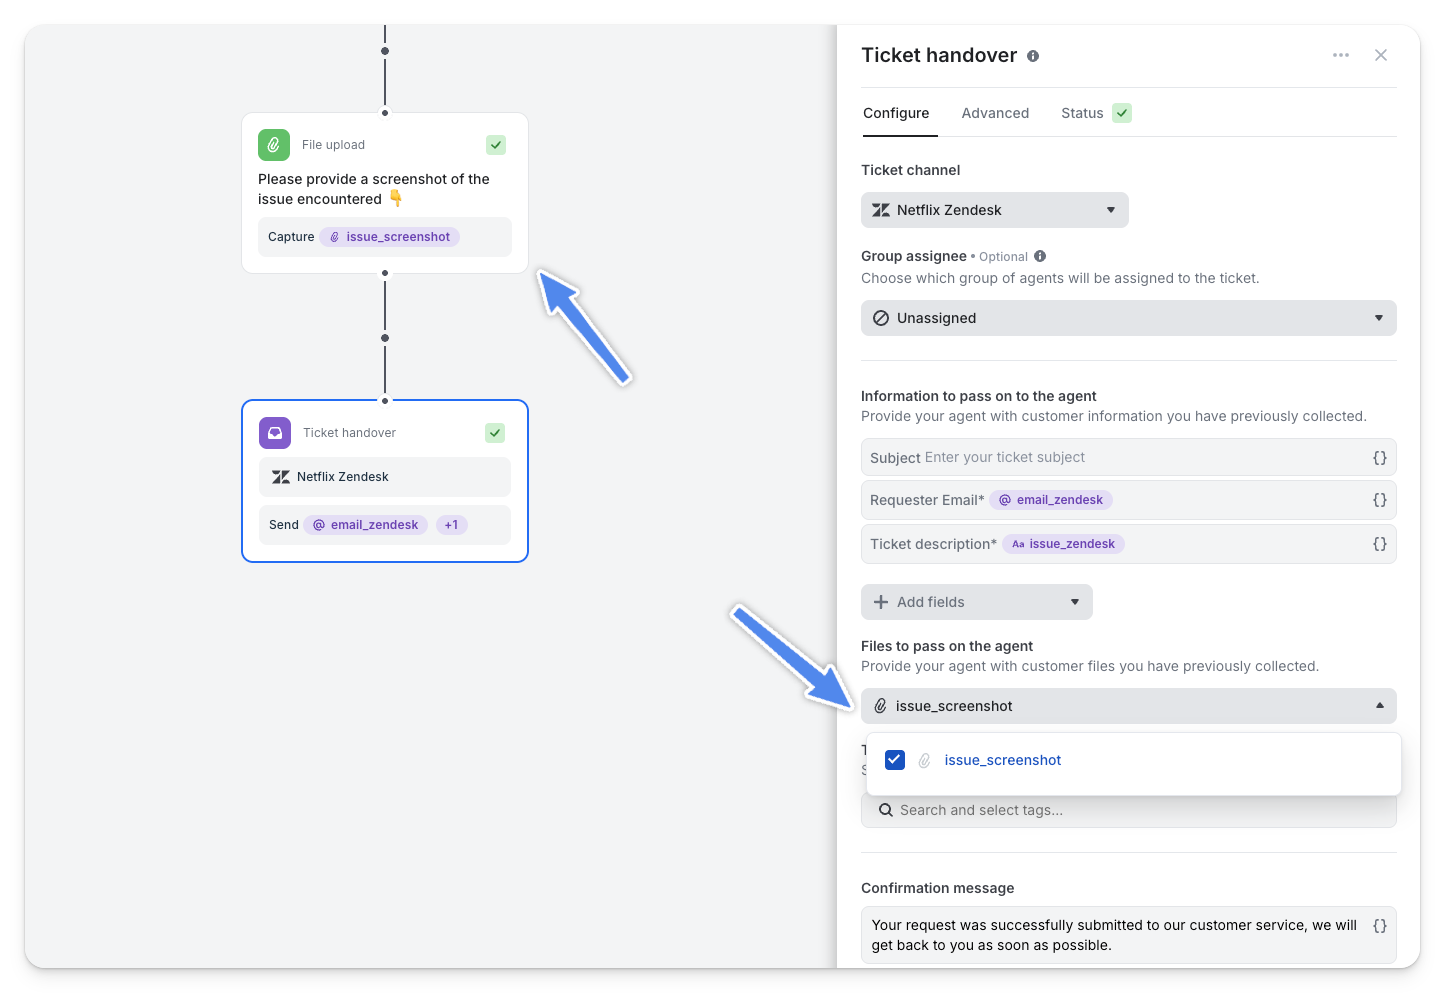
Add files to your ticket handover
You can ask the user to upload files in the chatbot using the File Upload step, and then add these files in the Ticket Handover step as explained in the image below 👇
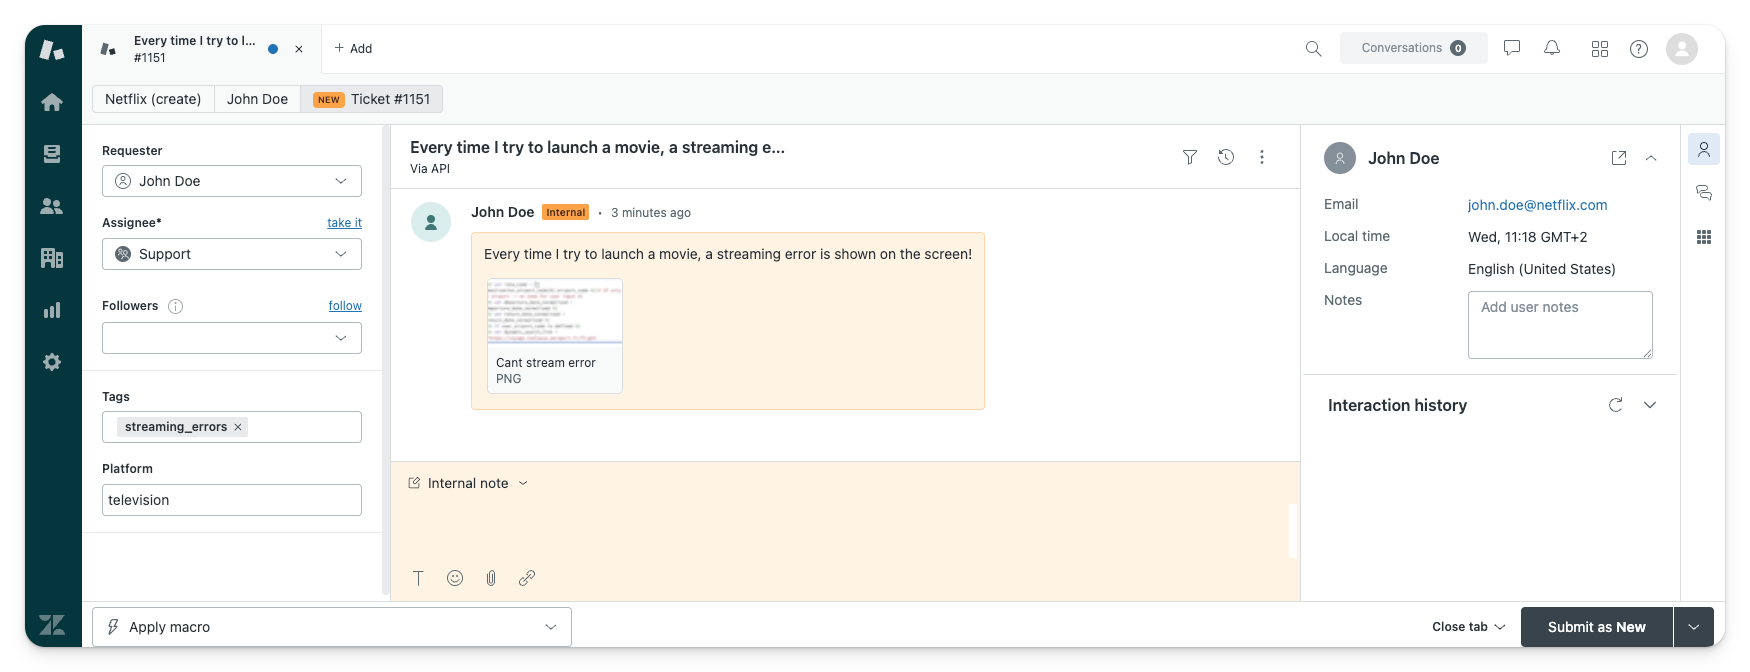
The ticket on Zendesk
Every time a user asks for a support ticket, the Use Case associated to Zendesk would trigger and the user can then fill in the information required.

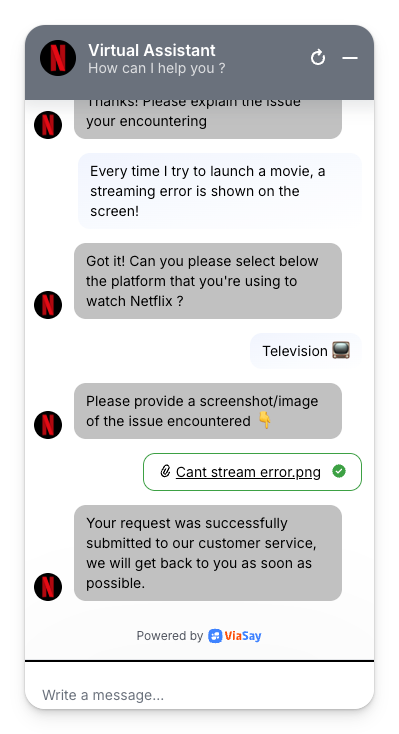
Once the Ticket Handover step is reached on the chatbot, a ticket is automatically created on Zendesk with all the information that the user provided.
Setting up Fields in Zendesk
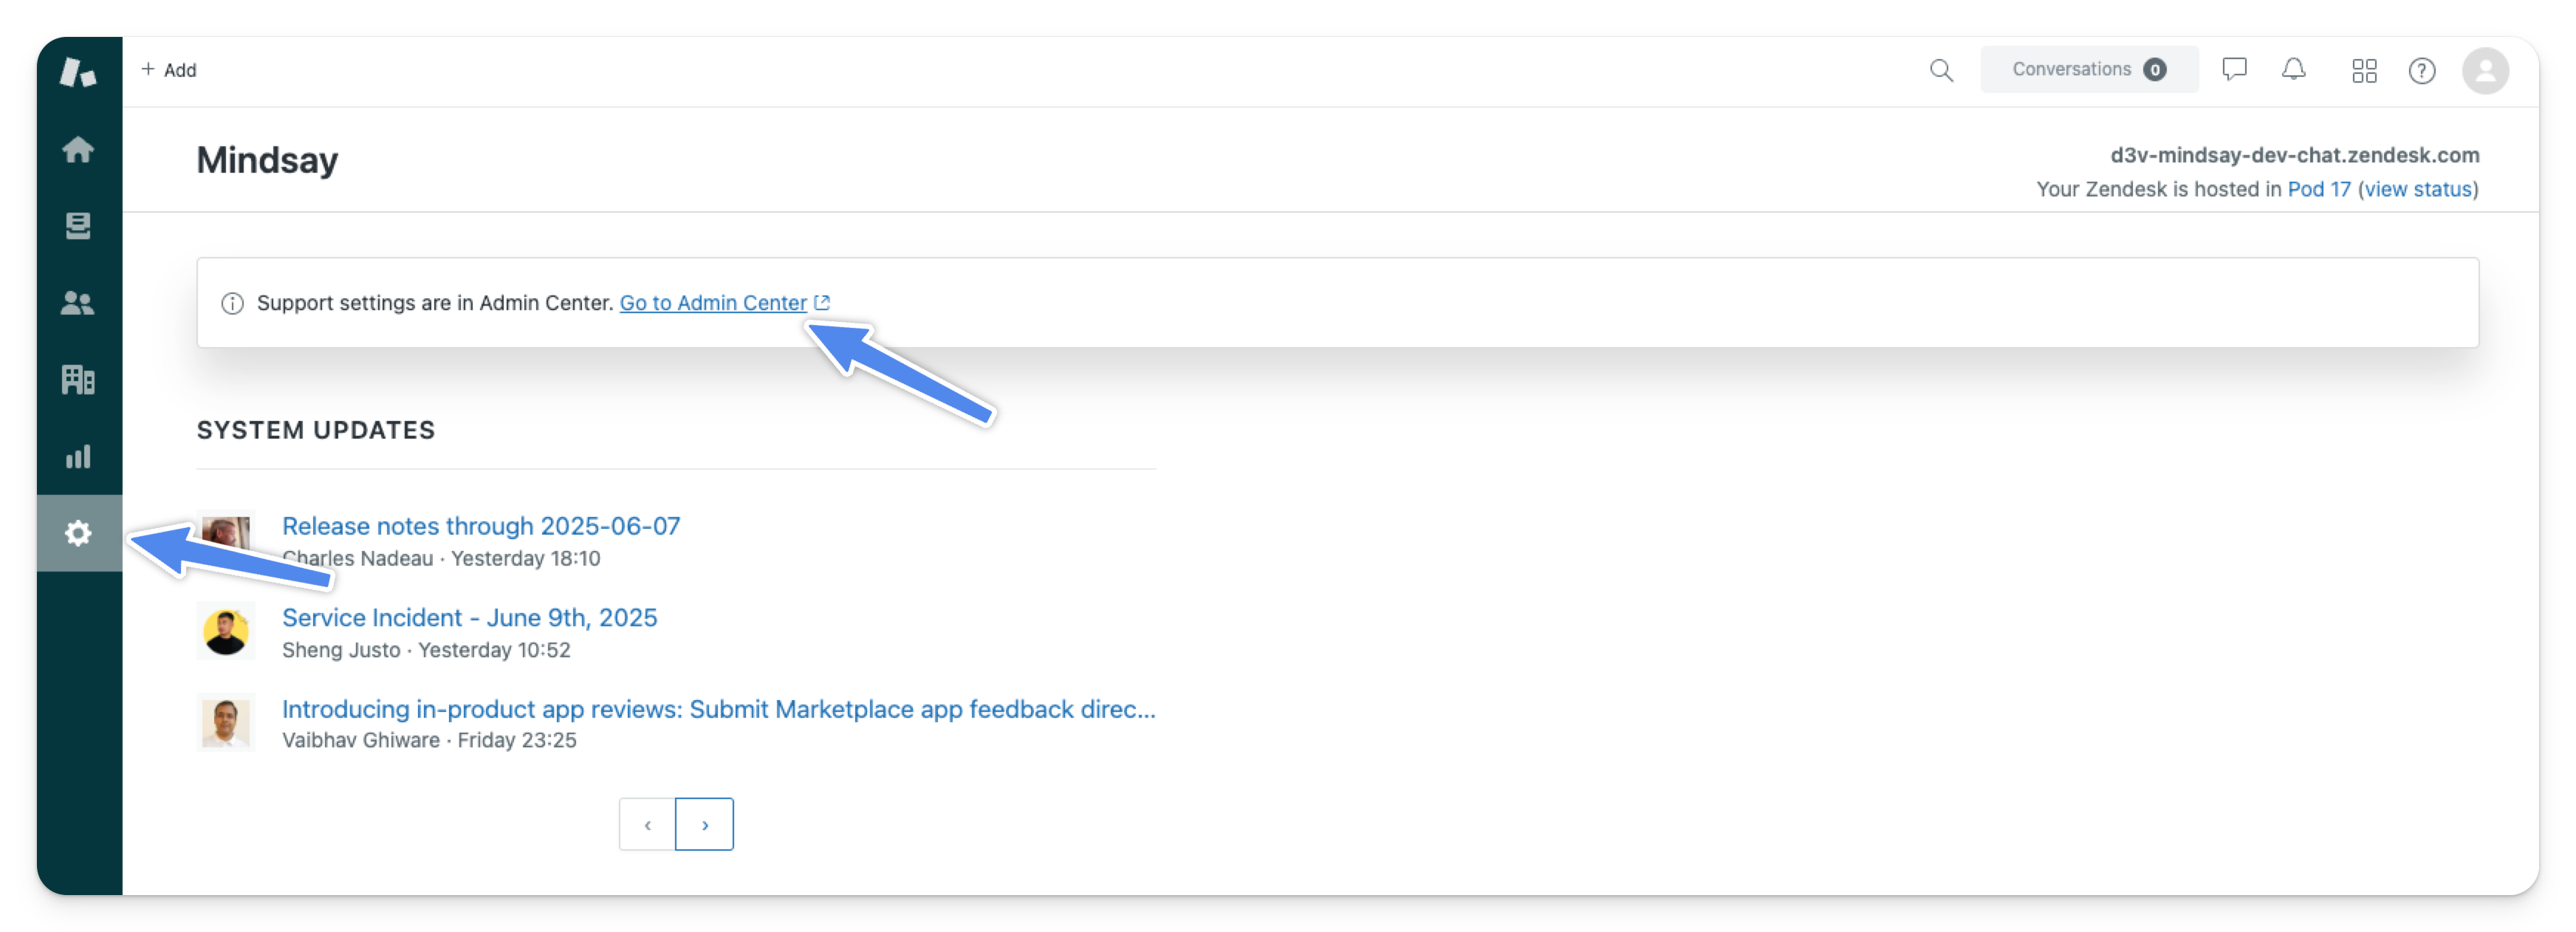
On your Zendesk Support section, click on Admin and then click on Go to Admin Center.
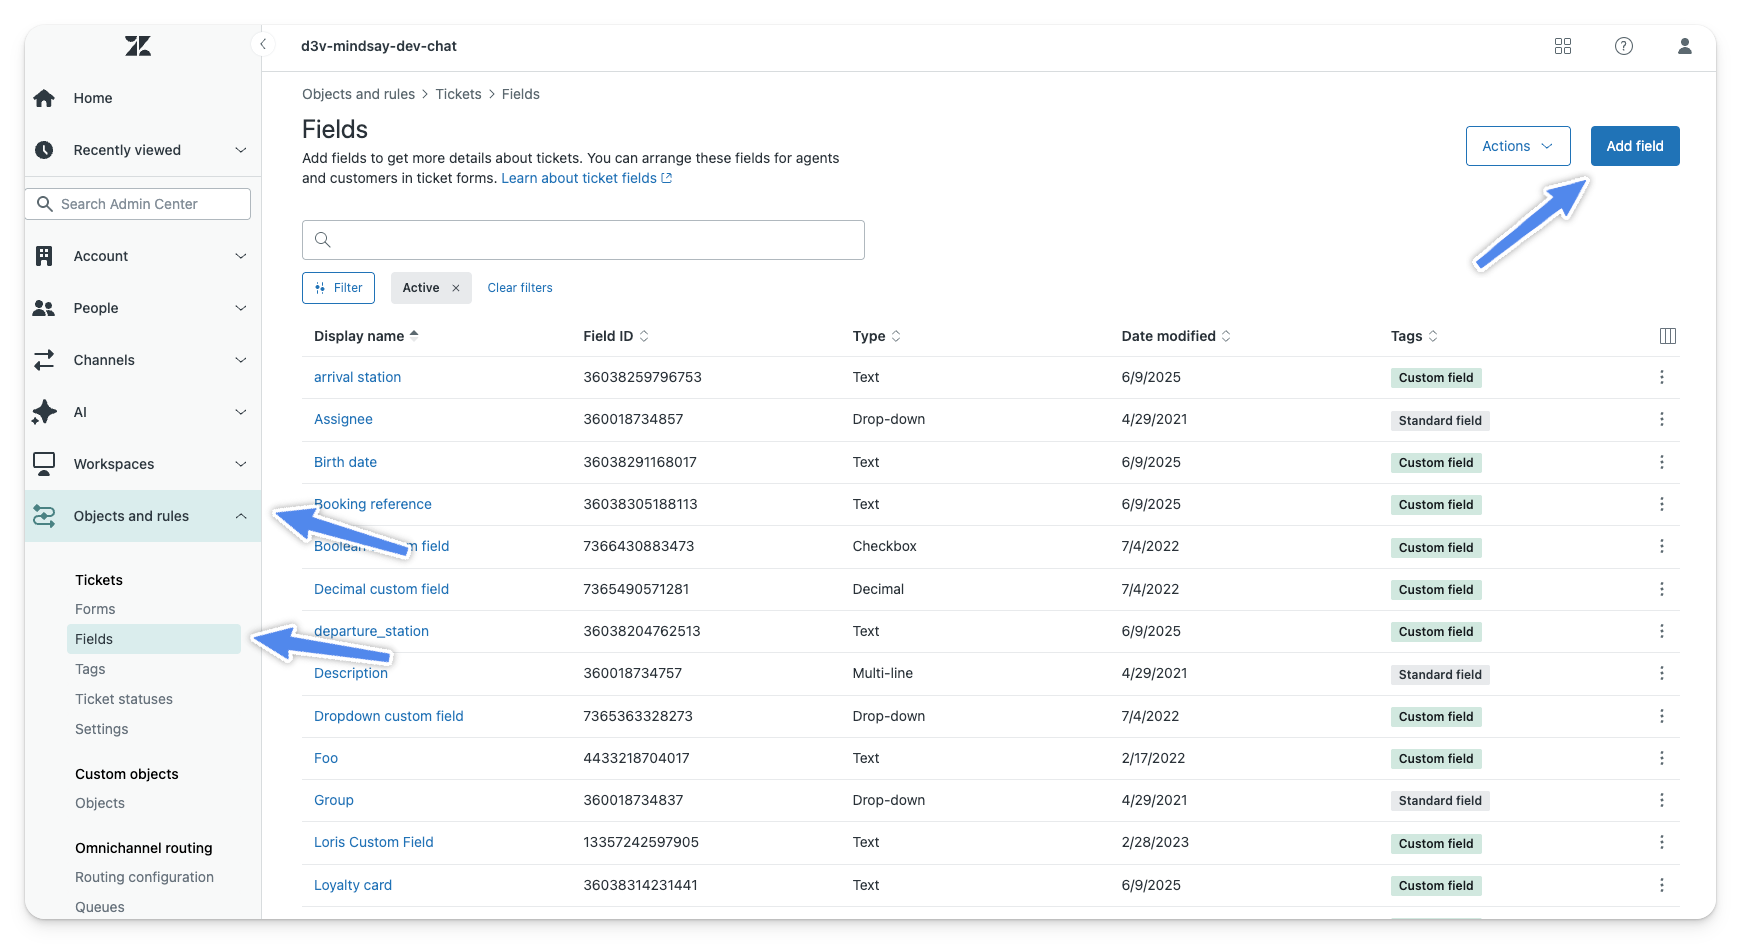
In the admin center, click on Objects and rules and then select Fields.
You can create a new field by clicking on Add field, or modify existing ones.
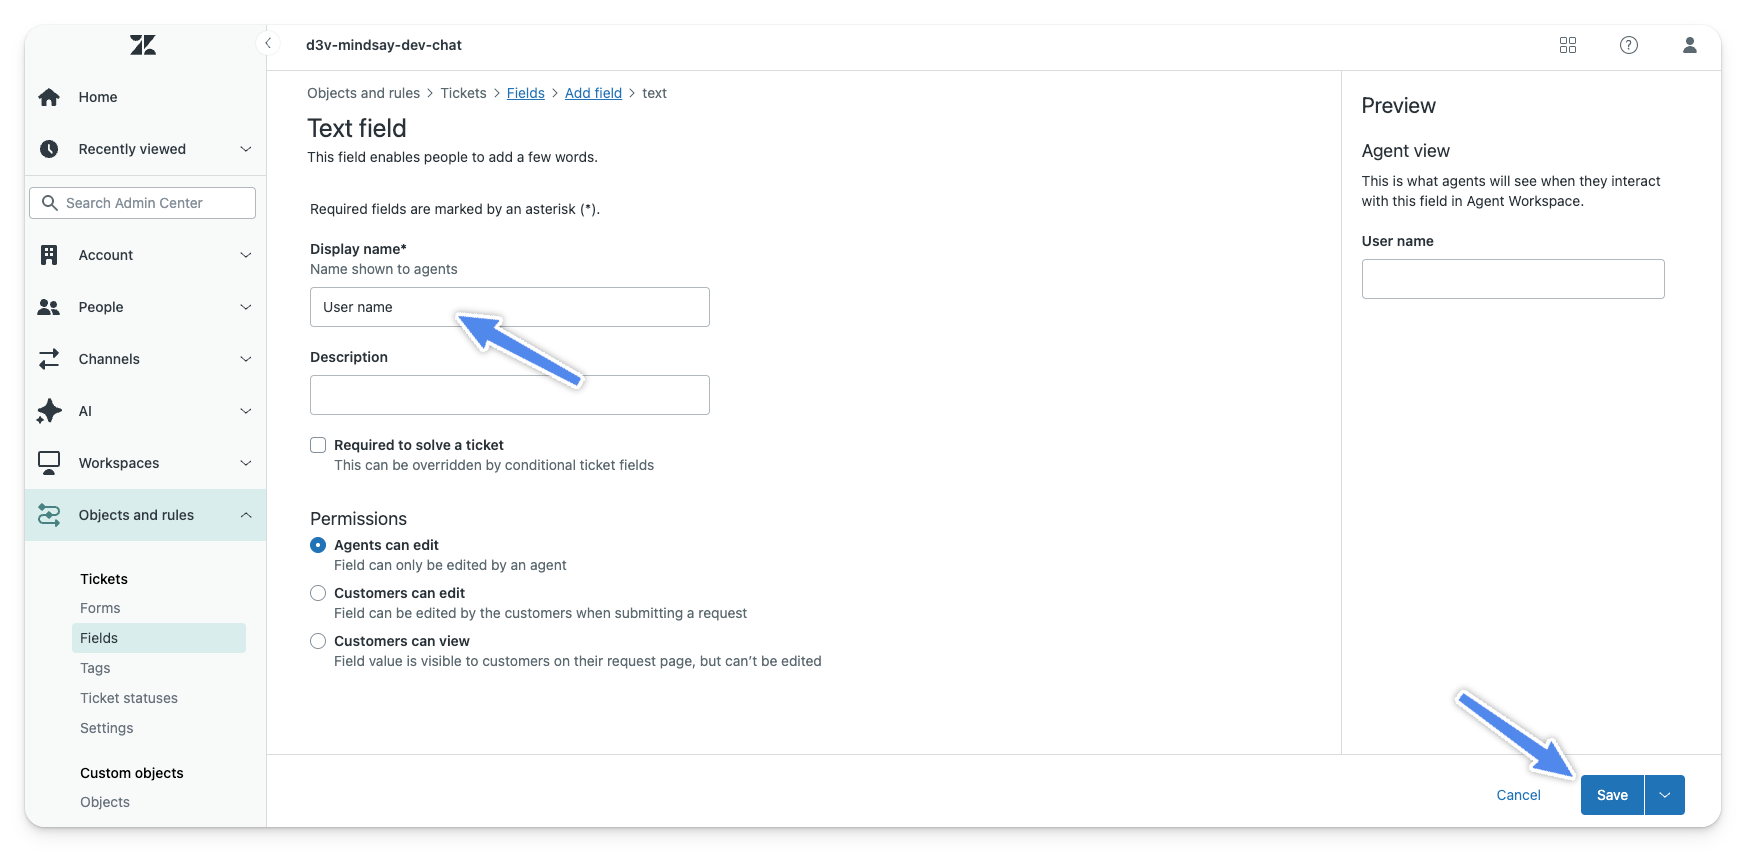
Choose the field type, usually Text and then give the field a name before clicking on Save.
A created Field is automatically assigned to the default Form of the Zendesk account, but could obviously be manually assigned to another Form.