
Freshchat
Freshchat Live Chat Integration
Connect Freshchat to ViaSay so your AI assistant can hand a conversation over to a human agent — automatically when it gets stuck, or whenever the customer asks to talk to someone. The agent receives the full bot conversation, so nobody has to repeat themselves.
Before you start
- Your User Channel must be a ViaSay Widget.
- You need a Freshchat account with admin access — generating an API token and setting up a webhook both require admin rights.
How the integration works
The setup has two parts, and you only do the first one once:
- Connect your Freshchat account — give ViaSay your Freshchat credentials and connect a webhook, so the two platforms can exchange messages both ways. (Steps 1 to 3 below.)
- Add a handover step to your flows — tell the bot when to hand over and which team should receive the conversation. (Step 4.)
Once both are done, every time the bot hands over, a live conversation opens in your Freshchat inbox with the full history attached.
Step 1 — Get your Freshchat credentials
ViaSay needs two things from Freshchat to reach your account: an API token (to prove it's allowed in) and your subdomain (to know which account to talk to).
- In Freshchat, go to Admin Settings > Marketplace & Integrations > API.
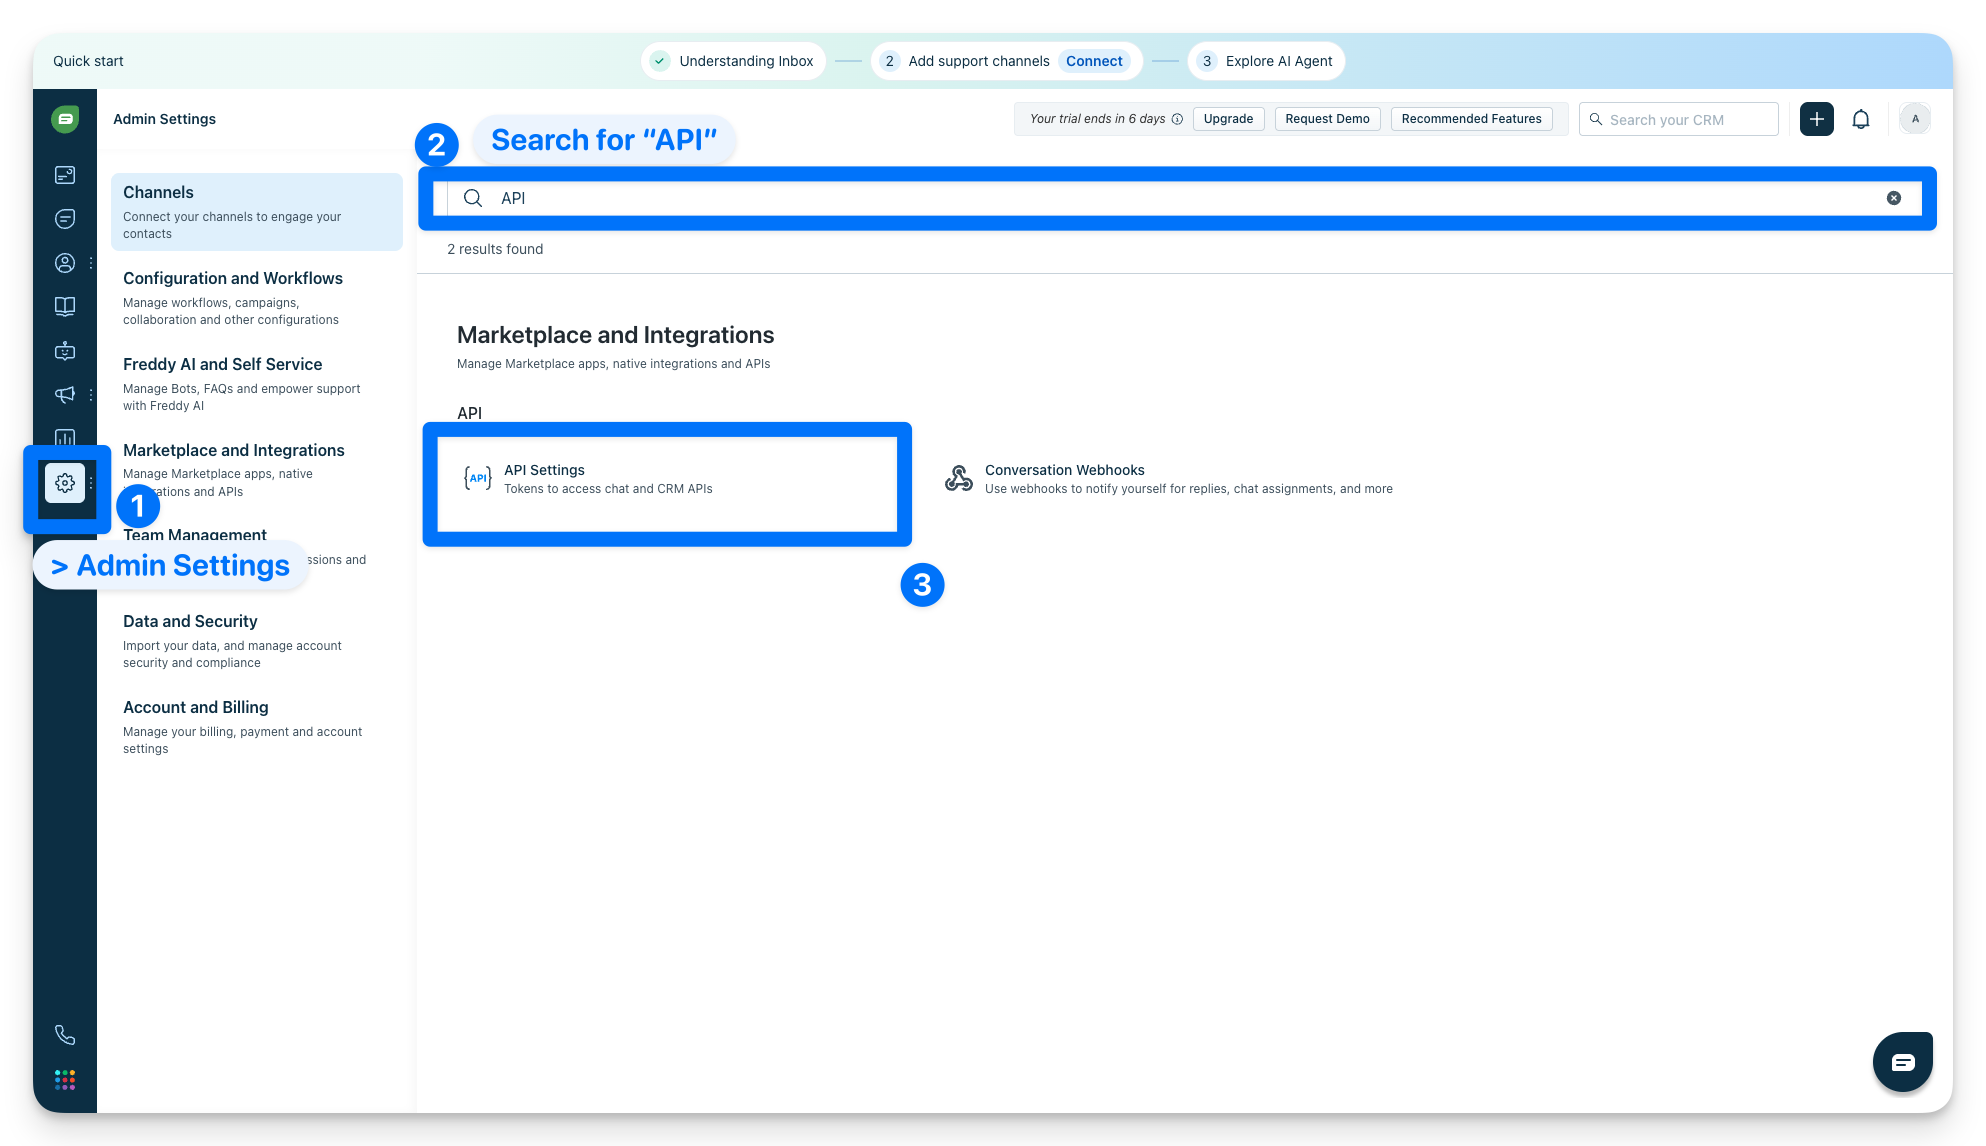
- Open API settings and find the API details for chat section.

- Copy these two values:
- API token → this is Your API key.
- Subdomain → take it from Your chat URL (for example,
viasay-org-d8eb5143d94194817792515).
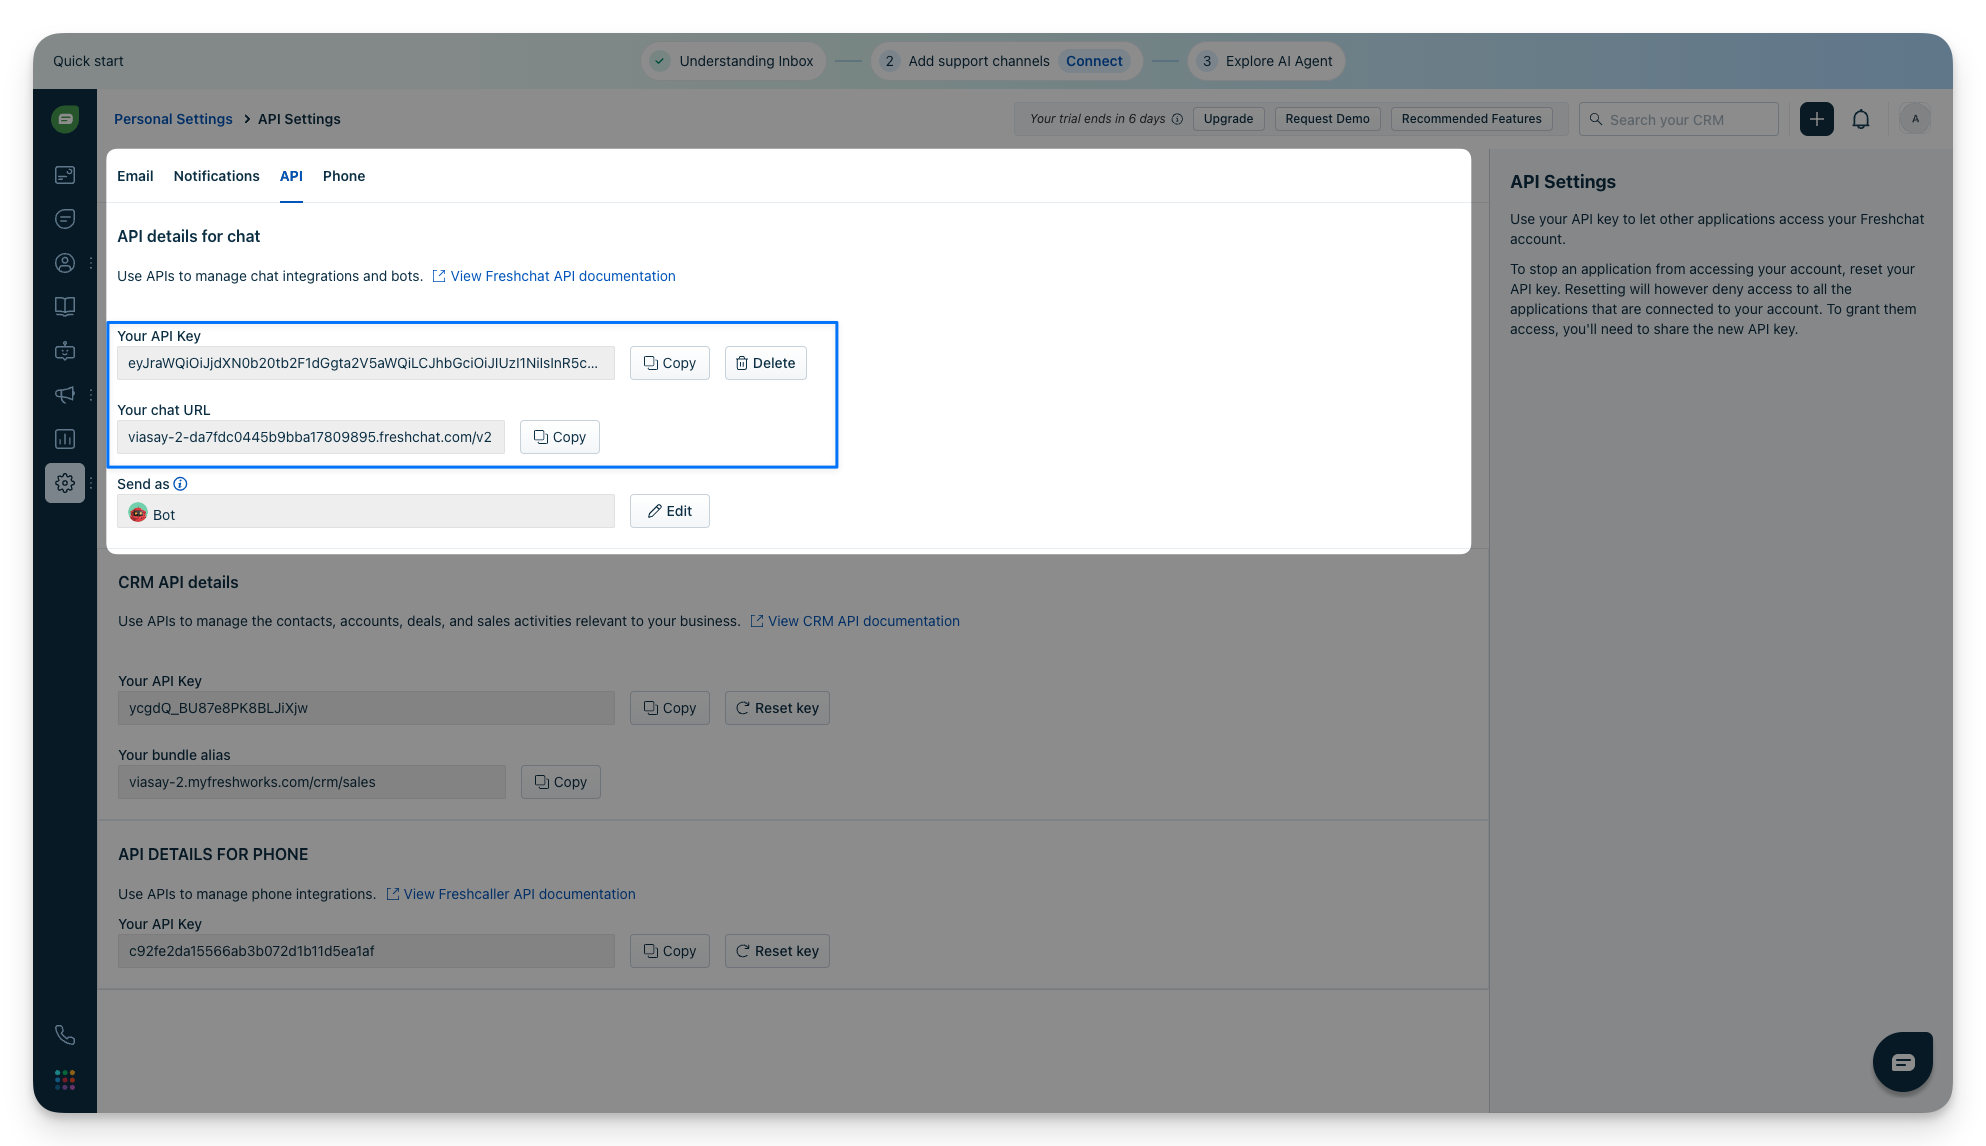
Keep these handy — you'll paste them into ViaSay in the next step.
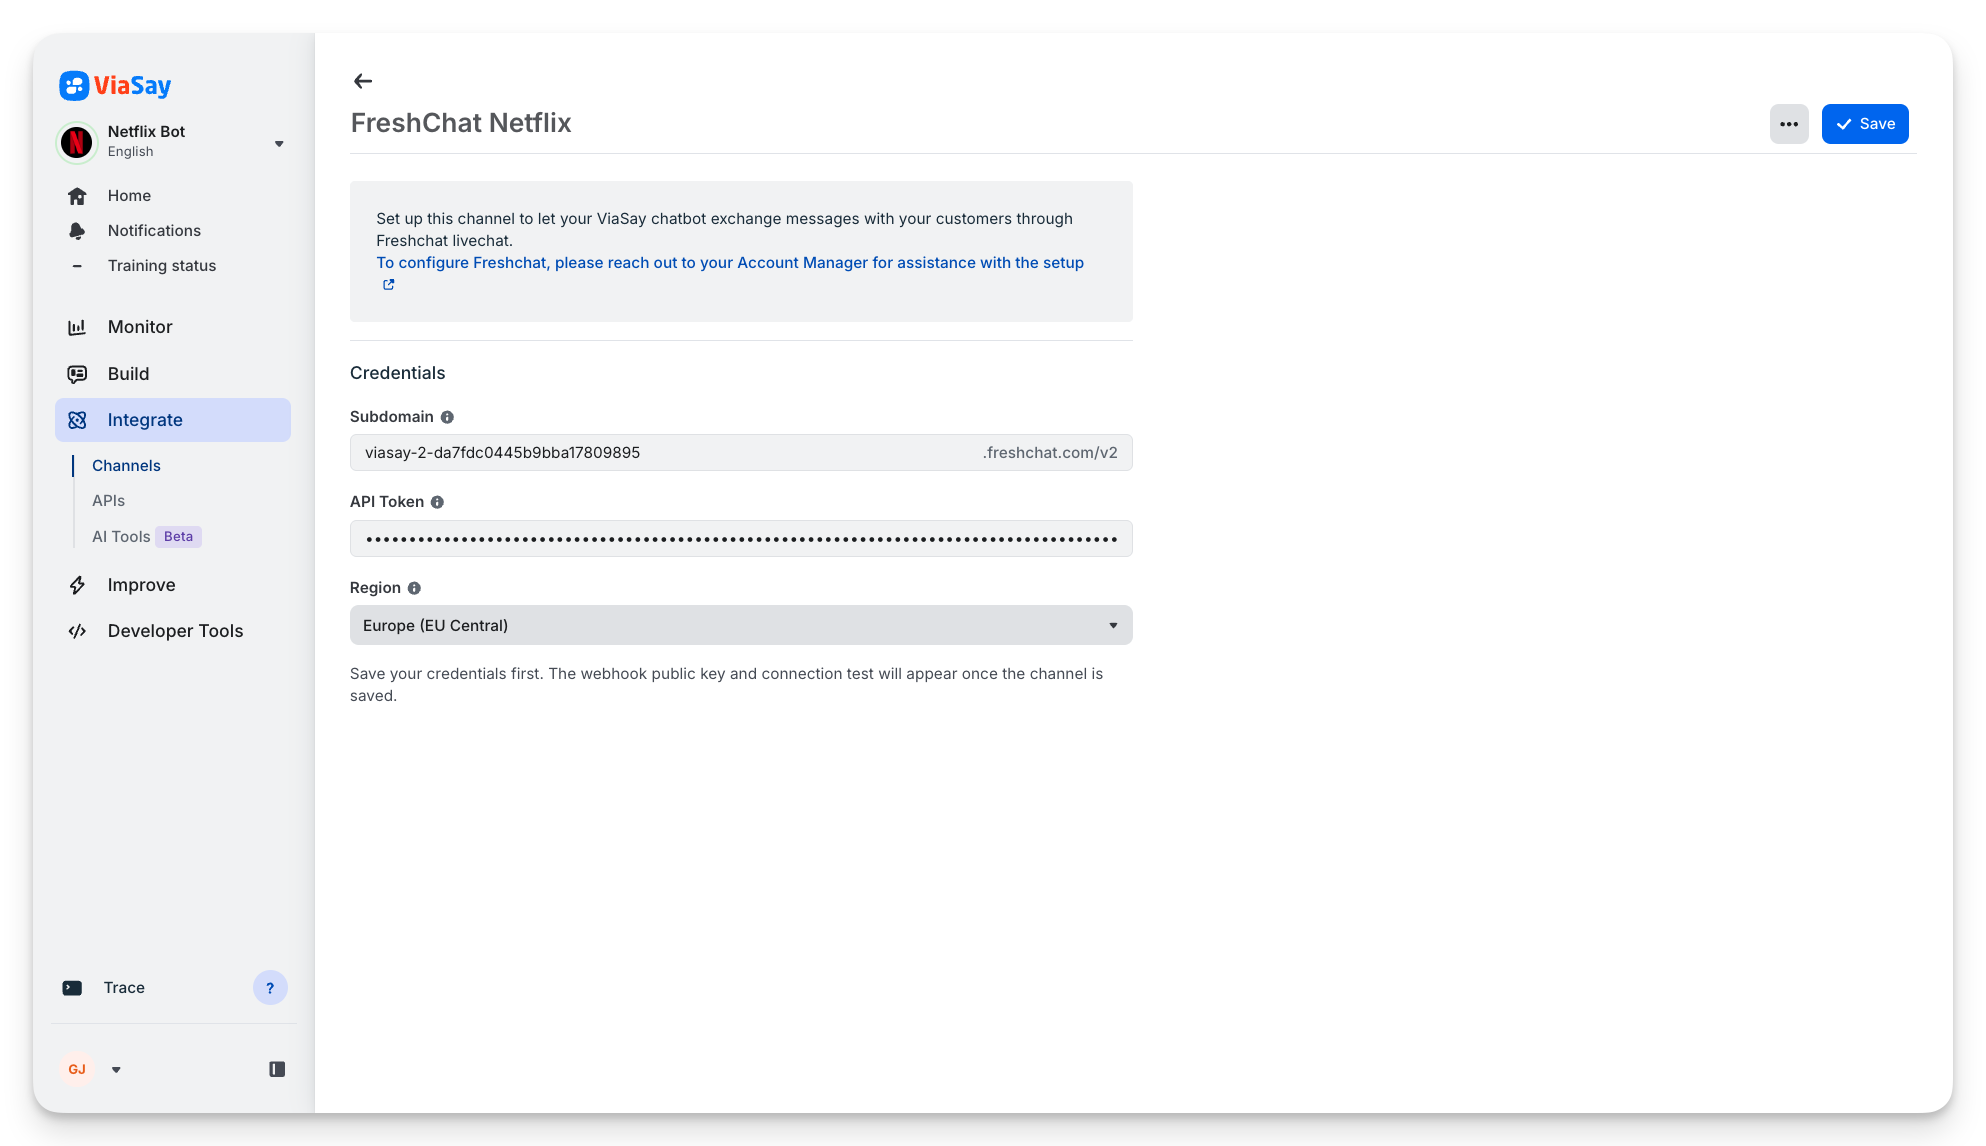
Step 2 — Create and configure the channel in ViaSay
Now create the Freshchat channel in ViaSay and paste in the credentials you just copied.
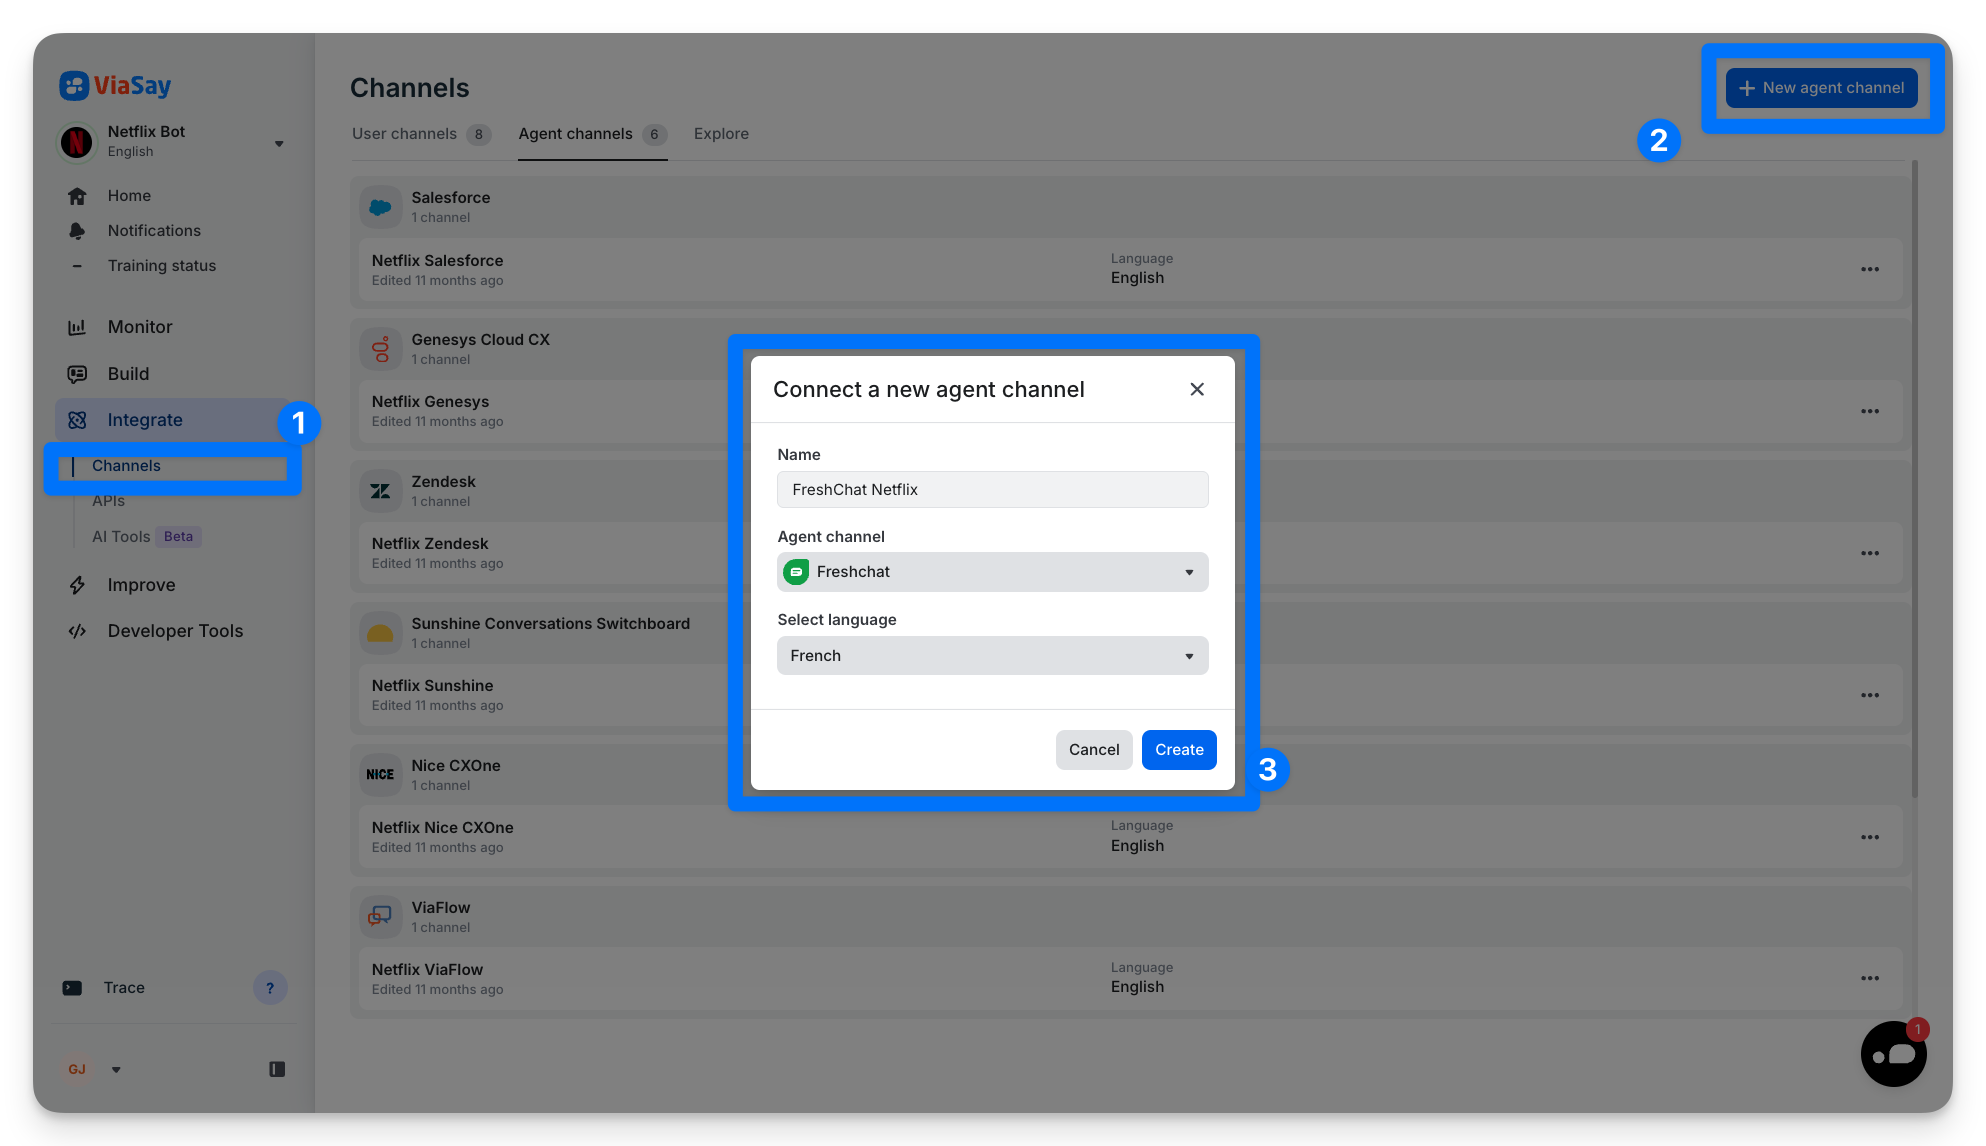
- In ViaSay, go to Integrate > Channels > Agent Channels.
- Click New Agent Channel (top-right).
- Give the channel a name, select Freshchat, and choose the bot language for this channel.
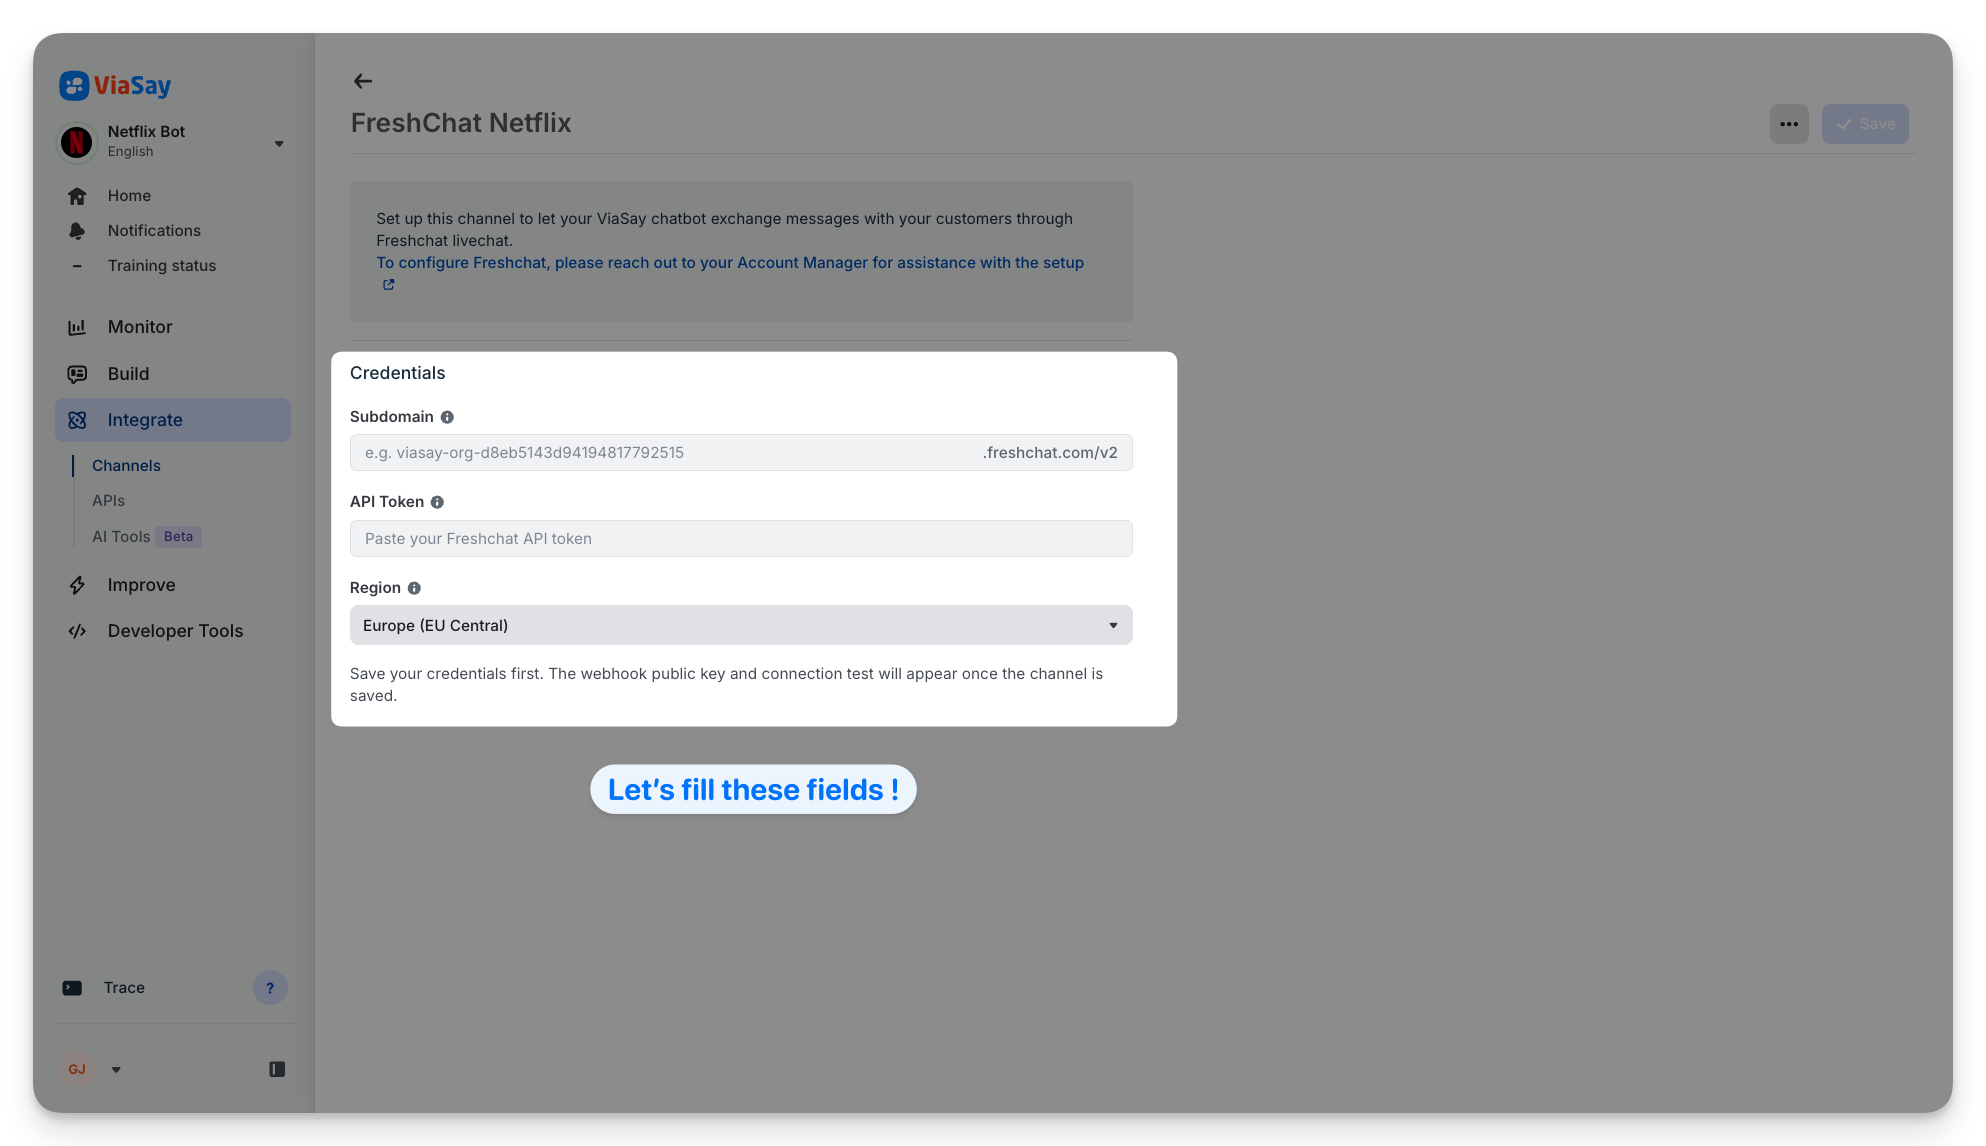
- Fill in the connection fields:
- Subdomain — the identifier from your Freshchat chat URL (for example
viasay-org-d8eb5143d94194817792515). ViaSay automatically appends.freshchat.com/v2. - API token — the API key you copied.
- Region — the data center where your Freshchat account lives (see below).
- Subdomain — the identifier from your Freshchat chat URL (for example
- Click Save.
Need a hand? The in-app setup also points you to your Account Manager, who can help you connect the channel.
Which region do I pick?
Freshchat hosts each account in one specific data center. Pick the one that matches your account — if it's wrong, the connection test will fail.
| Region | Data center |
|---|---|
| EU Central (most common) | api.eu.freshchat.com |
| US | api.freshchat.com |
| India | api.in.freshchat.com |
| Australia | api.au.freshchat.com |
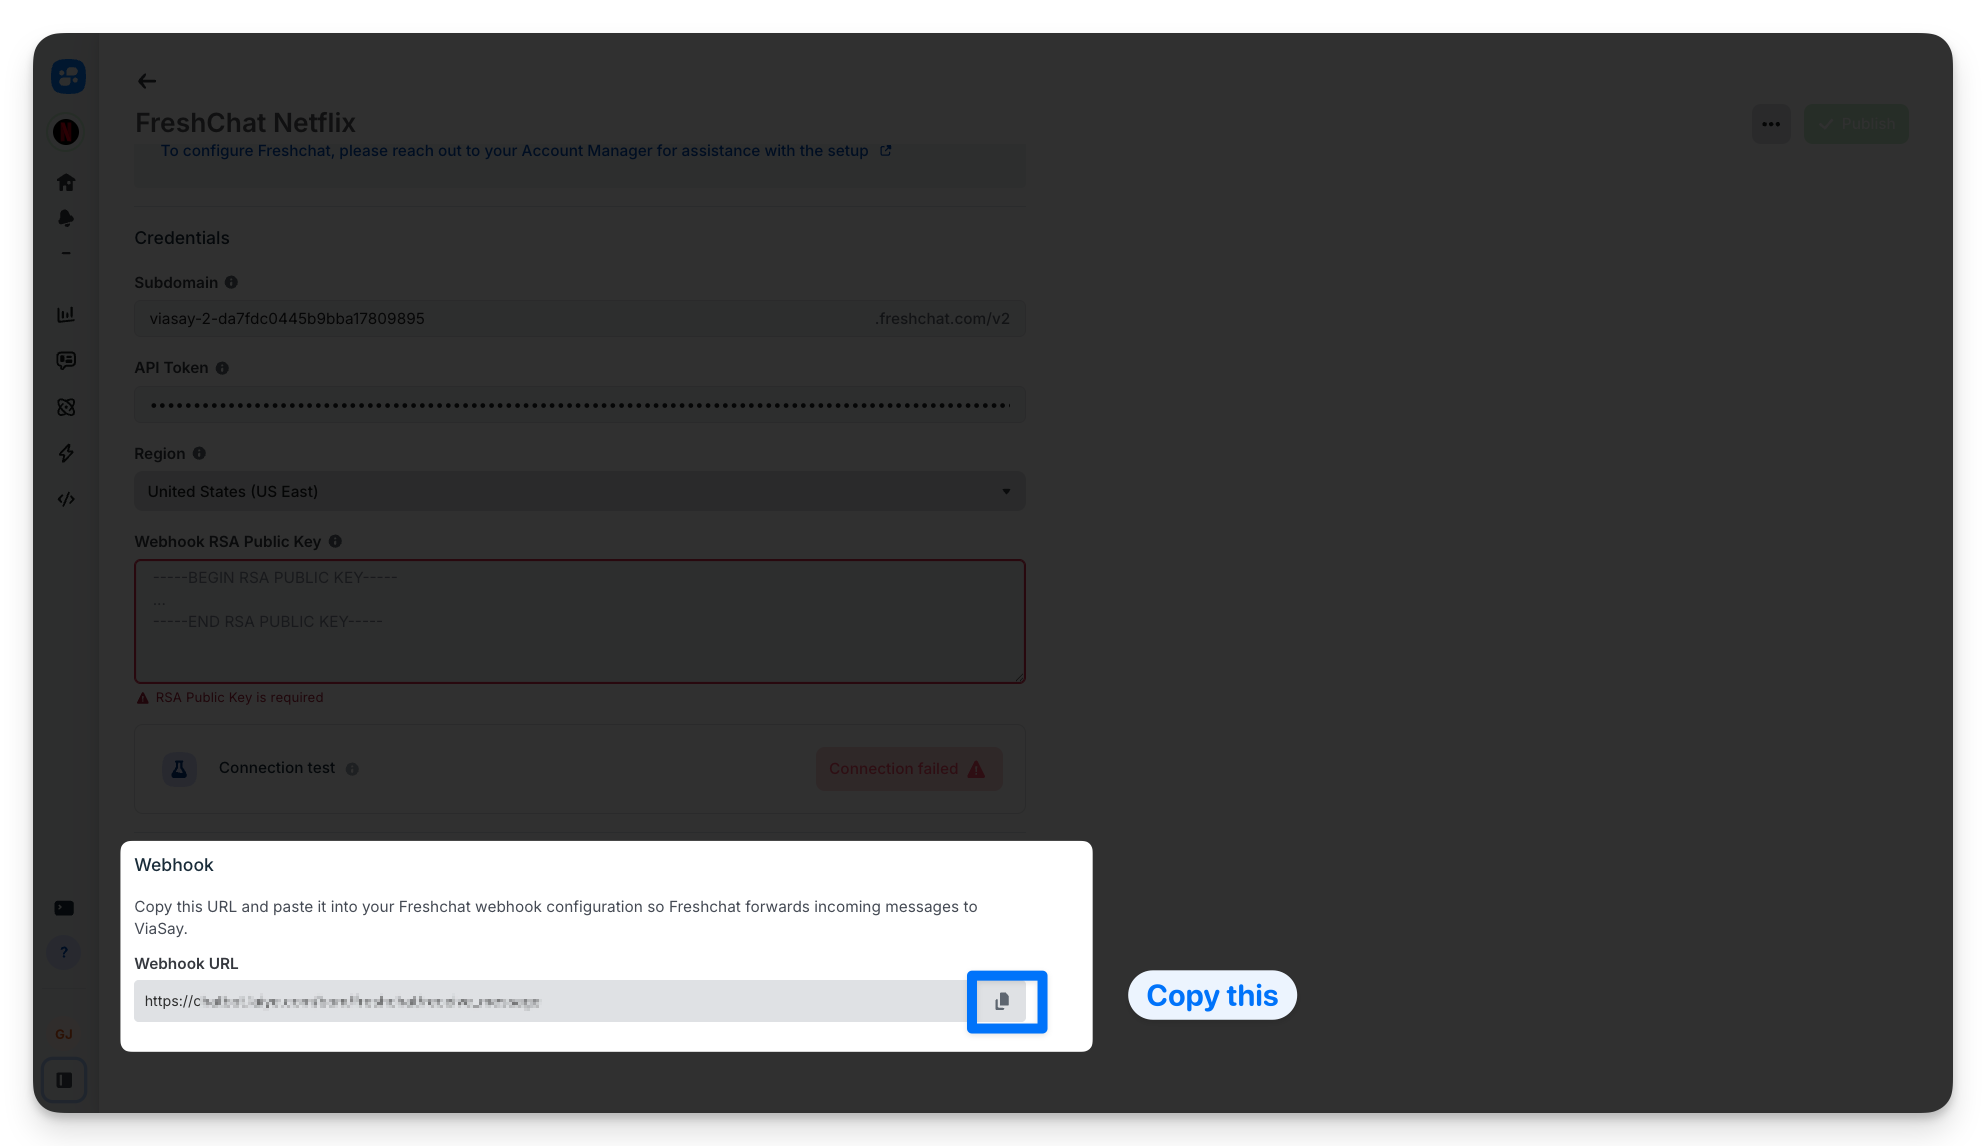
Step 3 — Set up the webhook
The webhook is what lets Freshchat send messages back to ViaSay — so when an agent replies, the customer sees it in the widget in real time. This section only appears once you've saved your credentials in Step 2.
The webhook can't be set up through the API. You configure it by hand in Freshchat, then paste a key back into ViaSay.
- In ViaSay, copy the generated Webhook URL shown on the saved channel.
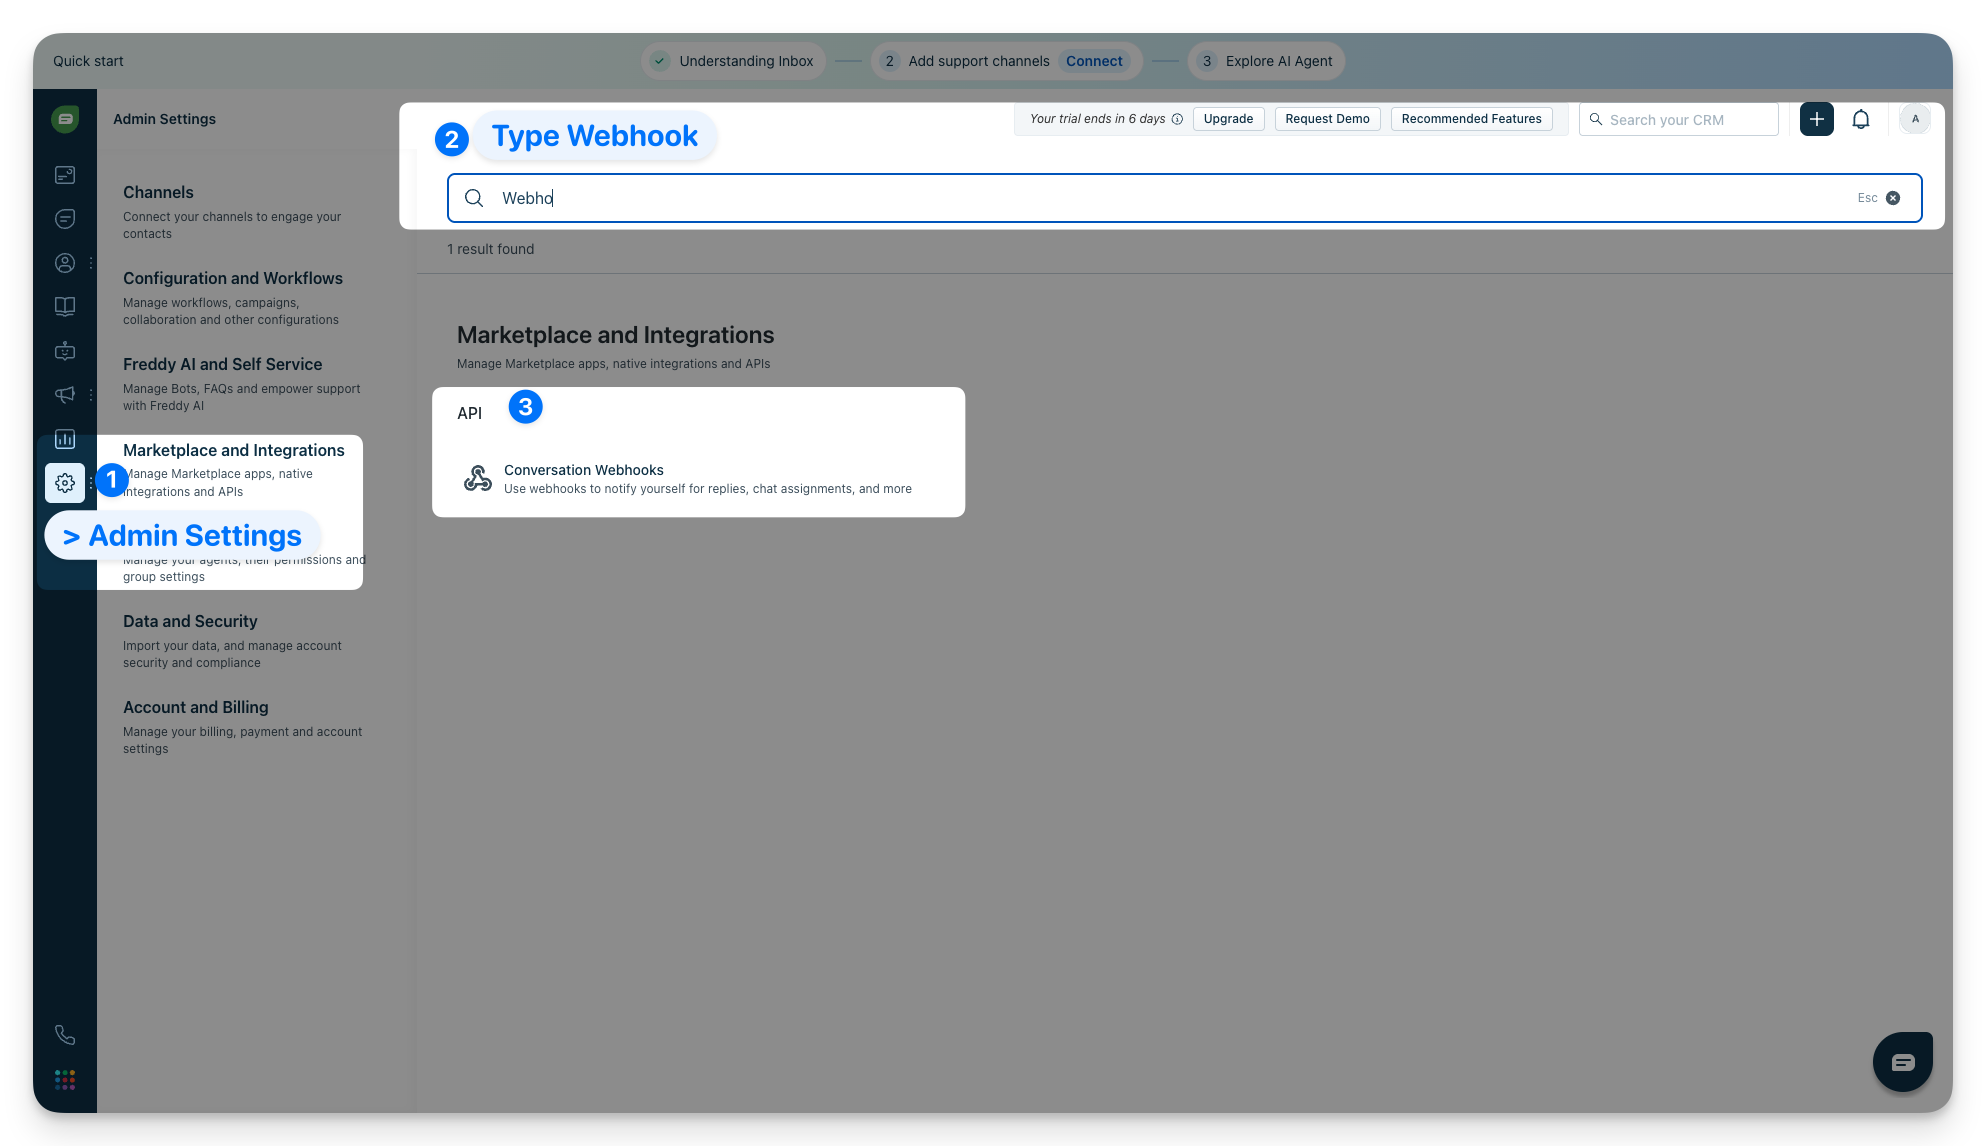
- In Freshchat, go to Admin Settings > Conversation Webhooks, paste the ViaSay webhook URL, and create the webhook.
- Freshchat then displays a Webhook RSA Public Key. Copy it.
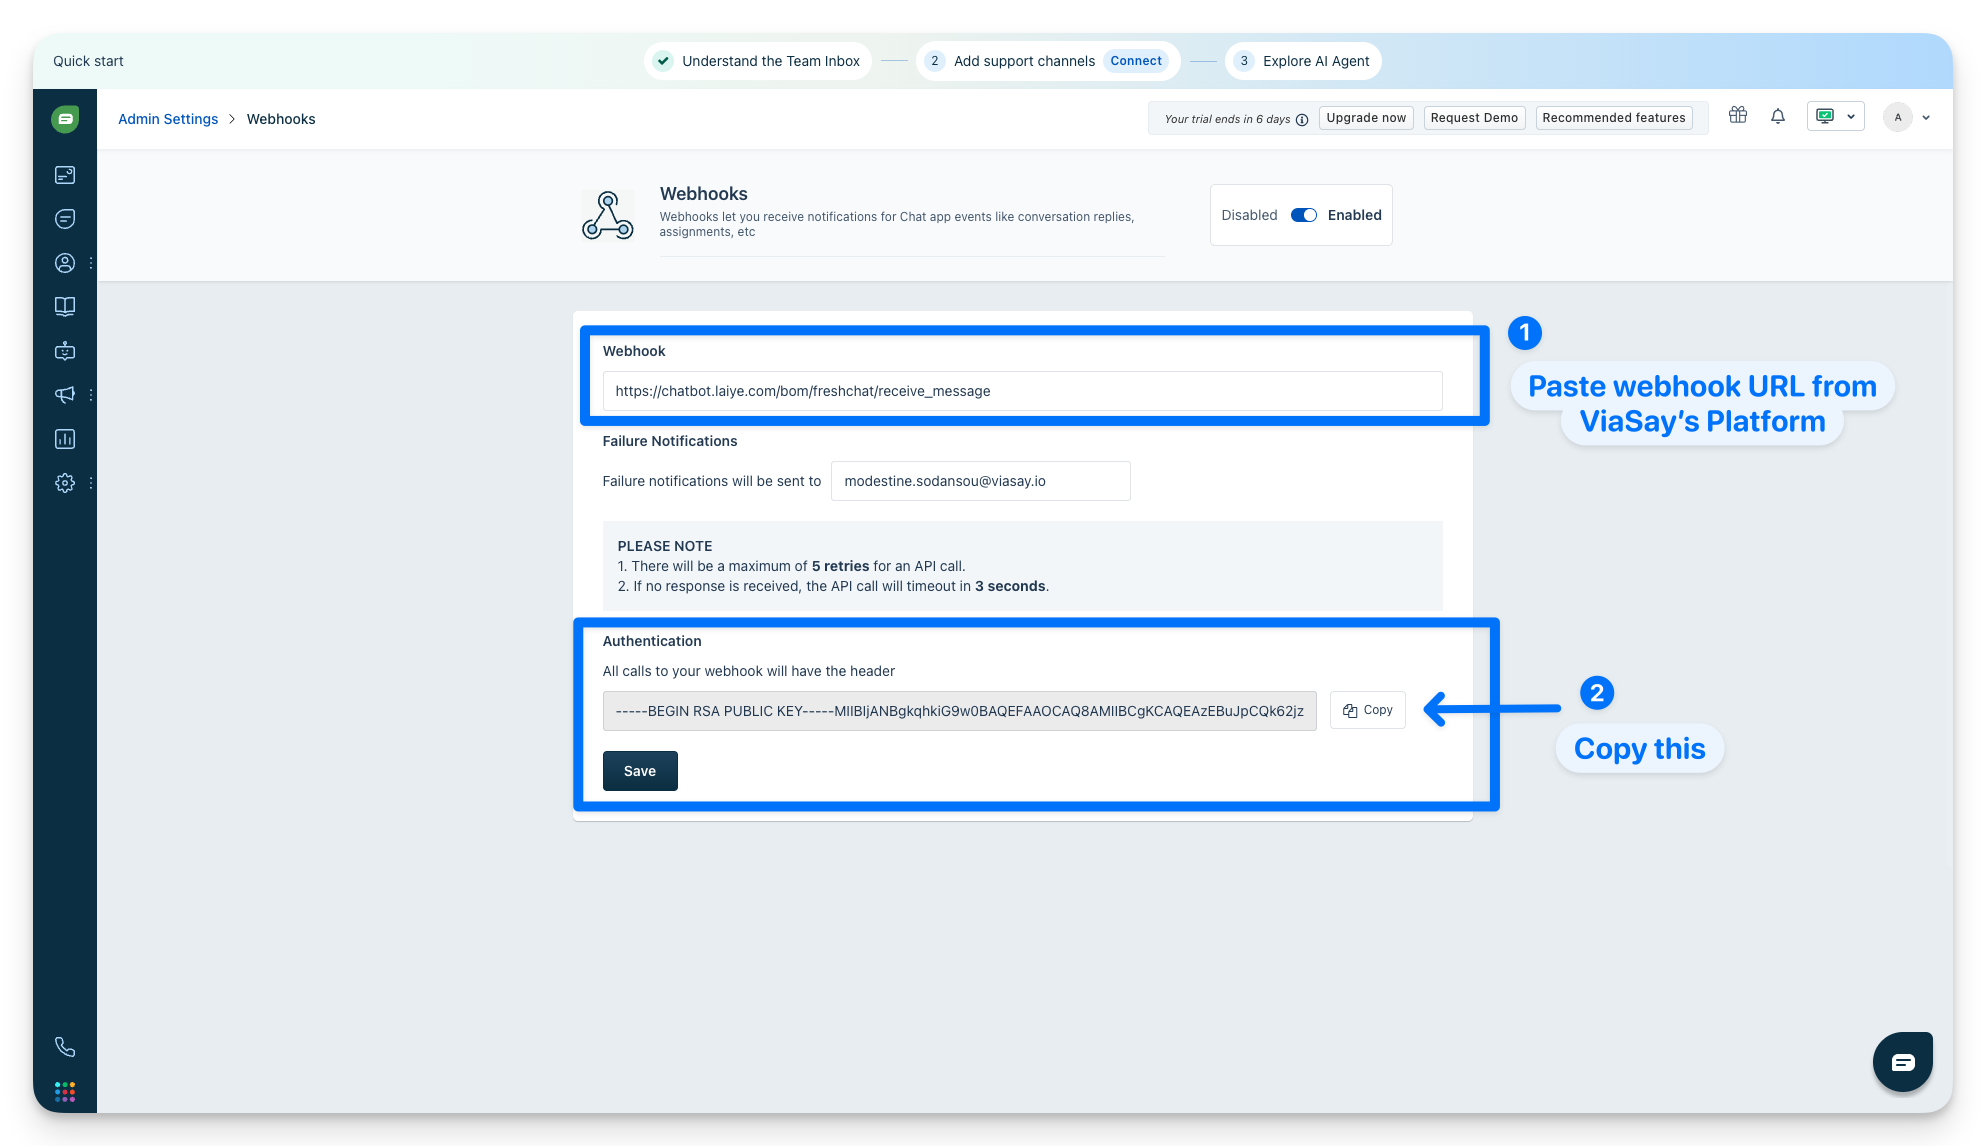
- Back in ViaSay, paste it into the Webhook RSA Public Key field, then click Publish.
ViaSay uses this key to verify that incoming webhooks genuinely come from Freshchat.
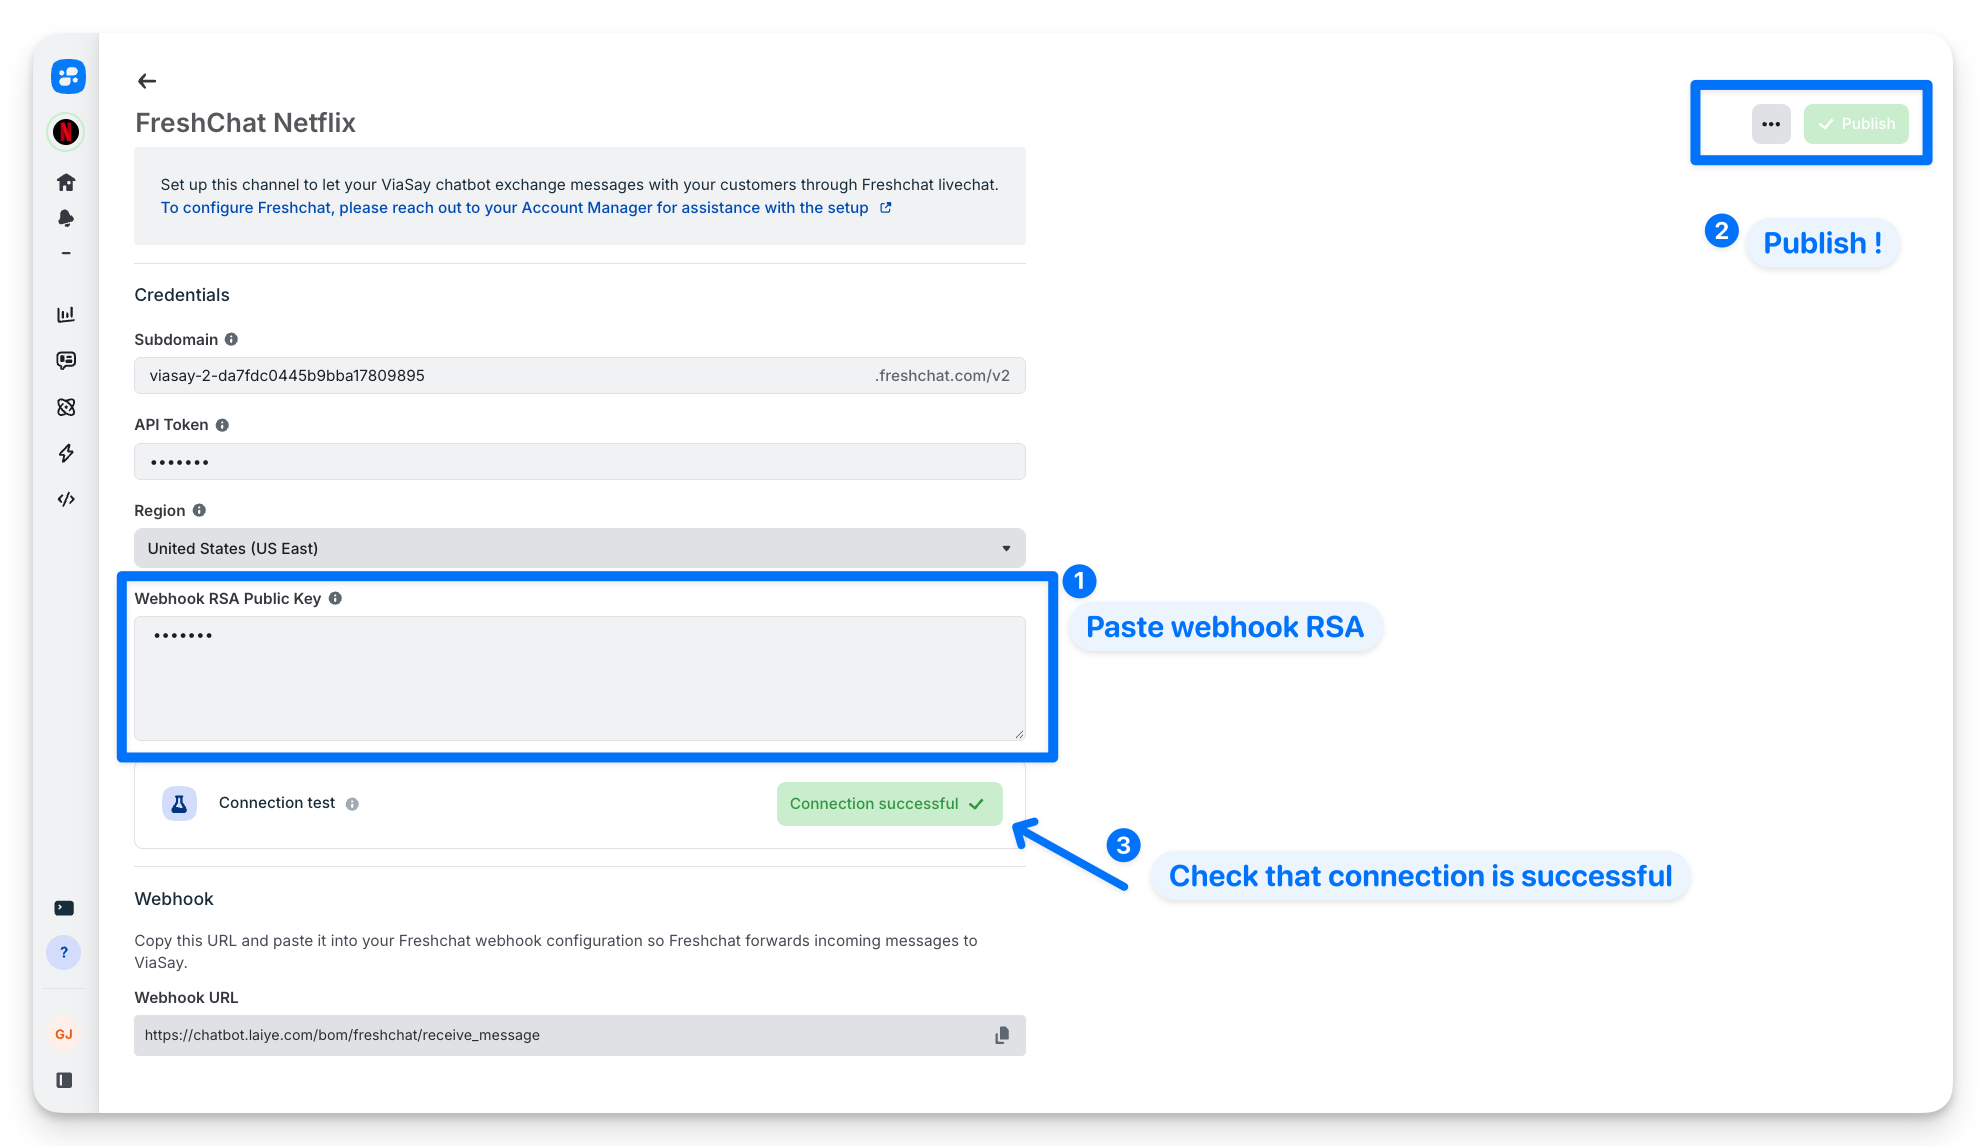
Test the connection
Click Test connection. ViaSay checks your saved credentials against Freshchat — a green result means everything is wired up and ViaSay can open conversations.
Step 4 — Add a handover to your flow
The channel is connected — now tell the bot when to hand over. You do this with a Live Chat Handover step in the Flow Builder.
- Open your flow and add a Live Chat Handover step where you want the transfer to happen (for example, after the bot fails to answer, or when the customer clicks "talk to a human").
- Choose the topic that should receive the conversation.
A topic is the Freshchat inbox the conversation lands in. The list is pulled straight from your Freshchat account.
- (Optional) Assign an agent group — the team that should handle it. When you set one, ViaSay can also check that agents in that group are available before handing over.
- Write the messages the customer sees when an agent is available, and when none are.
Topics and groups must exist in Freshchat first. Create your topics in Admin Settings > Web Chat Topics before referencing them here.
What happens during a handover
Here's what goes on behind the scenes each time the step runs:
- ViaSay opens a conversation in your Freshchat inbox — reusing the customer if they already exist, or creating them if not.
- The bot transcript is attached, so the agent reads the full story before replying.
- The conversation is routed to the topic (and group) you chose.
- Messages flow both ways: the agent replies in Freshchat, the customer sees it in the widget, and the customer's answers go back to Freshchat — a real live chat.
- When the agent resolves the conversation, ViaSay is notified and closes the session.
Reference
Supported regions
| Region | Base URL |
|---|---|
| EU Central (default) | api.eu.freshchat.com |
| US | api.freshchat.com |
| India | api.in.freshchat.com |
| Australia | api.au.freshchat.com |
Webhook events ViaSay listens to
| Event | What it means |
|---|---|
message_create | A message was sent in the conversation — agent replies are forwarded to the widget |
conversation_resolution | An agent marked the conversation as resolved |
conversation_reopen | A resolved conversation was reopened |
Troubleshooting
If ViaSay won't connect to Freshchat, check that:
- The region matches your Freshchat account's data center.
- The API token is valid and was copied from API details for chat.
- The subdomain matches your Freshchat chat URL.
- The webhook is set up in Freshchat and the public key is saved in ViaSay.