
How to pass variables through the widget script?
This tutorial shows you how your chatbot can tap directly into your website’s data to:
- Personalize conversations: Greet users by name when they’re logged into their account.
- Boost conversions: Remind shoppers how many items they have in their cart—and what they are.
- Power dynamic logic: Send a unique customer ID so your bot can call an external API and fetch loyalty points, order status, or plan details.
In short, this feature let you take any piece of info from your site and feed it straight into your ViaSay chatbot—turning static bots into context-aware assistants that drive engagement and satisfaction.
How it works ?
To do so, you will use a User channel variables. Once created, they behave like any other Custom Variable across the ViaSay platform—usable in flows, conditions, and messages.
You “push” values from your webpage into the bot by setting HTML attributes on the <destygo-webchat> element.
Step 1 : Create a User Channel Variable
In the ViaSay platform, navigate to Build → Variables → User channel.
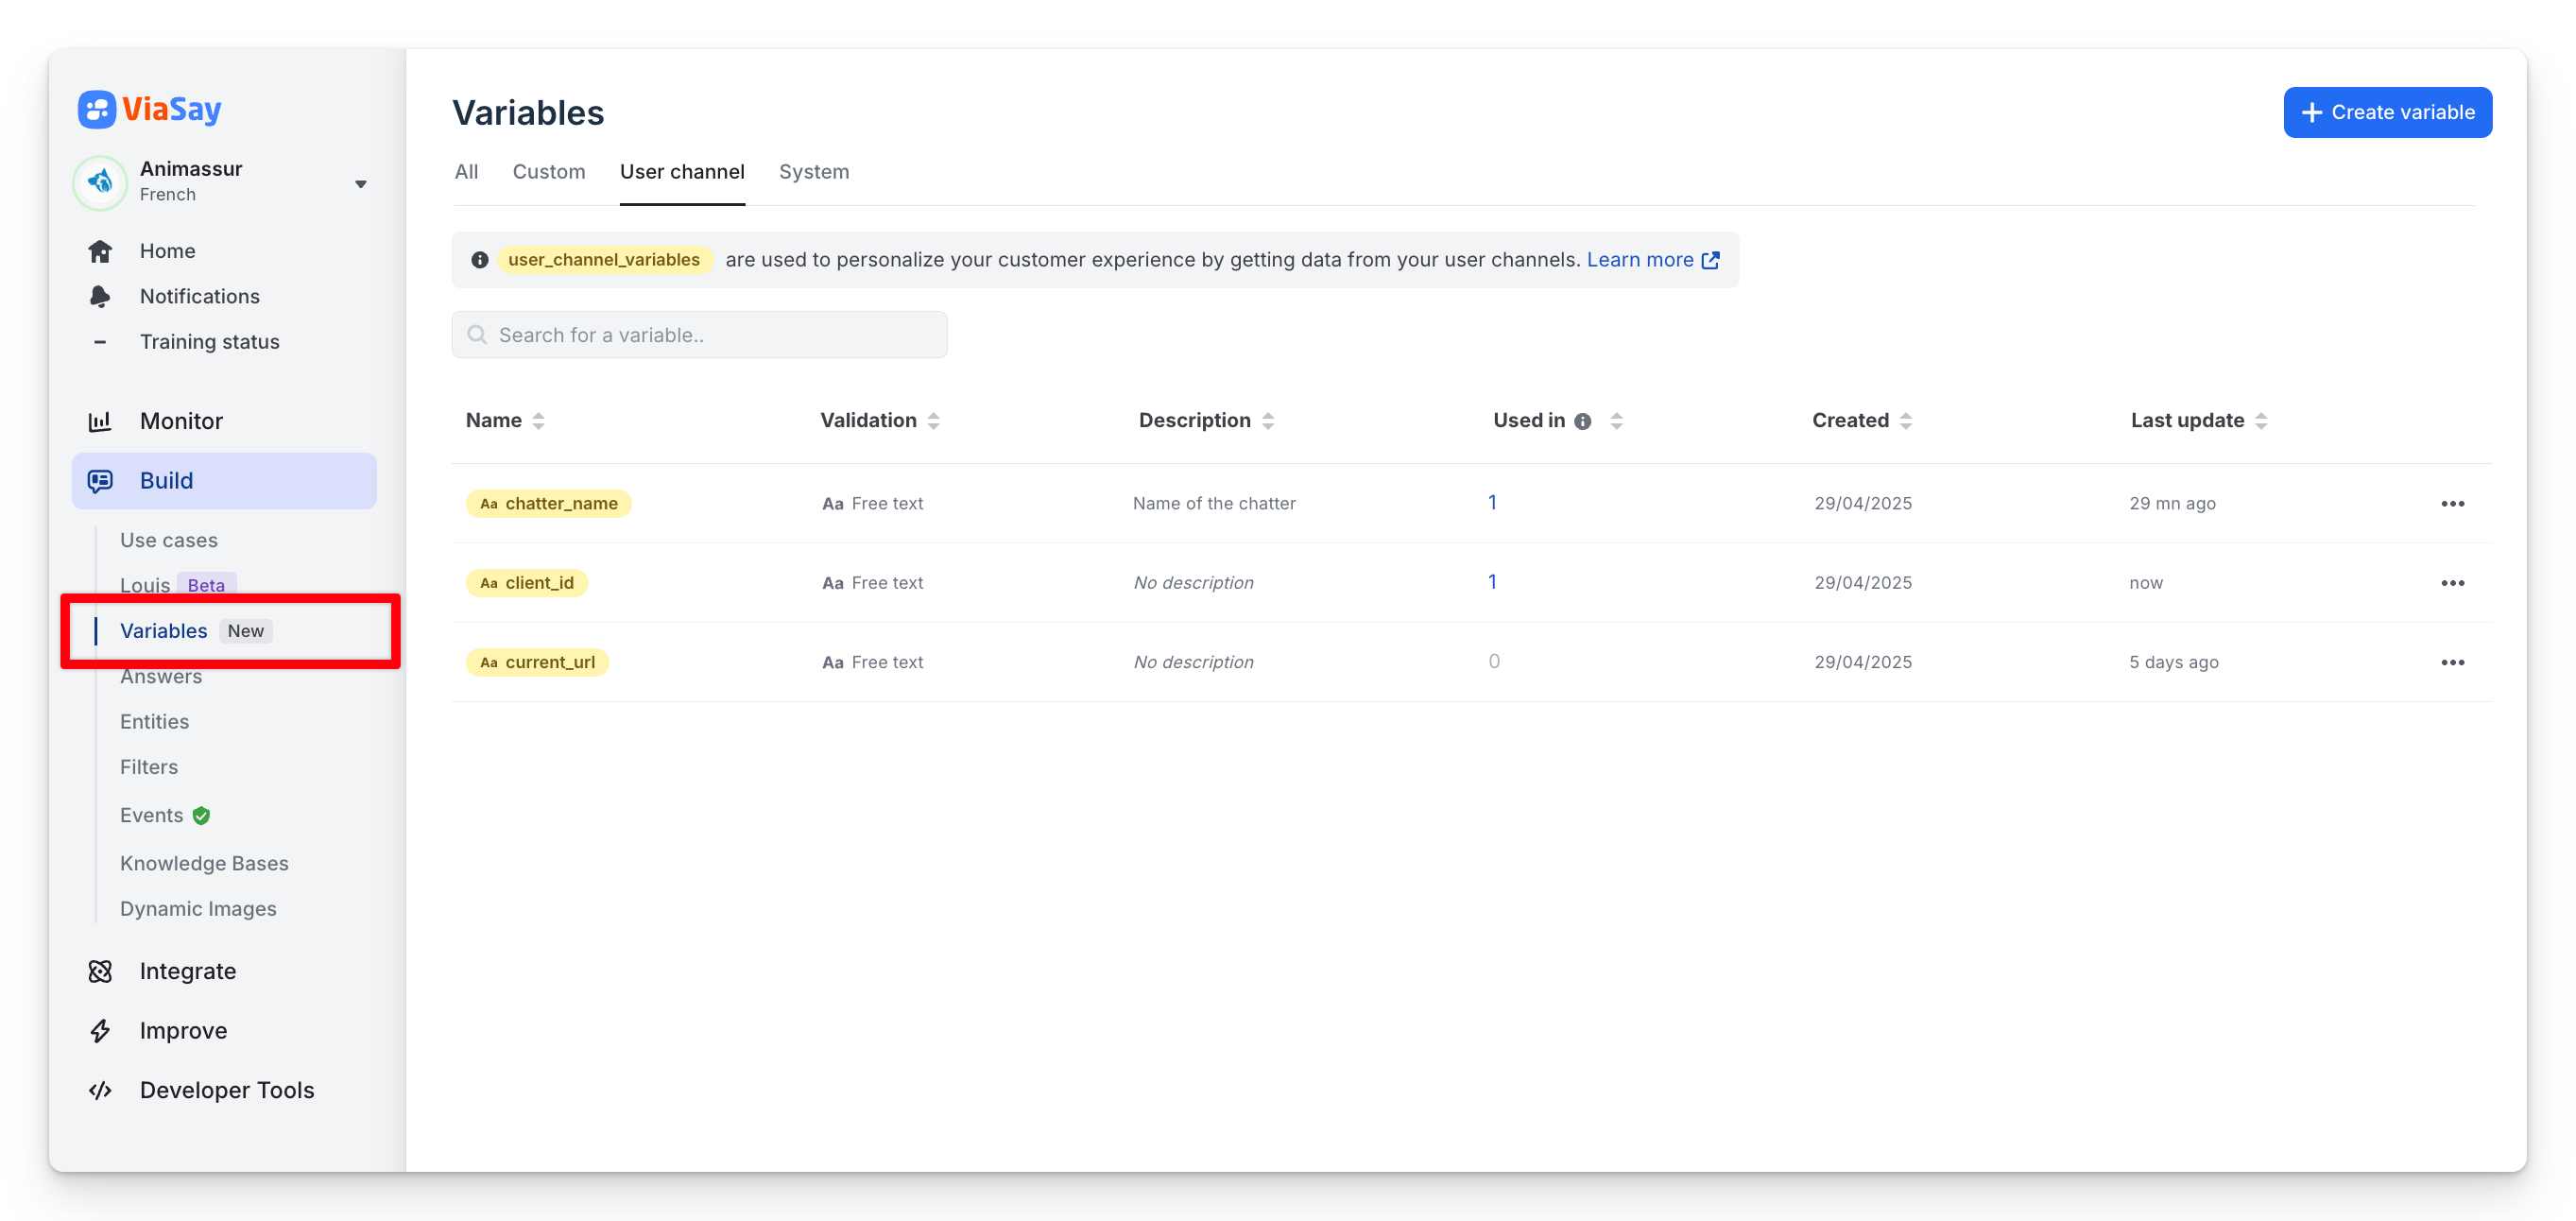
Click Create variable, select User channel variable, then enter a Variable Name (e.g. user_firstname) and add an optional Description.

When saved, your variable appears in the list—ready for use in any flow, condition, or message.
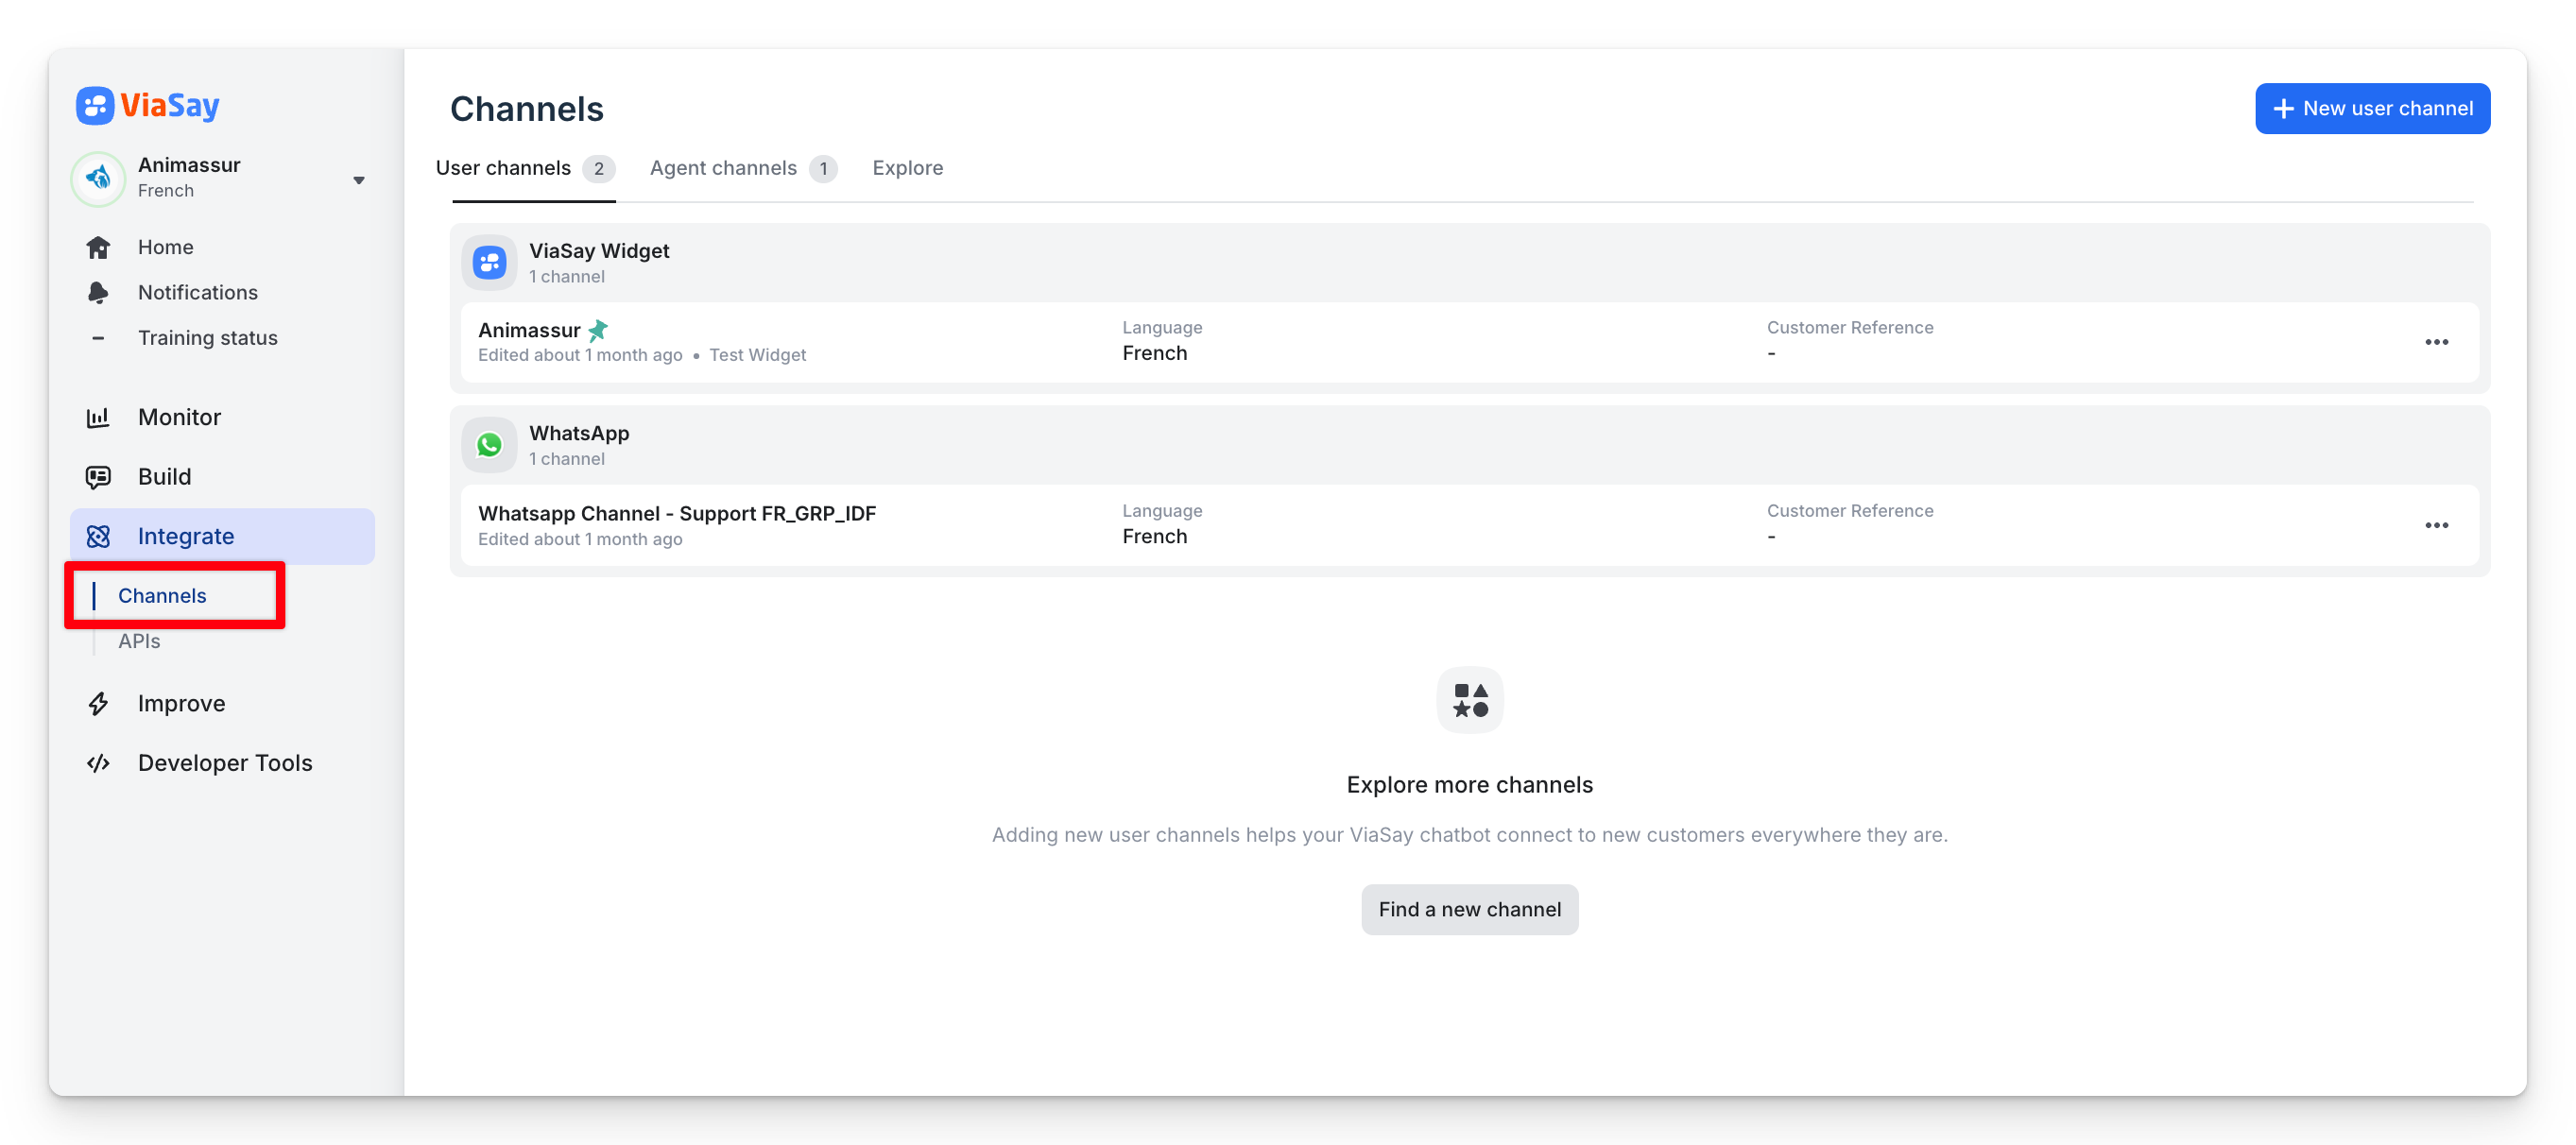
Step 2 : Pass variables through your HTML integration snippet
You’ll modify the standard widget embed code to include your variables.
First, copy the widget embed code found under Integrate → Channels → ViaSay Widget.
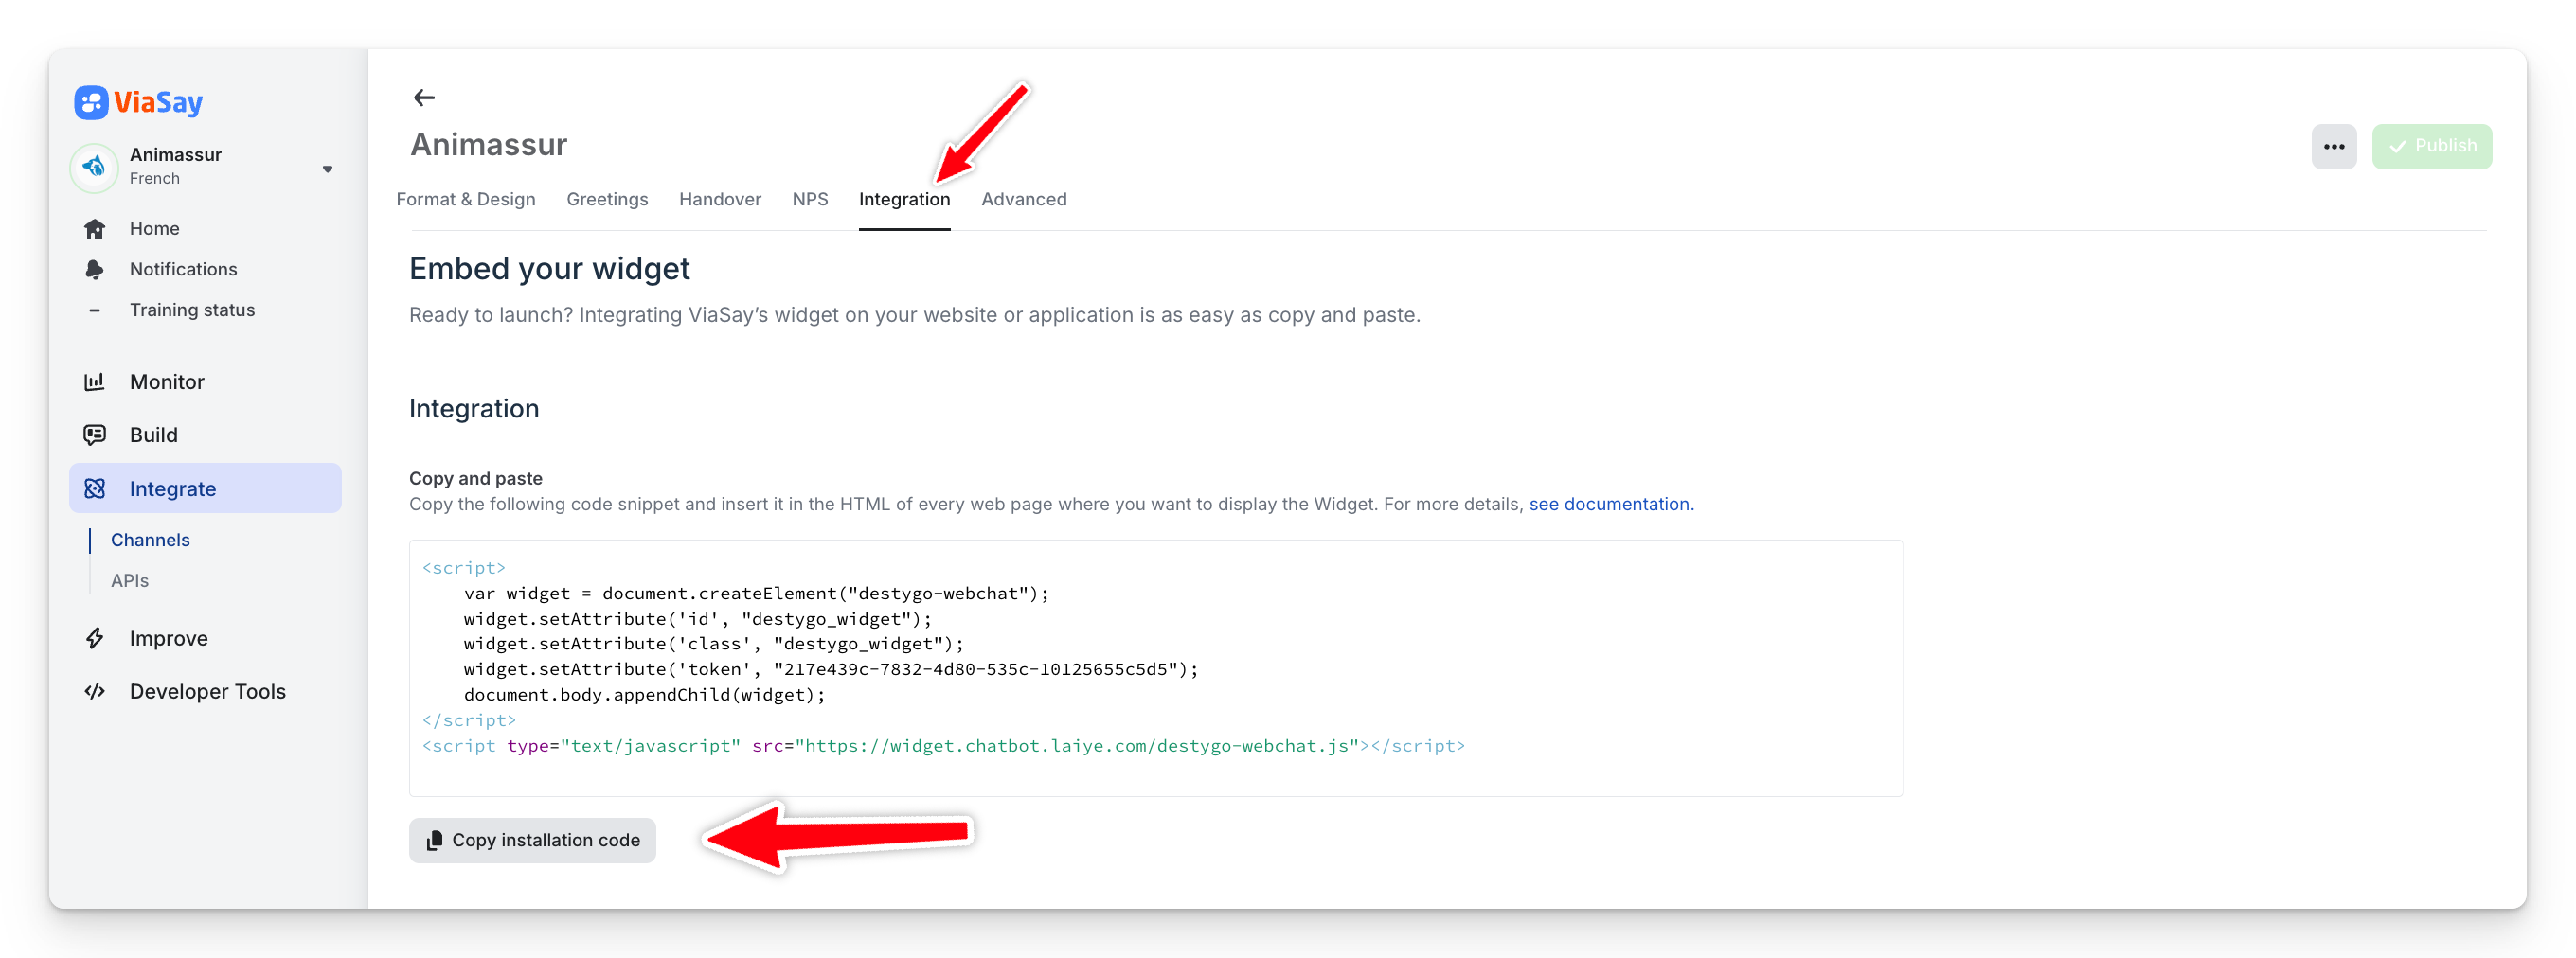
To pass data from your site into the chatbot, you simply add extra setAttribute calls before appending the widget.
Each call takes a key (the name of your User Channel Variable) and a value (either a hard-coded string or a JavaScript variable).
<script>
   var widget = document.createElement("destygo-webchat");
   widget.setAttribute('id', "destygo_widget");
   widget.setAttribute('class', "destygo_widget");

   widget.setAttribute('key', "value"); <---- VALUE TO ADD

   widget.setAttribute('token', "here_is_your_widget_token");
   document.body.appendChild(widget);
</script>
For example, if you want to pass the visitor’s name, their ID and their subscription plan, you would update the snippet like this:
<script>
	var widget = document.createElement("destygo-webchat");
  widget.setAttribute('id', "destygo_widget");
  widget.setAttribute('class', "destygo_widget");
  widget.setAttribute('token', "217e439c-7832-4d80-535c-10125655c5d5");
  widget.setAttribute('chatter_name', chatter_name);
  widget.setAttribute('client_id', client_id);
  widget.setAttribute('client_plan', client_plan);
</script>
Remember that attribute names are case-sensitive and must be all lowercase (so chatter_name works, but Chatter_Name does not). That’s it—once this is in place, your bot will receive chatter_name, client_id and client_plan as variables you can reference throughout your Flow Builder.
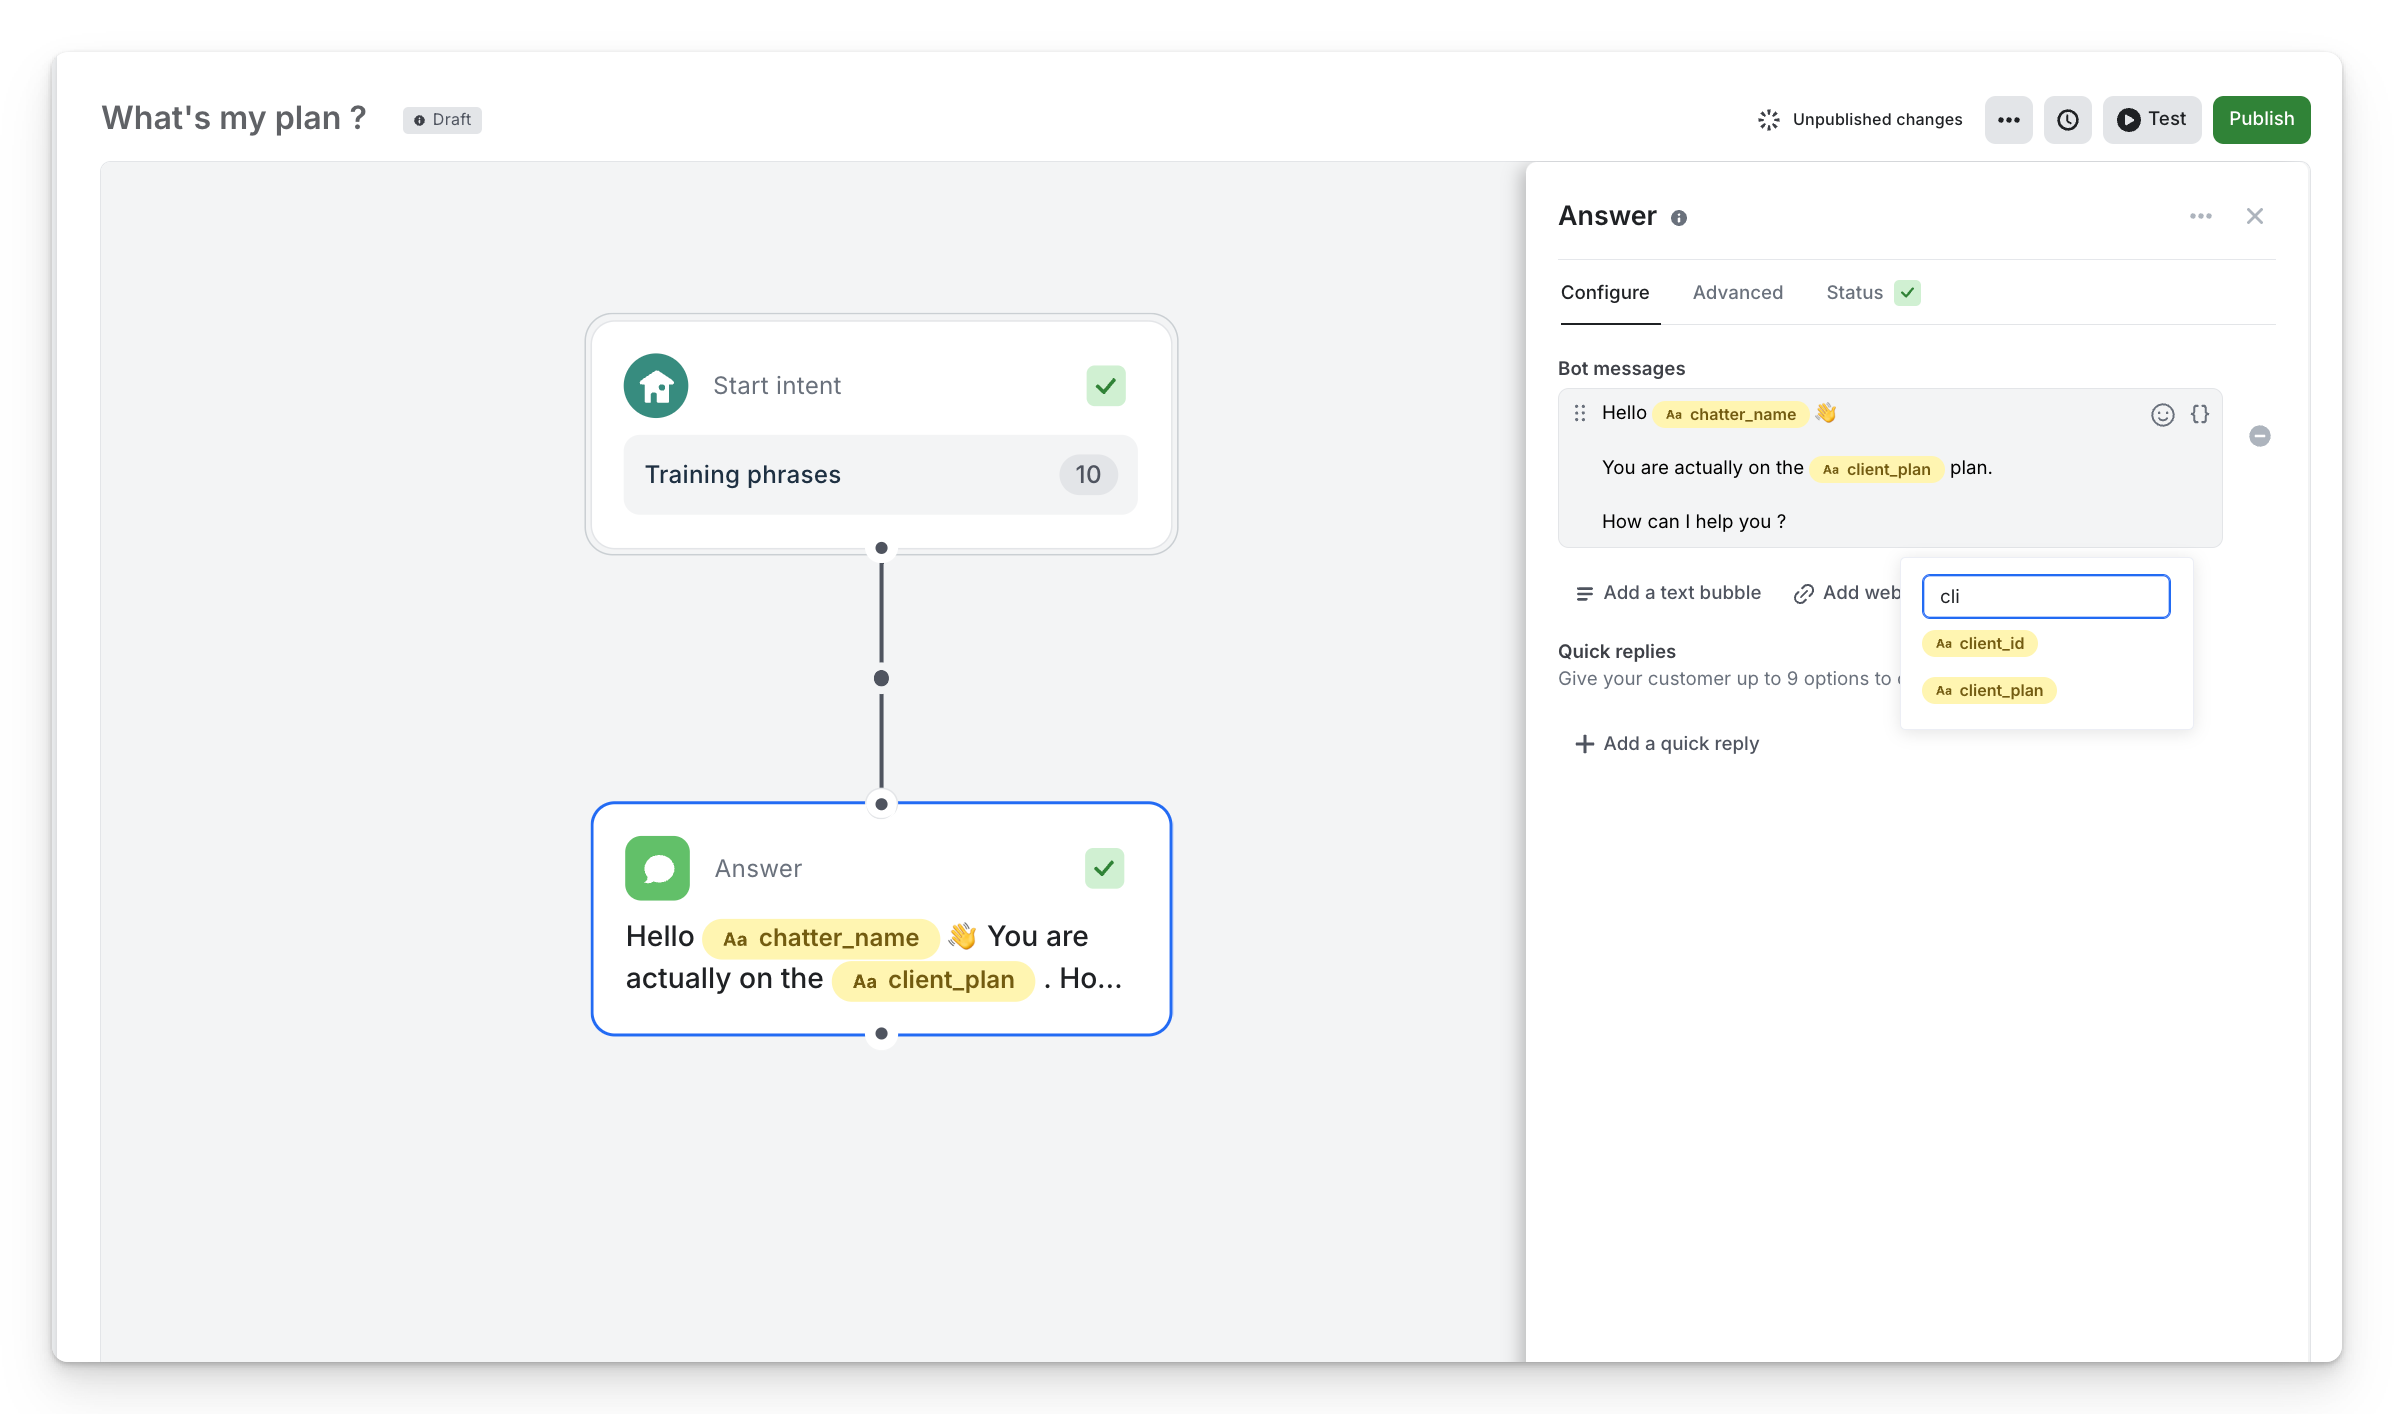
Step 3 : Use the variable in the Flow Builder
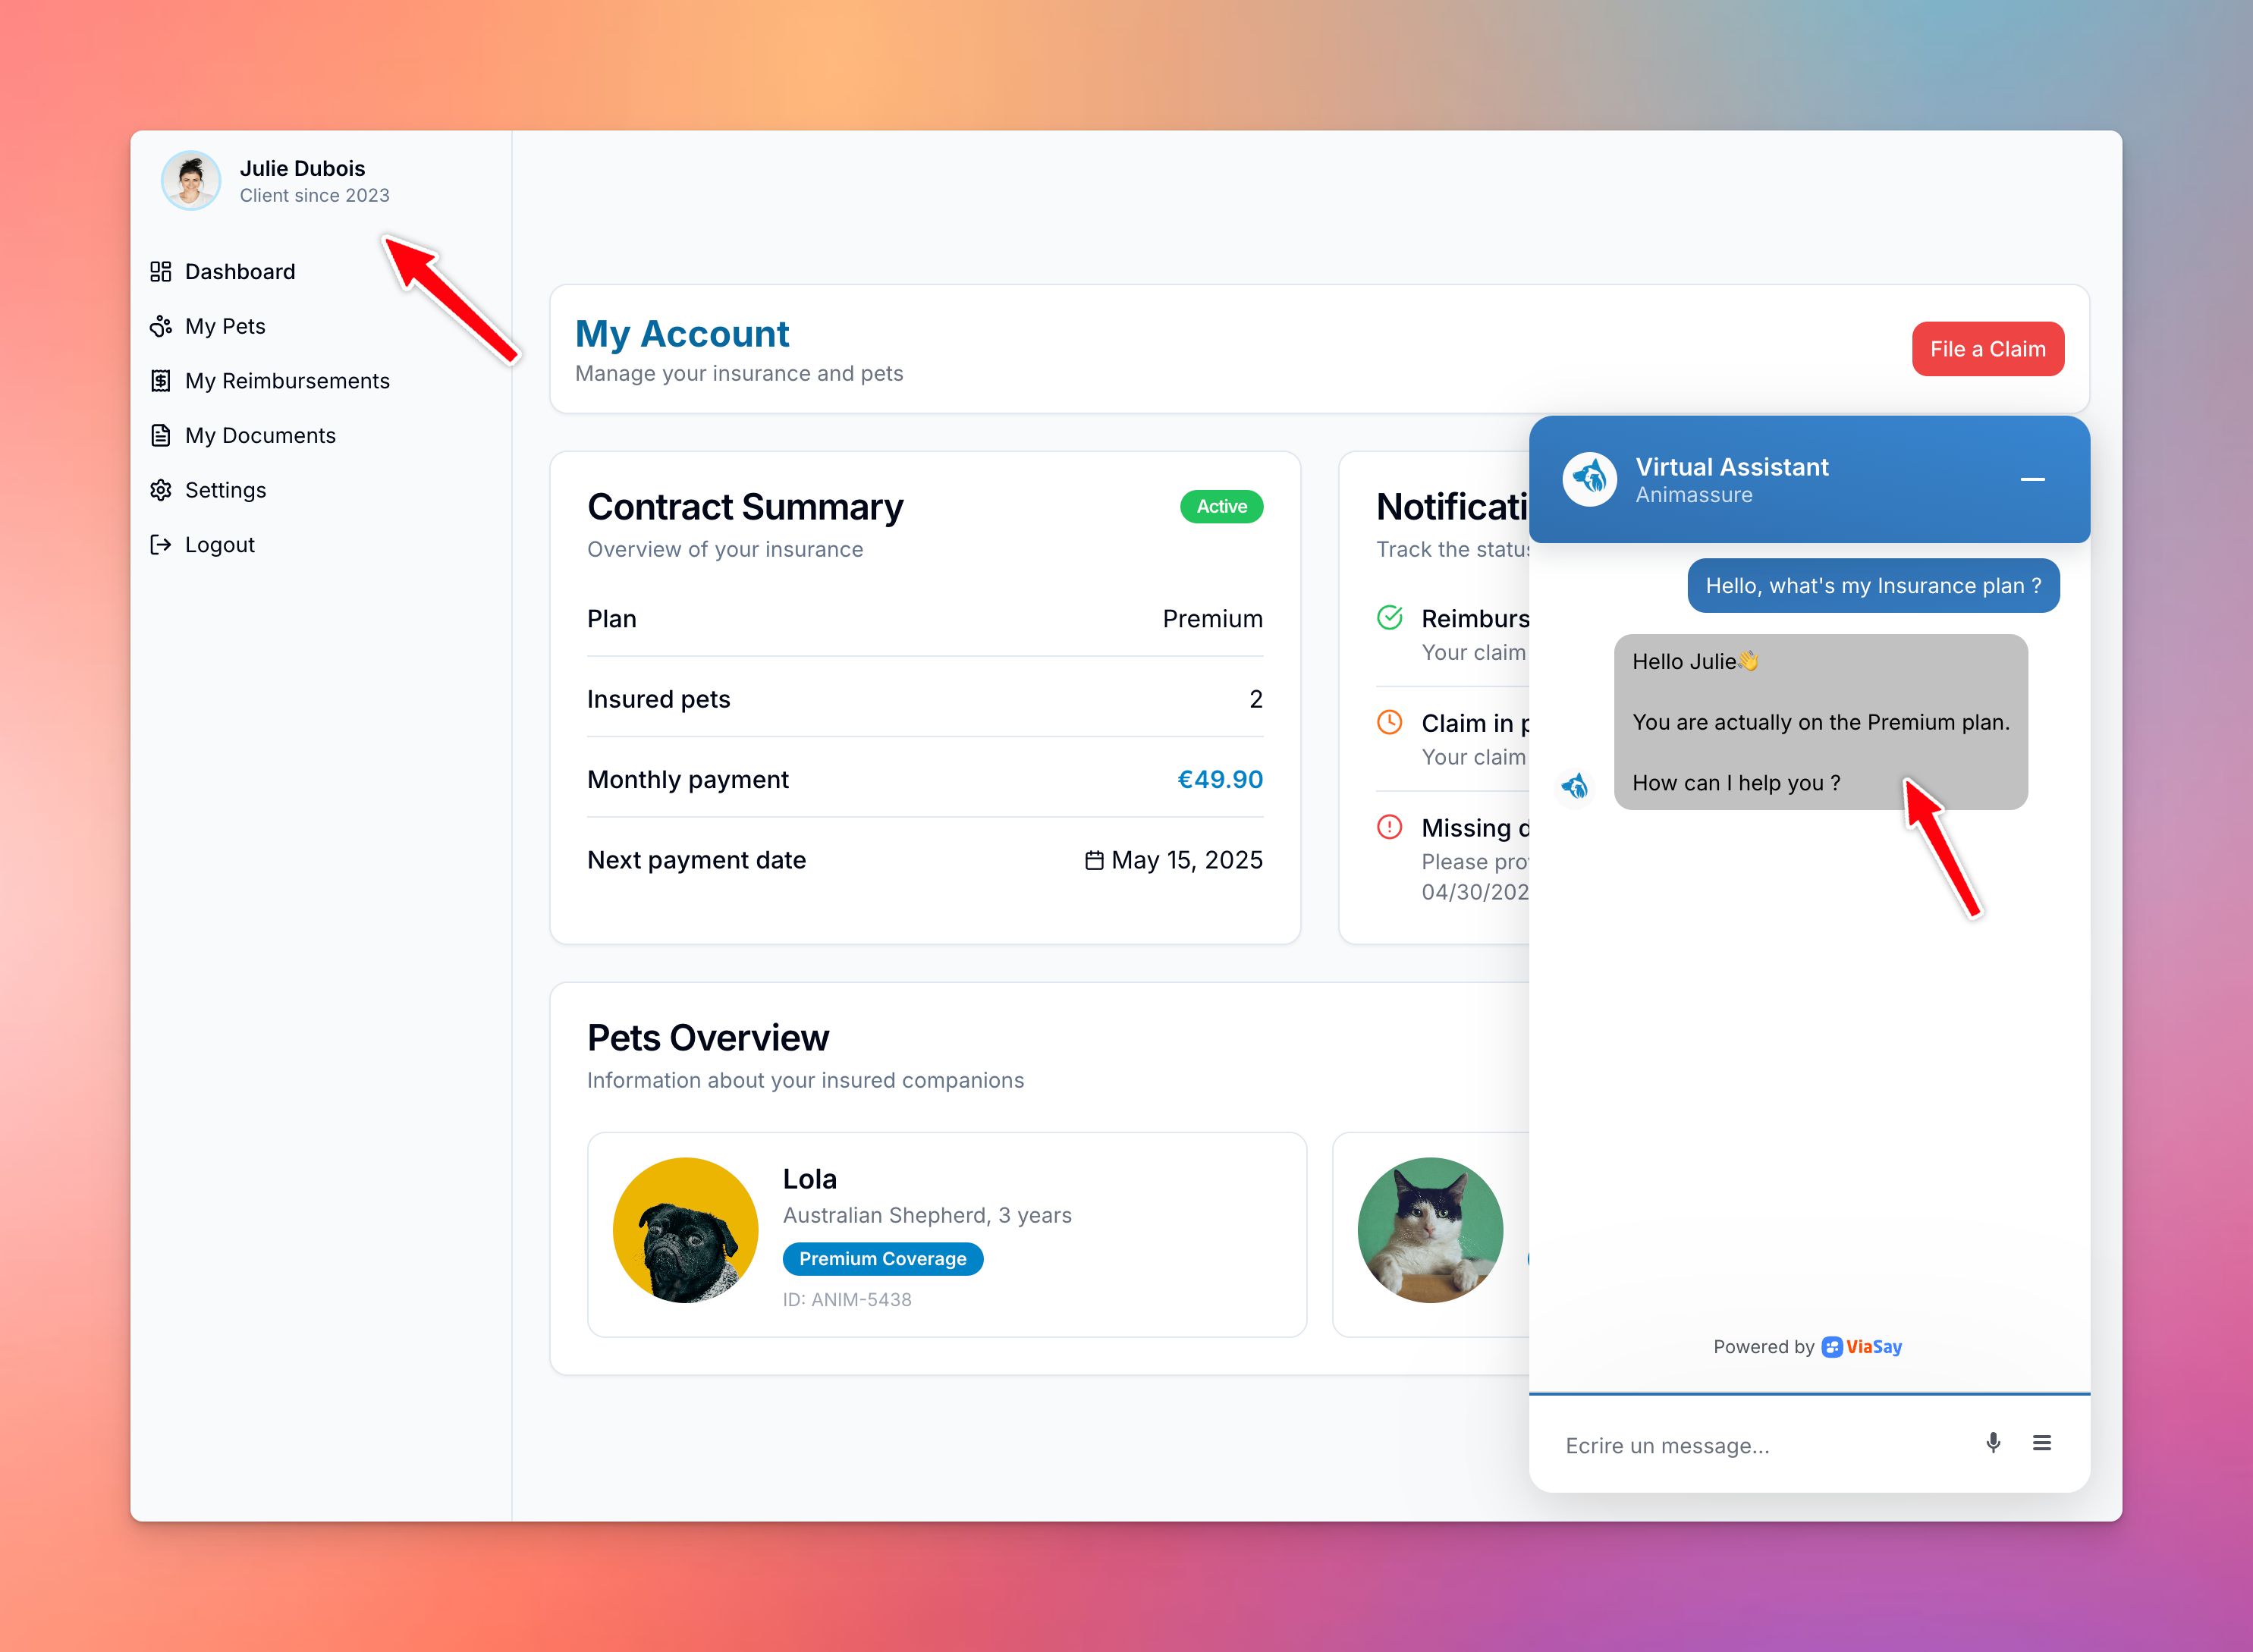
Now that your webpage is pushing live values into the chat widget, head over to the Flow Builder to see them in action. Anywhere you would normally type text, you can simply insert {{variable_name}} and ViaSay will replace it with the value you passed.
For example, in a Answer step you might write:
If you need to fetch additional data - for instance, getting the user’s latest invoice status - you can include the same variable in an API Call step. In the configuration panel on the right, drop {{client_id}} into your JSON body or URL, then map the API response to a new bot variable:
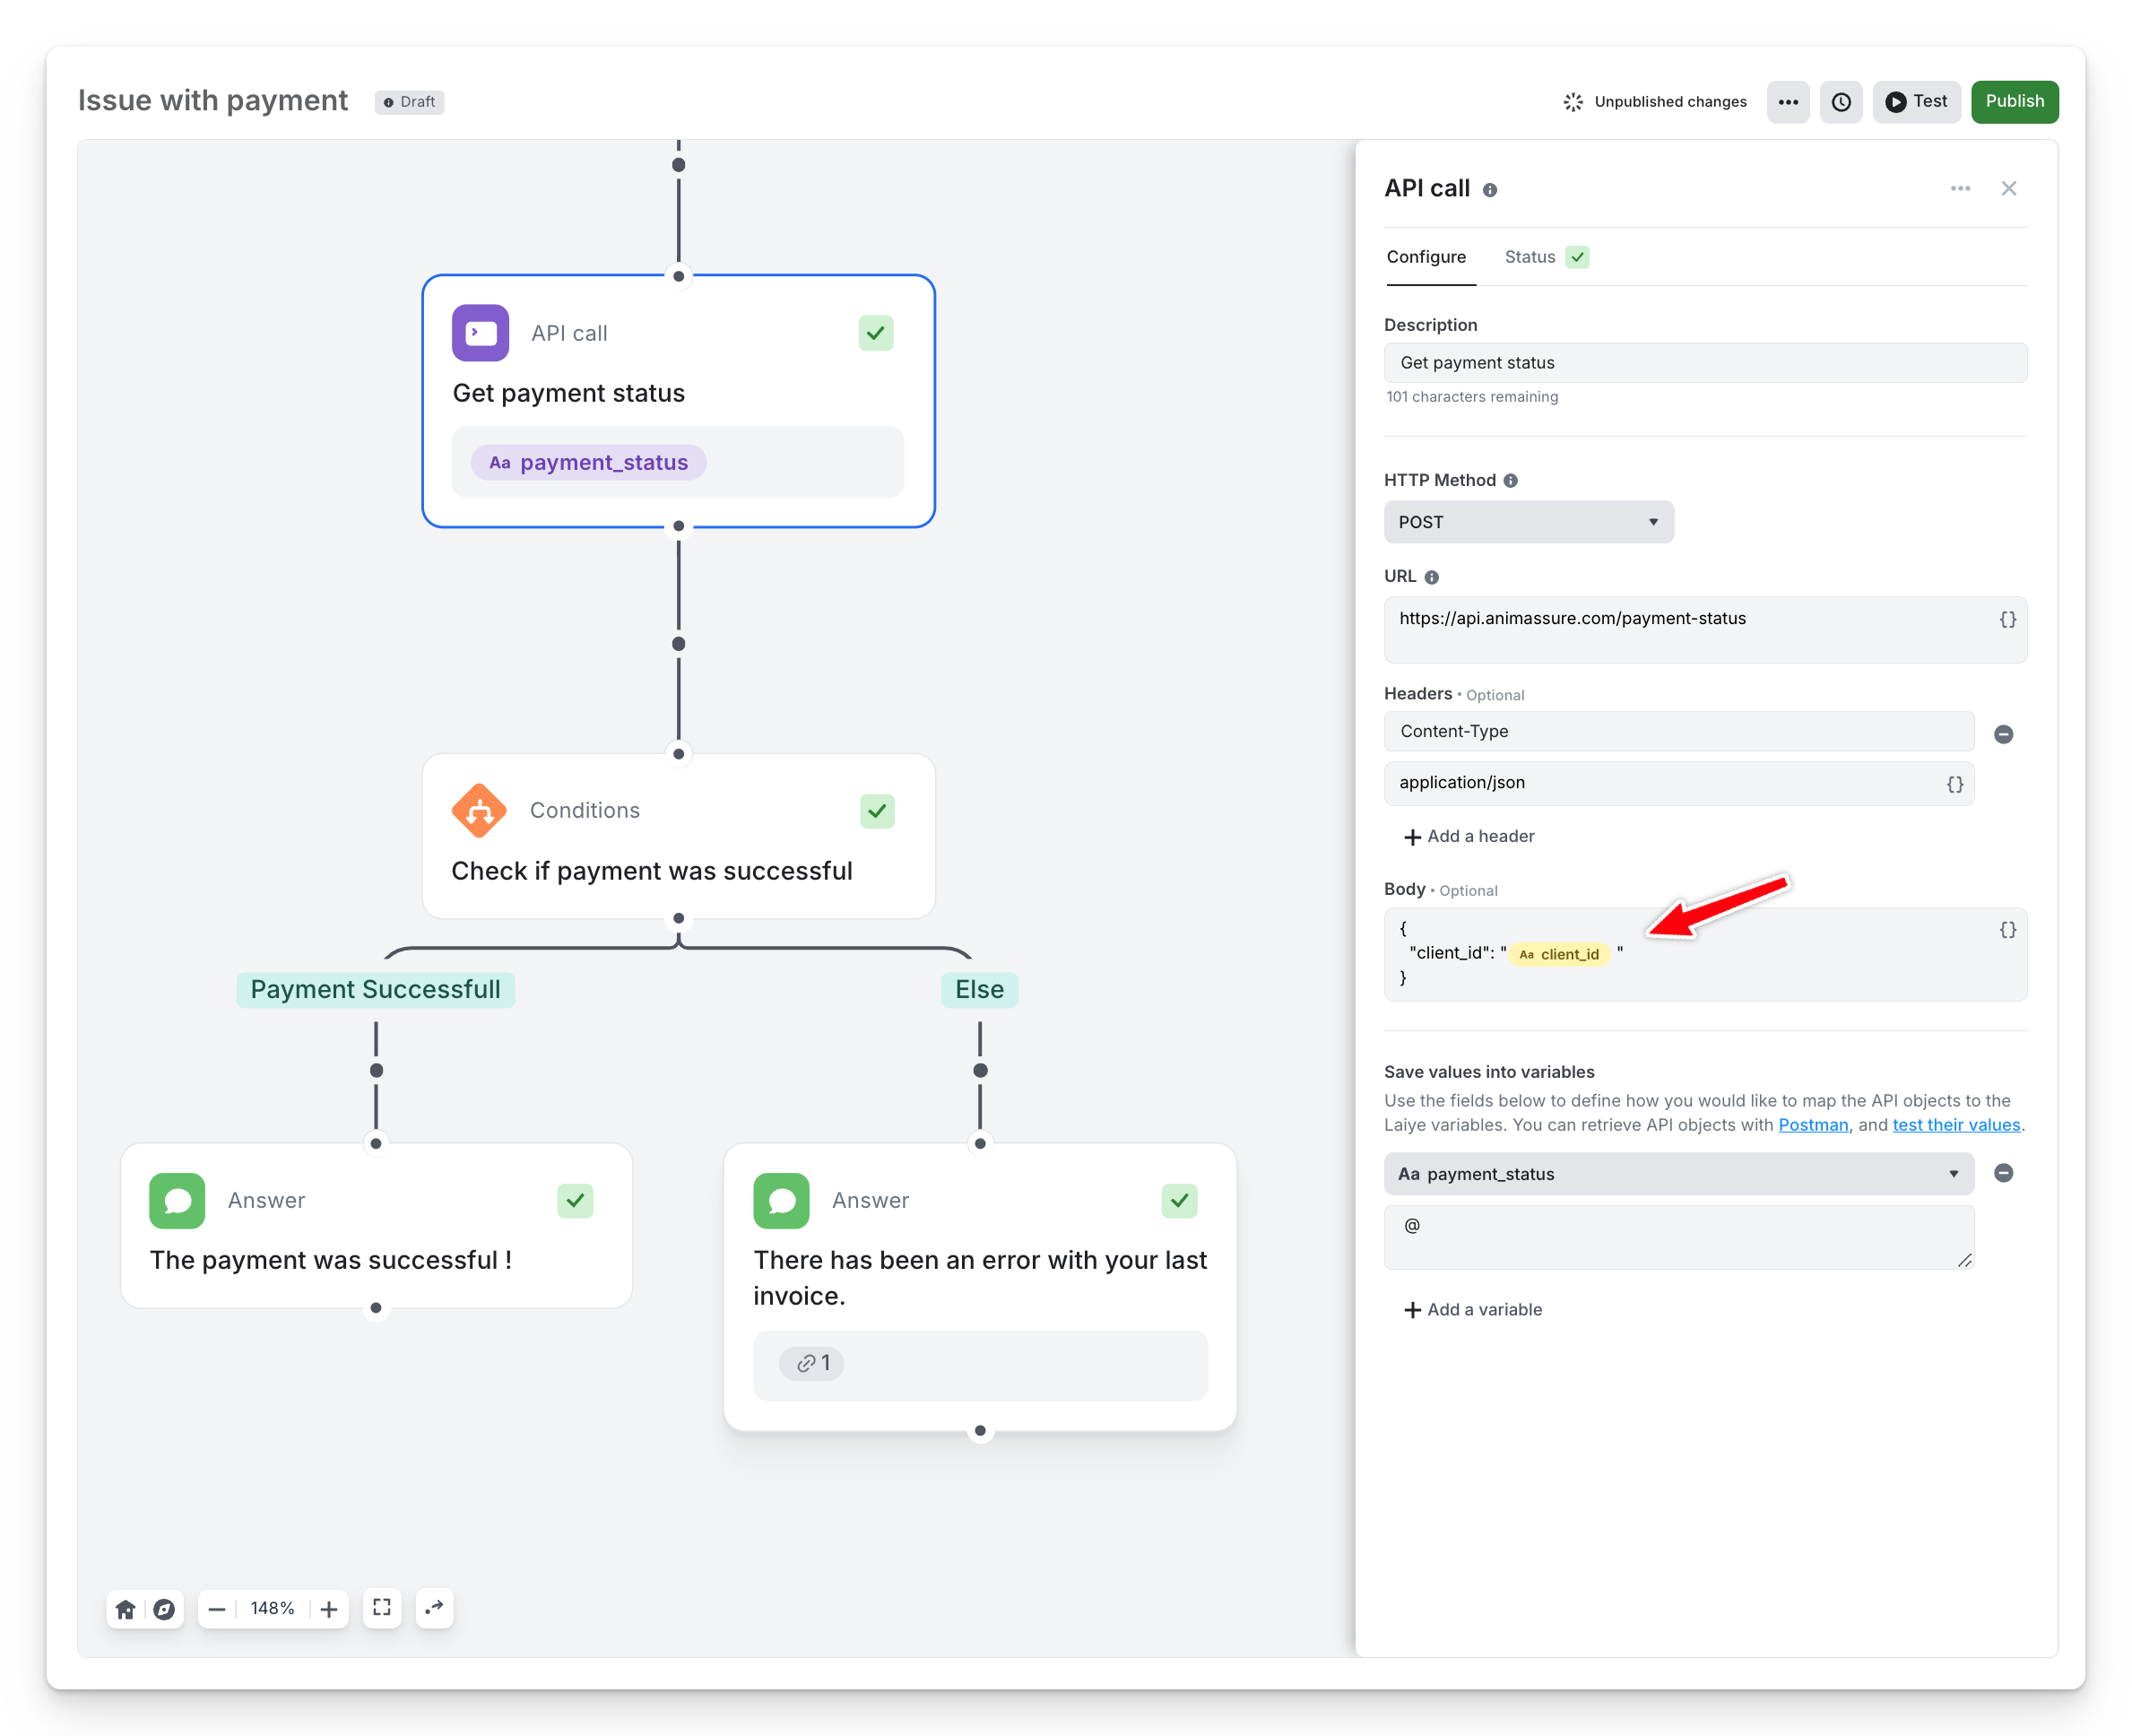
From there, add a Condition step immediately after the API call. For example, if {{payment_status}} equals "failed", you could route the conversation to a human agent; otherwise, continue with an automated confirmation message.
Let's test
Finally, always test your flow in Production—only then will your User Channel Variables be populated. Load your public webpage, trigger the chat, and verify that each {{…}} placeholder is replaced with the correct live data.
If you’re passing sensitive values (for example, user IDs or tokens) to your API, make sure to encrypt them first. For a step-by-step walkthrough on setting up encryption in your widget integration script, see our Encryption Guide.