How to pass variables through the widget script?
🔹 Introduction
This tutorial shows you how to customize your chatbot’s integration script by passing variables directly into the bot’s context. This helps streamline conversations and enhance the user experience.We'll walk through how to:
- Pass a user's name into the script.
- Optionally, pass encrypted data securely through the same script.
🔍 Where to find your integration script
You can locate your integration script directly from the ViaSay platform by navigating to:
INTEGRATE → USER CHANNELS → Your VIASAY Widget → INTEGRATION
- You then need to copy your integration script and paste it into your web page. In a standard HTML setup, it would look like this:
<!DOCTYPE html>
<html>
<head>
<meta charset="utf-8">
<meta http-equiv="X-UA-Compatible" content="IE=edge">
<title></title>
<meta name="description" content="">
<meta name="viewport" content="width=device-width, initial-scale=1">
<link rel="stylesheet" href="">
</head>
<body>
<h1>How can I pass variables through the integration script? </h1>
<script src="" async defer></script>
<!--Your integration script below -->
<script>
var widget = document.createElement("destygo-webchat");
widget.setAttribute('id', "destygo_widget");
widget.setAttribute('class', "destygo_widget");
widget.setAttribute('token', "here_is_your_widget_token");
document.body.appendChild(widget);
</script>
<script type="text/javascript" src="https://widget.destygo.com/destygo-webchat.js"></script>
</body>
</html>
🔧 How to pass variables through the integration script?
Important:
To test this feature, make sure you're outside of the ViaSay platform — on a real webpage that loads the widget with the values. Also, your bot must be in Production mode, as widgets aren’t fully available in Draft mode.
🧩 Example: Script with additional ('key', "value") pair
<script>
var widget = document.createElement("destygo-webchat");
widget.setAttribute('id', "destygo_widget");
widget.setAttribute('class', "destygo_widget");
widget.setAttribute('key', "value");
widget.setAttribute('token', "here_is_your_widget_token");
document.body.appendChild(widget);
</script>
<script type="text/javascript" src="https://widget.destygo.com/destygo-webchat.js"></script>
Note
Keys are case-sensitive. For example, key will work, but KEY won’t — so always use lowercase for your variable names.
Let's say you want to greet the user using their first name because they are already authenticated on the website. You can pass the variable user_firstname
in the script of the widget so it can be used by the bot.
🧩 Example: Script with custom variables
<script>
var widget = document.createElement("destygo-webchat");
widget.setAttribute('id', "destygo_widget");
widget.setAttribute('class', "destygo_widget");
widget.setAttribute('user_firstname', "Chuck");
widget.setAttribute('user_email', "[email protected]");
widget.setAttribute('token', "your_widget_token_here");
document.body.appendChild(widget);
</script>
<script type="text/javascript" src="https://widget.destygo.com/destygo-webchat.js"></script>
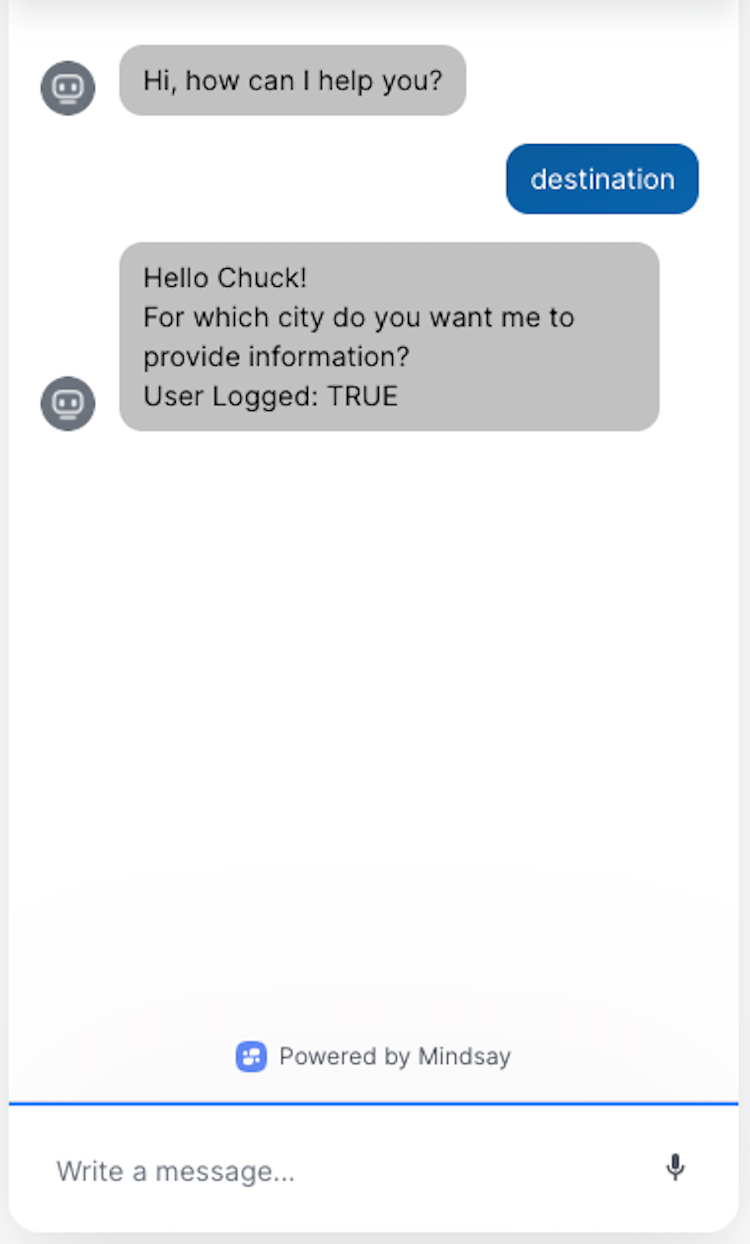
Let's say our user's name is Chuck, he is logged in and wants to get some information on a destination he is going to.
The widget will be passed a variable user.name containing the value "Chuck", and the answer will look like:
In the bot, you can use a case statement to check the value of the variable and personalize the conversation. For example, if you've passed the user's first name like this:
🔐 How to pass encrypted data through the integration script?
Before you start, make sure you’ve followed the encryption setup process.
Need help with encryption?
Follow this step-by-step guide to encrypt and decrypt data in your widget script.
🧩 Step 0 — Add encrypted data to your script
Once your encryption keys are generated, update your widget script to include the encrypted variable, like this:
<script>
var widget = document.createElement("destygo-webchat");
widget.setAttribute('id', "destygo_widget");
widget.setAttribute('class', "destygo_widget");
widget.setAttribute('encrypted_user_id', 'xJICFuyE77I/VoTi2b2iuWRZvWqN');
widget.setAttribute('token', "51ffba0c-2d25-052e-f919-27d9b2c216d9");
document.body.appendChild(widget);
</script>
We add the encrypted_user_id variable with its encrypted string value as a key-value pair in the widget script. You can also pass a variable that contains this encrypted value.
🧰 Step 1 — Create an API and connect it to your use case
- Go to INTEGRATE → API in the ViaSay platform sidebar.
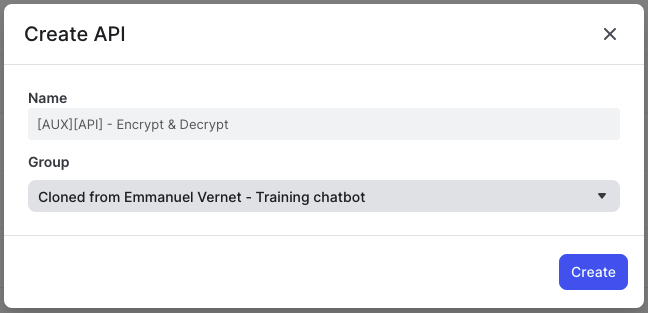
- Click Create API and give it a clear, descriptive name.
Tip: Use naming conventions to stay organized.
For example:
[AUX] for auxiliary APIs
[KB] for knowledge base-related APIs
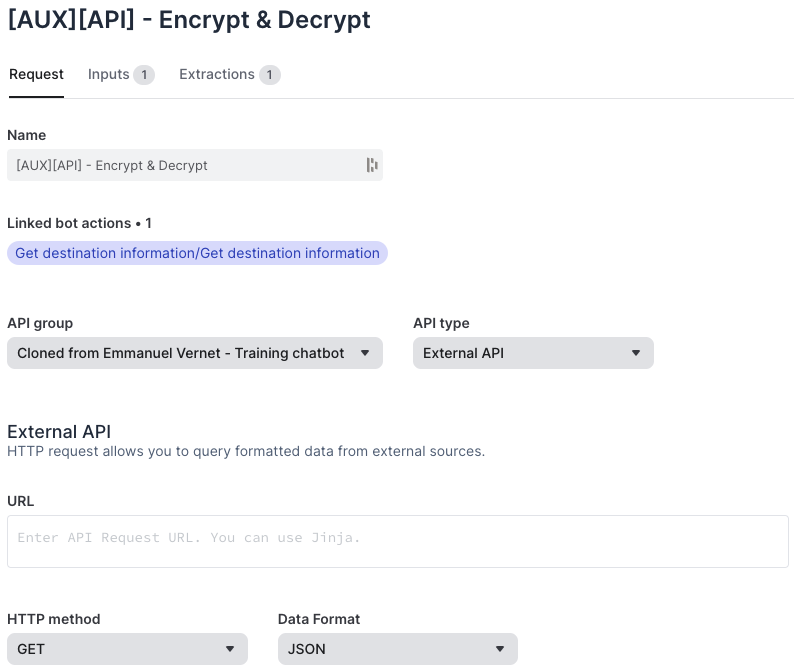
- In your Bot Action, add the API and define:
- an input variable called
encrypted_user_id
- an output variable called
decrypted_user_id
- an input variable called
- Open the API details and set it as an external API to complete this step
🧪 Step 2 — Create the extractions
- Go to the Extraction tab in your API configuration.
- Create a new extraction for the variable decrypted_user_id
Here’s an example of the extraction code you can use:
{% if encrypted_user_id is defined %}
`{{encrypted_user_id|decrypt("Odjts2S6KkfjnMPl3e0zPyjb3EAkKWf9", "U0kFxO/5SJKiEAqWvZwGsW15ZRKY+Qxq", 'NACL') | safe}}`
{% endif %}
# Details on decrypt(key, iv, 'NACL') ->
# The key and iv parameters are specific values generated for each decryption key created
# They were generated in the previous steps and passed in our JSON for future reference
In our example, we're decrypting the user name "Chuck", which was passed as an encrypted value in the widget variables.
- Once decrypted, the value stored in
decrypted_user_id
can be reused to replace other user input variables in your bot flow.
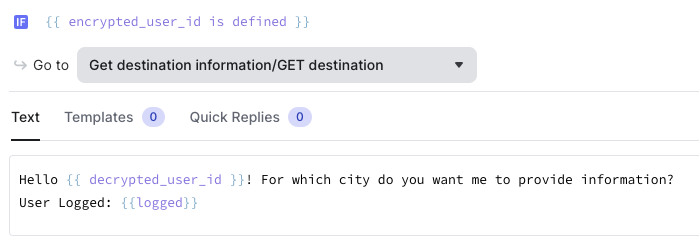
- Next, add a condition in your bot flow to check if the decryption was successful.
✅ Step 3 — Let’s test your solution!
Now that everything is set up:
- Load your webpage that contains the widget script with the encrypted data.
- Trigger the bot and check if the decrypted value (e.g. the user's name) is correctly recognized and used in the conversation.
- Confirm that the bot behaves as expected based on the decrypted variable.
🎉 Congratulations!
You’ve successfully learned how to encrypt and decrypt variables in your chatbot, and how to pass encrypted data through the widget script securely.
Your bot is now smarter, safer, and ready to deliver a more personalized experience!