
🌟 Enhancing User Experience with Different Widget Configurations
Tailor your chatbot’s widget configuration to suit various user needs and webpage layouts for an optimized user experience.
Setting Up and Managing Widgets on Different Pages
-
Find Your Widget Configuration:
- Navigate to Integrate → Channels in the Mindsay platform.
- Select the desired widget in the User Channels tab.
📸

-
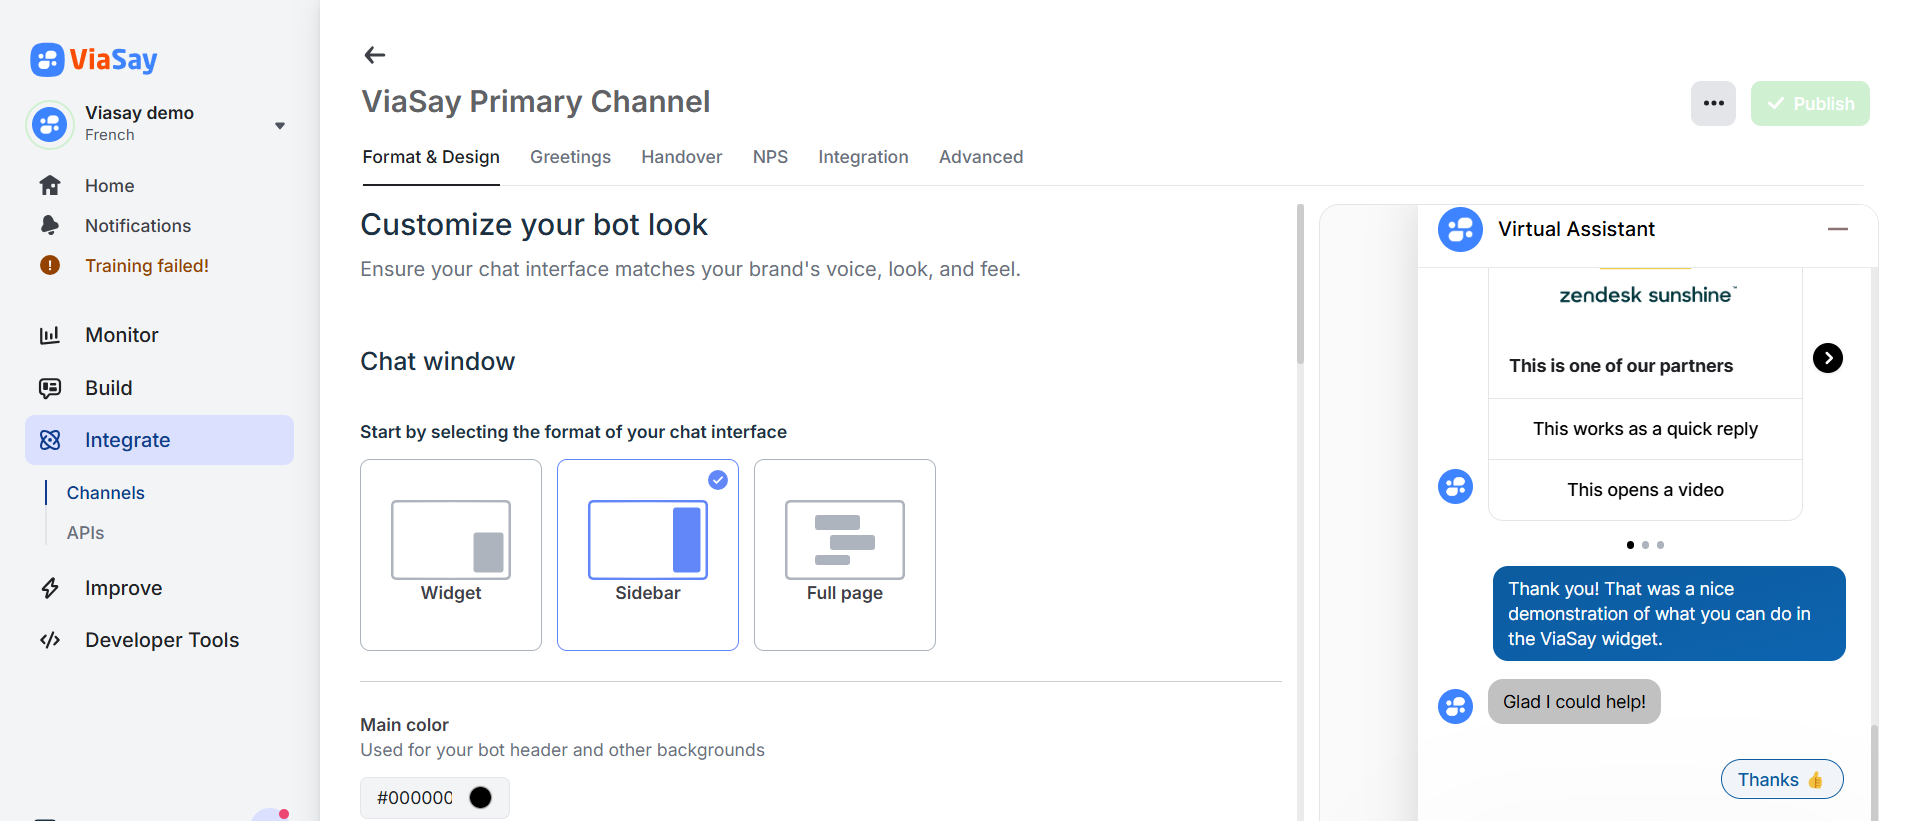
Format and Design Options:
- Customize colors, fonts, avatar, position, and open behavior to align with your branding and ensure the widget is easy to find.
- For instance, you can set a Main Color for the bot header and a Secondary Color for quick replies.
📸
Important Notes:
- Changes in configuration apply to both Draft and Production instances.
- Customization preview is strictly visual; chatbot functionality cannot be tested while editing.
Choosing the Right Widget Format
Selecting the correct widget format based on your page requirements can greatly impact user engagement.
-
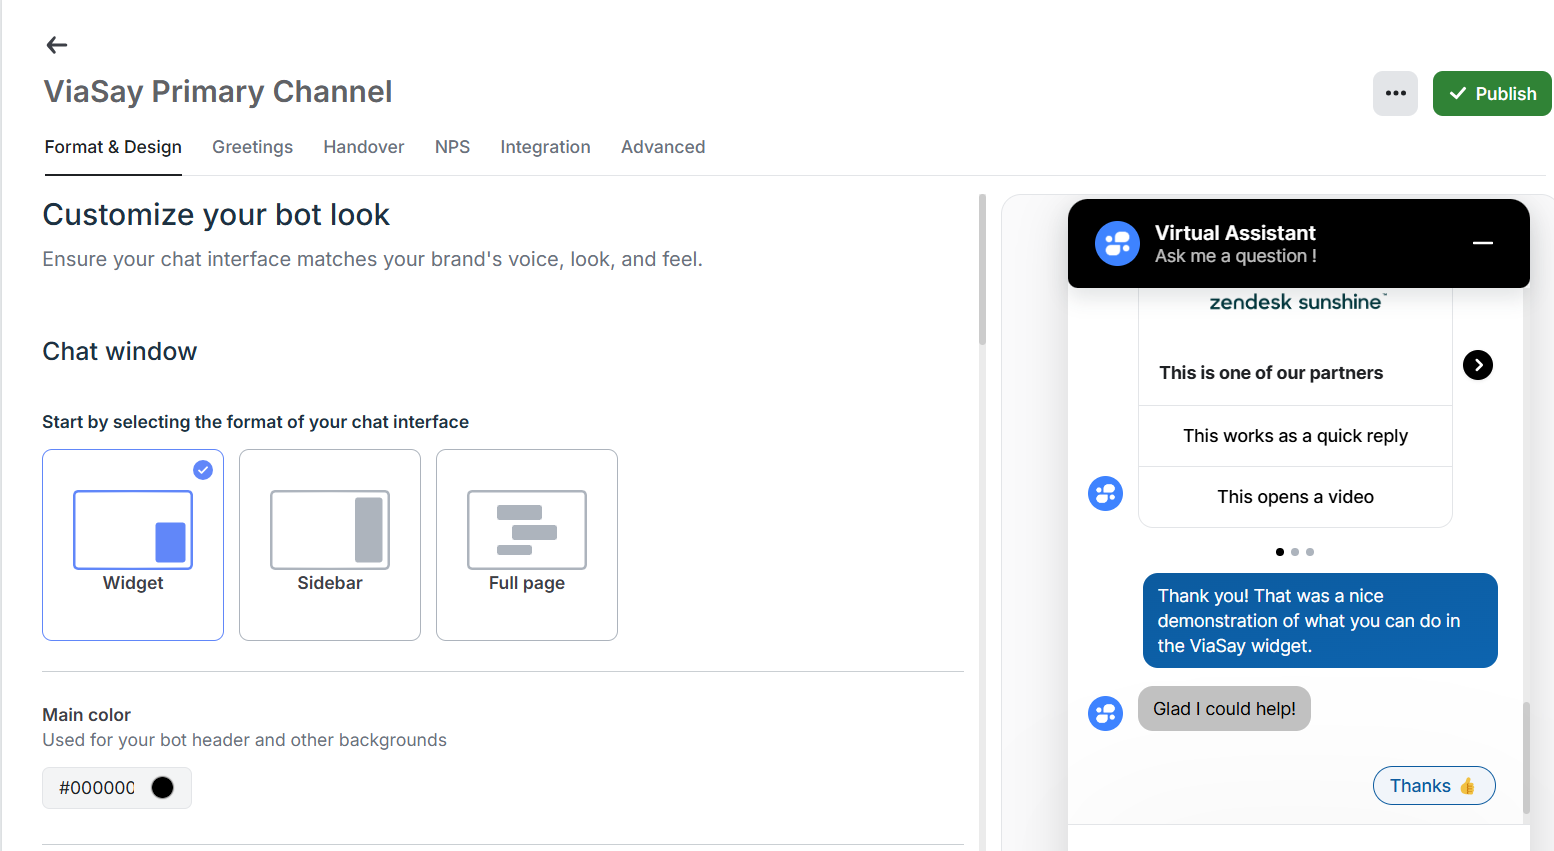
Widget Bubble:
- The most commonly used format, this is non-intrusive and works well across various web pages.
- Example: An e-commerce site where users want quick, unobtrusive assistance while shopping.
📸
-
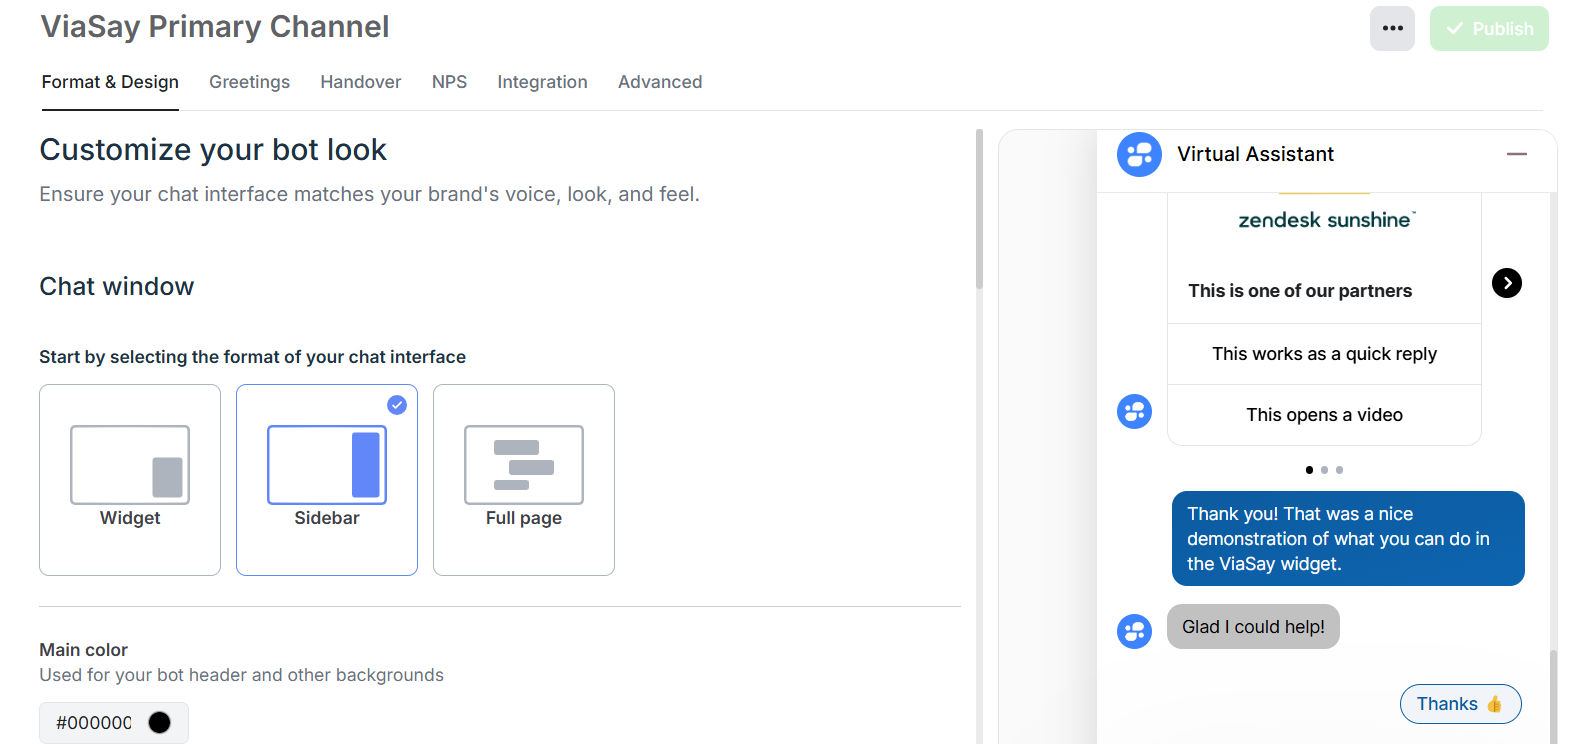
Sidebar Widget:
- Opens a full-height sidebar with a dimmed background, which draws focus to the chat.
- Ideal for processes that require user attention, like order cancellations or account management.
📸
-
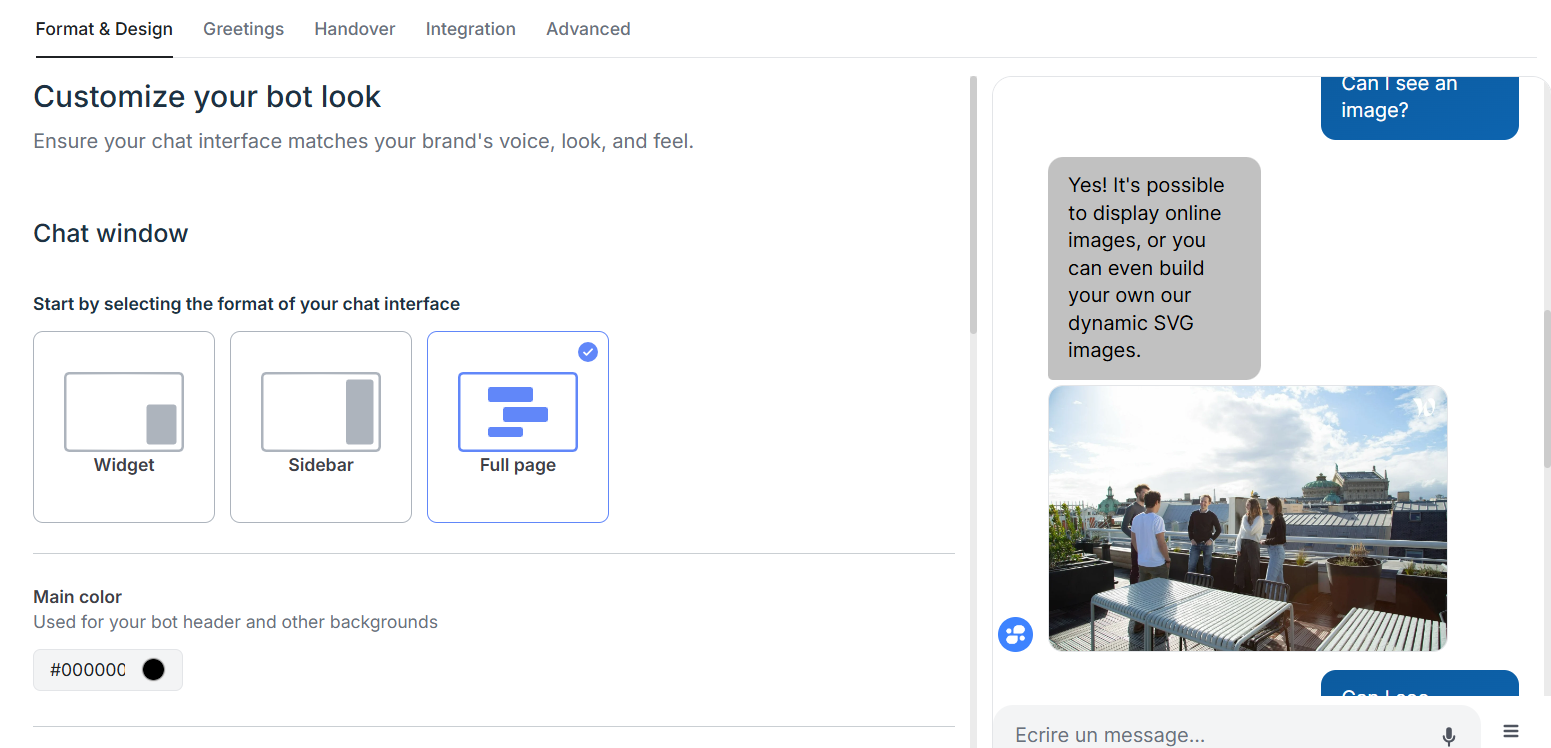
Full-Page Widget:
- Covers the entire screen and resembles a standard web page.
- Suitable for replacing FAQ sections, contact forms, or any full-screen service interface.
📸
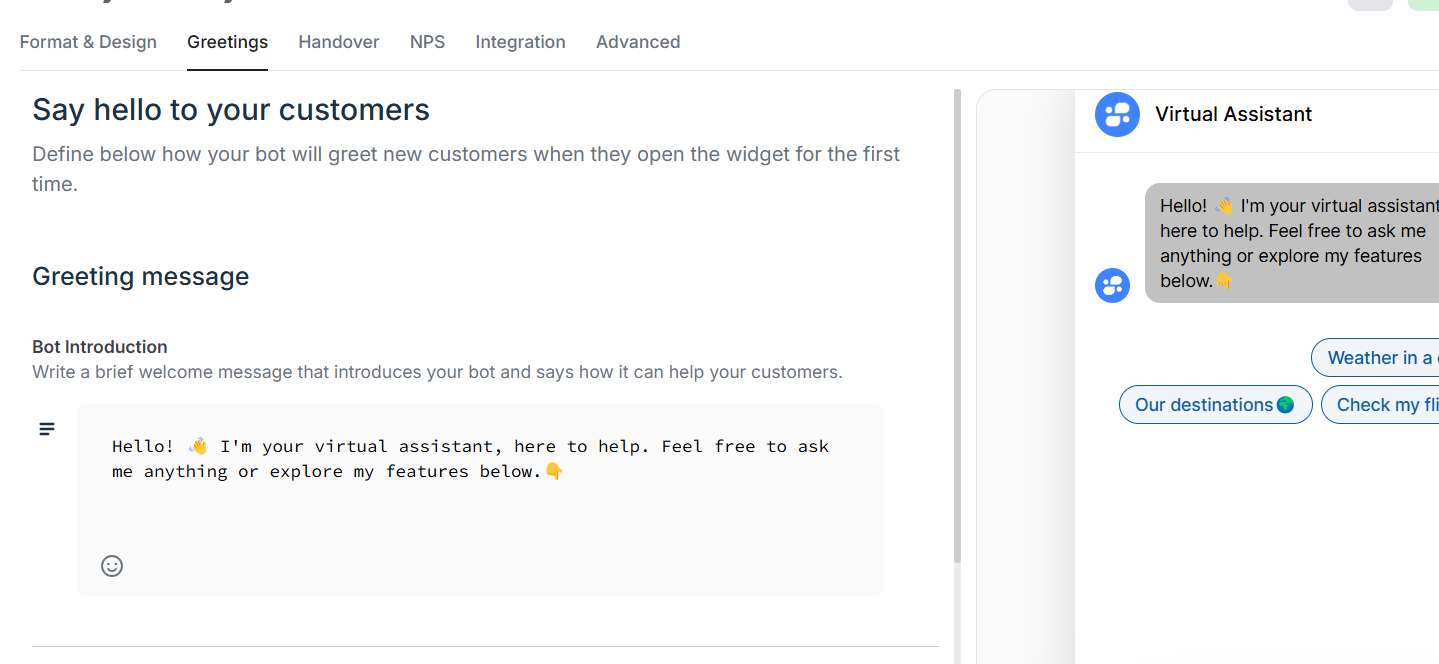
Setting Up the Greeting Section
The greeting section is critical for guiding users and showcasing the chatbot’s capabilities.
Steps:
-
Access the Greetings Tab:
- Go to Integrate → Channels → Greetings Tab for the relevant widget.
📸
-
Create a Customized Greeting Message:
- Example: On an insurance page, use “Hello {{user_name}}! Welcome to your insurance dashboard!”
Tips:
- Use warm, welcoming language and emojis to reduce user hesitation.
- Make it clear they’re interacting with a chatbot.
-
Set Up Quick Replies (QRs):
- Limited to ten options, link these to high-traffic use cases to maximize efficiency.
- Example: For a weather bot, a QR could be “Check today’s weather 🌤️.”
-
Publish and Test Your Changes:
- Remember, changes made here reflect on both Draft and Production instances.
Each widget configuration is independent. Multiple language versions, for instance, need separate customizations to suit their audiences.
By following these steps, you’ll ensure each page and audience interacts with the chatbot in a way that feels native and unobtrusive, enhancing user experience significantly.